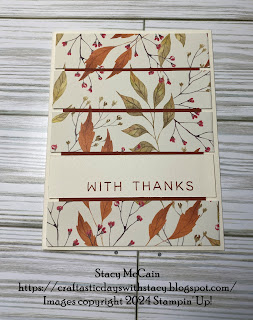
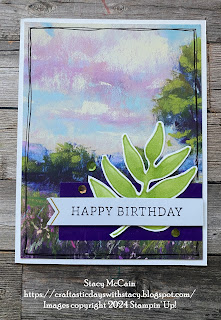
While the Autumn Abundance Paper Pumpkin kit has been a lot of fun, there hasn't been an "abundance" of time to play with it. I finally found myself back and home and inspired by the changing trees around me and knocked out some great alternatives.
To find out more about Paper Pumpkin, visit HERE.
This kit came with supplies to make 9 cards, 3 each of 3 designs. I love the originals. A little busy but useful and the envelopes were really beautiful as well. The kit came with the supplies to make 9 of these cards plus the instructions, envelopes, Cajun Craze ink spot, and exclusive photopolymer stamp set.
Below are the first set of alternatives that I created. I put these step by step instructions together for my customers as a thank you. The first three use one of the envelopes on each of the cards and were mounted on an 8 1/2 x 5 1/2 piece of Very Vanilla.
Tip: Uses the small envelope & a black marker to create some definition.
Tip: Combine with the Add On Dies.
Tip: Keep it simple when you design and leverage supplies you have already and love - that makes designing easier.
Tip: Cut up the card fronts to size onto new cards - two cards for the price of one! The upper background is a wash using the ink spot provided in the kit and a little Wild Wheat because it wasn't properly cleaned off my waterbrush from my last project.
While there was a pdf for these cards for subscribers, these next cards just sort of happened this time around.
Tip: Cut the wood card in half at the score line - then cut in half again. Score at 1/2" on the right side and attach to the square of Cajun Craze in the kit using the Tear & Tape. Then stamp the wood and add a sentiment. Layer the pieces on the front with adhesive.
This is another version of my card above. This time I used the tag from the Merry Tags & More Add On Dies (only available to subscribers and while supplies last) and cut off the tag top. Then I layered my snail and leaf again and stamped the sentiment. I layered it on a Stylish Shapes square die of Wild Wheat and then put it on a bigger square of Copper Clay. This is layered on a cut off card front (with the circle) and is mounted on a larger piece of Copper Clay. The snail layer is added with dimensionals.
This is the square card's other piece, without the circle, cut into 1" strips. I put a 3 1/2 x 5 piece of Cajun Craze in the center of a Very Vanilla card and then layered the strips on. I stamped the sentiment on a 1 x 4 piece of Very Vanilla and added it with adhesive too.
This one is a leaf card cut in half. Cut one side down to 5 1/4 x 4 and add to a standard Very Vanilla card. Add a stamped 4 x 1 piece of Very Vanilla to the middle. Add a copper leaf with dimensionals and a Very Vanilla bow using the Essentials Baker Twine.
This is the other half of that card. This time I used a base of Misty Midnight. I cut the card down to 5 1/4 x 4. Then I cut 1" off the top of the card front and the next piece at 3" (which leaves a 1 1/2 piece for the bottom.) I turned over the 1" piece so the leaf is on the left and stamped the sentiment from the Online Exclusive set - Sweetly Scripted. Then I mounted all three pieces on a 5 1/4 x 4 piece of scrap with adhesive and added the ribbon. It's mounted with Tear & Tape due to the ribbon.
This card isn't my favorite but it used up scraps I had on the table. Remember you can stamp leaves anywhere and you can turn over dies to use the white size if you'd like!
This one uses the leaf die from the "Every Celebration" Add-On dies and is shaded with ink and a blending brush. I cut a large Stylish Shapes circle to help guide the placement. The background is embossed using the birch 3D embossing folder.
This uses the other half of the wood card from up top. I cut the tag and trimmed the top. Then I layered some of the leaves using adhesive and dimensionals and then stamped a banner saying for the sentiment using the Stylish Shapes dies again. It also uses the 3D birch folder.
Finally, I needed a few more Get Well cards so I simply cut another leaf card in half. Then I trimmed the pieces to 5 1/2 x 4. I cut off the top 3/4 of each panel and stamped with the sentiment. Then I added the leaf piece to a Very Vanilla card with adhesive and added the sentiment with dimensionals. That way I can add more leaves or images if I'd like later.
I hope something here is inspiring and that you'll consider signing up for Paper Pumpkin so you can make great projects and fun alternatives along with me.
Have a craftastic day,


