Thursday, April 21, 2016

Retiring Products 2016

Some of you may have thought I retired considering how long it has been since I did a blog post!  I am still here - just really involved with volunteering and teaching lately and haven't had words left over to put down on my blog! 

During Sale-a-Bration, I had two great women join my team and I'm excited to start having monthly meetings again to offer them ideas and to keep me inspired with their creativity as well!

This is one of the make-n-takes we did at our meeting to capture the essence of the SU! Retired lists as it has retiring colors, designer papers, embellishments, tools, and stamps.  This card was based on a design from Ronda Wade that was a part of her framelit class.  The goal of the make-n-takes at my monthly downline meetings is to show a technique or product that can be adapted easily into a class or personal crafting and this project fit that bill!  Plus it's just cute I think!


Supplies:
  • Cardstock: Blackberry Bliss (retiring), Very Vanilla, Basic Black, Typeset Speciality Designer Paper (retiring)
  • Ink: Blackberry Bliss (retiring)
  • Stamp Set: And Many More (retiring)
  • Accessories: Big Shot, Cutting Mats and Multi-purpose Platform, Decorative Dots TIEF (retiring), Very Vintage Designer Buttons (retiring), Dimensionals, Glue Dots, Scissors, and Adhesive

RETIRED LIST


You can check out the retired list here on my blog.  Please use hostess code JHRR4NQB when checking out if you find something to order.  These are available while supplies last!

JOIN MY TEAM

If you are interested in joining out team and participating in monthly meetings with free make-n-take projects and outstanding company, contact me today or go here to sign up!  You can get $125 in free merchandise that you choose yourself for only $99 plus shipping and tax.  The new catalog is a great time to sign up!

Have a craftastic day,
Stacy

Sunday, January 31, 2016

January 2016 Paper Pumpkin Samples - Cute Conversations

 
Today I am sharing the alternate projects I came up with for the January 2016 Paper Pumpkin kit called Cute Conversations.  Paper Pumpkin is the perfect solution for busy men and women who want a little time to themselves to create without having to invest in a craft room or come up with ideas themselves.  At $19.95 plus tax each month, you get creativity delivered to your doorstep and a little time to create something wonderful before the next "to do" sweeps you away.
 
Individuals that subscribe for Paper Pumpkin with me receive project sheets each month with details on how to create alternative projects with their kit supplies.  If there are additional supplies required, I let them know.  Below are the projects I created with this month's kit.  Let me know if you have any questions or sign up with me today to start receiving your inspiration in the mail!
 
Home Décor Options:
 

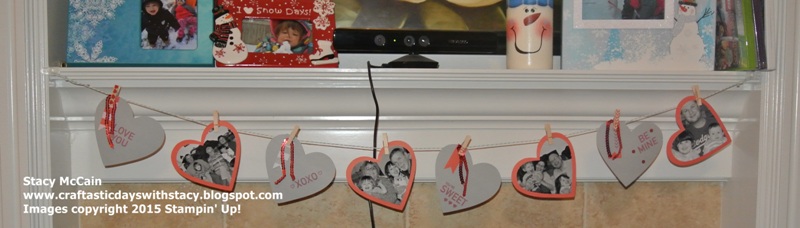
I chose to use just two colors of the hearts for my banner so that I could use black and white photos.  I cut them out using the 2nd biggest heart in the Hearts Collection Framelits but you could use one of the hearts for a stencil as well if you didn't have the framelits.  I stamped on the clothespins and the hearts using the stamp set and Watermelon Wonder Ink Spot.  That's another perk of Paper Pumpkin -- you get to use our newest In Colors and play with products we don't normally sell like the Watermelon Wonder sequin trim!


Another home décor item was this collection for the Hello Life Project Rack.  The great photos on this project were done by Heidi Hagman Photography (http://www.heidihagmanphotography.com/).


Treat Bag:
 
The other set of instructions in the kit was for treat holders.  I chose to put a gift card in mine instead off a candy treat.  I stamped the clothespins again. 
 

Cards:
 
My husband hates Valentine's Day so this card was for him.  On the inside, I used the Love You stamp and then wrote under it (even if you hate Valentine's Day!)  You can pull the Mint Macaron trim out of the Baker's Twin and you are left with white thick twine.


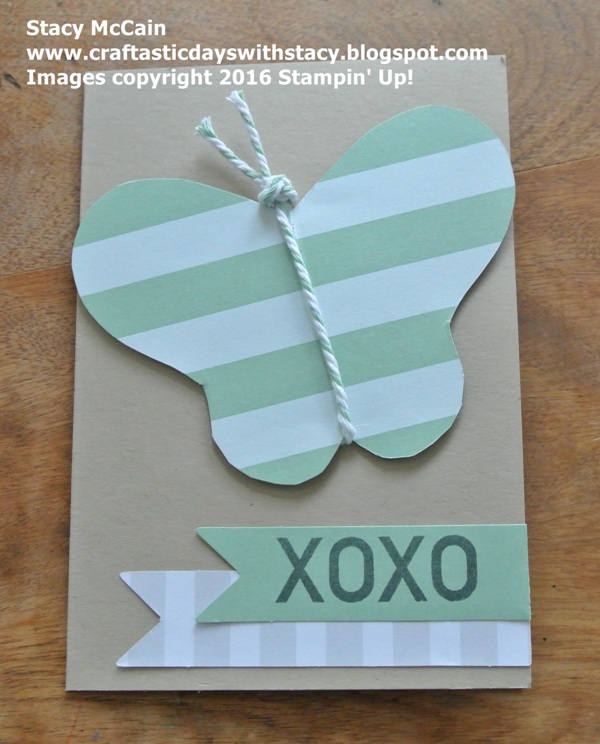
This butterfly is cut from one of the hearts.  I like the double banner at the bottom as well.


 Here's another idea with the hearts and banners that I really liked.


You can use the hearts as a stencil and sponge in the ink.


You can insert a brad and make a flipper card.


You can stamp and punch out the sayings using other punches and then use the adhesive strips in the kit around the back of them to add a sequin trim.  The bow on the bottom is the thread left over when you strip off the sequins.


I hope you find something useful in here.  See you next month!


Paper Pumpkin is probably my favorite Stampin' Up! offering.  As a demonstrator, I'm often having fun conducting classes but it's nice to take some every once in a while.  Paper Pumpkin lets me be creative without having to design!  That being said, I do design a few alternative ideas using supplies from the kit to send out to my customers that subscribe with me.  If you are looking for a way to be creative at home at a great price, I highly recommend investing in Paper Pumpkin.  From now until March 31st, you can purchase a pre-paid subscription for $55.  Not only will you receive three months of Paper Pumpkin in the mail but you will also get to pick out a Sale-a-Bration item for free!
 
Order HERE today using hostess code A4B9DFG4 when checking out.
 
Have a craftastic day,
Stacy

Thursday, January 7, 2016

Mistletoe and Holly Paper Pumpkin Samples

Today I'm sharing my November 2015 Paper Pumpkin samples.  The kit was called Mistletoe and Holly and it was beautiful.  The stamp set was versatile and the ink spot was Cherry Cobbler, one of my favorites!  I got the project sheet out to my subscribers before Christmas but never made it online to post the ideas.  If you'd like to get the directions on how to make any of these projects, sign up for Paper Pumpkin with me or buy a pre-paid subscription and they are all yours for free!

Card Ideas:


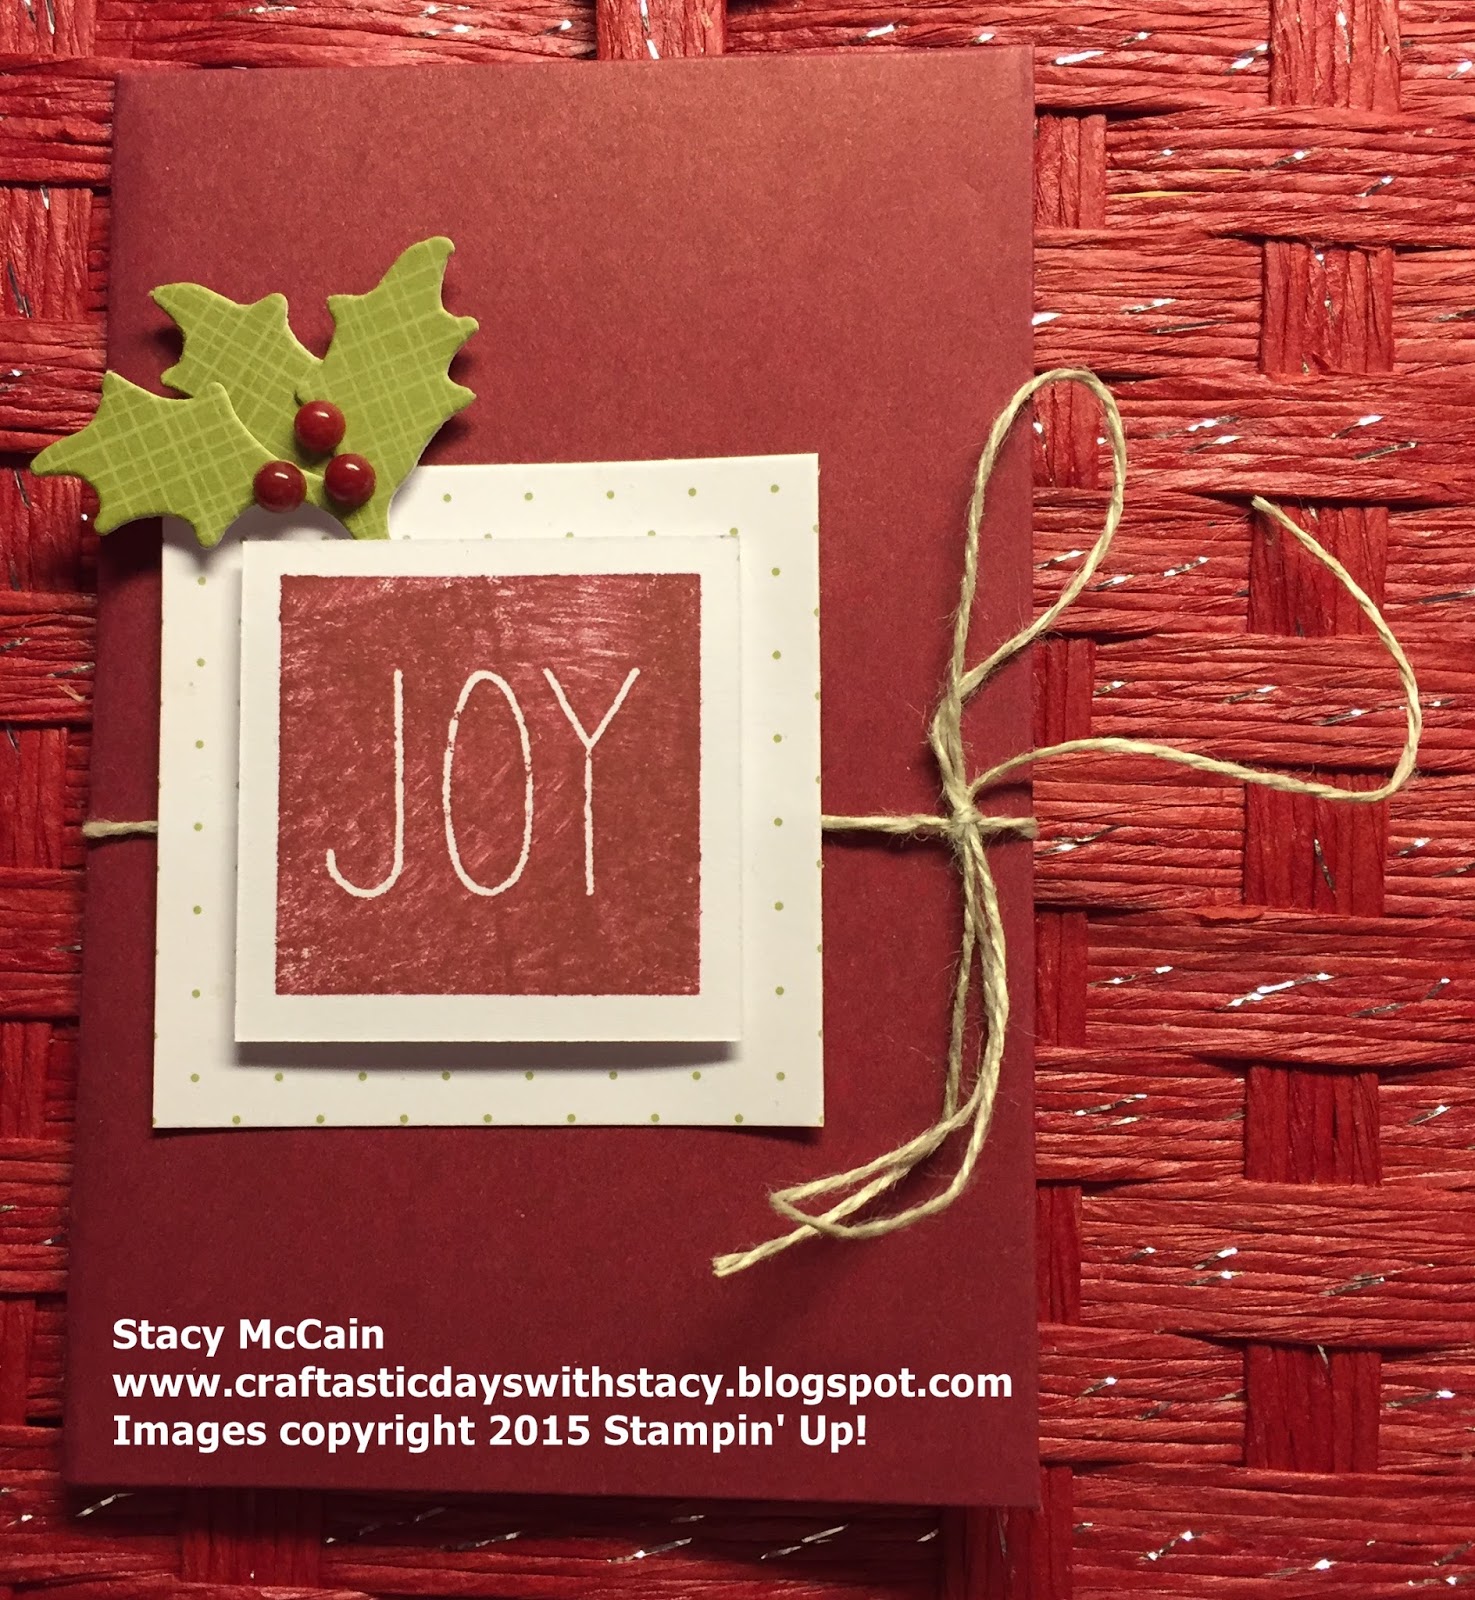
Gift Card Holder: The base is the awesome Cherry Cobbler envelope folded in half.


Décor Piece: Cut one of the cards into fourths and use the linen thread and glue dots to create this festive banner.


Photo Card:  This was what I was going to send out for our Christmas card but I didn't get my refills ordered before they sold out!


Décor Piece: I cut one of the cards in half and then cut down the side to make the background piece for my 3 1/2 x 5 frame.  I turned over the piece I cut and stamped the back and attached with dimensionals.  A great holiday frame to use year after year.


Sorry these are so late but hopefully they help inspire those that haven't made those kits yet!


Paper Pumpkin is probably my favorite Stampin' Up! offering.  As a demonstrator, I'm often having fun conducting classes but it's nice to take some every once in a while.  Paper Pumpkin lets me be creative without having to design!  That being said, I do design a few alternative ideas using supplies from the kit to send out to my customers that subscribe with me.  If you are looking for a way to be creative at home at a great price, I highly recommend investing in Paper Pumpkin.  From now until March 31st, you can purchase a pre-paid subscription for $55.  Not only will you receive three months of Paper Pumpkin in the mail but you will also get to pick out a Sale-a-Bration item for free!
 
Order HERE today using hostess code 7TEKJKYF when checking out.

Have a craftastic day,
Stacy

Wednesday, January 6, 2016

One Great Year Paper Pumpkin Project

We all start out the new year with some sort of resolution.  To lose weight. To stop a bad habit.  Some of us take it a different direction and look at it as a new start.  To be more generous.  To read more.  To be a better friend/mother/daughter.  Whatever the new year means to you, it's always handy to have a calendar  to start it off with and the December Paper Pumpkin did just that.

 
My new years resolutions were more a vow to myself to be less critical.  To work on the items that make me feel overwhelmed so that I can't enjoy my life and those wonderful people in it (which I'm very fortunate to have!)  That resolution forced me to take a long look at how I was running my business and what place it has in my life.

This project was adorable.  You all thought so too since the refills sold out in record time.  I think it's the papers which would be perfect for cards - I love that watercolor look. I had a whole bundle of cards planned for this one but since it's sold out, I went ahead and just did the calendar.

Just a few tips to make this calendar project even more fun. 

  • When stamping November, make sure you place the flowered oval die cut on the calendar piece first so you know how you need to stamp on it.  Mine didn't cover up the number beneath so I had to add another flower.
  • Use a dimensional to hold down the end of your Baker's Twine or Gold Thread and then start creating your loops.  When you have loops you like, use dimensionals strategically to hold it in place.  It gave me a little better results.
  • Do all your stamping before you add dimensionals.  I added dimensionals behind all my flowers too for extra volume.  It still fits on the rack.
  • Remember that putting a Paper Piercing Mat under your paper while stamping with the photopolymer stamp sets will give you the best image.
  • Check out the YouTube video from Stampin' Up! for this kit - https://www.youtube.com/watch?v=BgLsUo7Pz7Y 

Tomorrow, I'm going to flash back to November's Paper Pumpkin kit because I never posted my samples.  So don't worry - while I still have my Christmas tree up and my outdoor lights shining, I am not continuing to celebrate the holiday season!  I just like all the lights!


Paper Pumpkin is probably my favorite Stampin' Up! offering.  As a demonstrator, I'm often having fun conducting classes but it's nice to take some every once in a while.  Paper Pumpkin lets me be creative without having to design!  That being said, I do design a few alternative ideas using supplies from the kit to send out to my customers that subscribe with me.  If you are looking for a way to be creative at home at a great price, I highly recommend investing in Paper Pumpkin.  From now until March 31st, you can purchase a pre-paid subscription for $55.  Not only will you receive three months of Paper Pumpkin in the mail but you will also get to pick out a Sale-a-Bration item for free!
 
Order HERE today using hostess code 7TEKJKYF when checking out.

Have a craftastic day,
Stacy

Tuesday, January 5, 2016

New Year, New Plan, New Samples

Happy new year everyone!  I took a few months off from blogging and my business to focus on my family and my sanity over the holidays.  Now that we are in a new year with a new routine, I am back on the idea sharing bandwagon!  I finally got to pull out some of my Occasions pre-order and begin playing.  There is going to be a lot of fun ideas floating around over the next two months!

I want to start back with a few updates!  Today is the beginning of my favorite Stampin' Up! Promotion!  It's Sale-a-Bration time!  What does that mean exactly?


There are three parts to Sale-a-Bration.
  1. SHOP - For each $50 you spend, you can pick out one of the exclusive items from the Sale-a-Bration brochure.  There are three items in the brochure this year that will retire on February 15th and a few new selections will come into play on February 16th!
  2. HOST - If you are interested in hosting a party, you can earn $25 extra hostess dollars to use for free merchandise from the new Occasions catalog or the annual catalog if your party totals $250 or more.
  3. JOIN - Now is the best time to join my Stampin' Up! Team!  For $99 plus tax you can select $155 in merchandise!  That's $155 of anything you want from the Occasions or Annual Catalog.  Then you have until JUNE to hit that first quarterly minimum which means you can order from yourself for the new catalog.  Contact me today if you would like to hear the perks of being on my team!
If you are interested in purchasing items from my online store, click HERE.  Please enter hostess code 7TEKJKYF when checking out.


Paper Pumpkin is probably my favorite Stampin' Up! offering.  As a demonstrator, I'm often having fun conducting classes but it's nice to take some every once in a while.  Paper Pumpkin lets me be creative without having to design!  That being said, I do design a few alternative ideas using supplies from the kit to send out to my customers that subscribe with me.  If you are looking for a way to be creative at home at a great price, I highly recommend investing in Paper Pumpkin.  From now until March 31st, you can purchase a pre-paid subscription for $55.  Not only will you receive three months of Paper Pumpkin in the mail but you will also get to pick out a Sale-a-Bration item for free!
 
Order HERE today using hostess code 7TEKJKYF when checking out.
 
Check back tomorrow when I post the latest Paper Pumpkin kit and my tips!
 
Have a craftastic day,
Stacy

Monday, November 23, 2015

Online Extravaganza - Starting Today!

Our holiday season sale is here and you won't believe the deals.  Visit http://www.stampinup.com/ECWeb/CategoryPage.aspx?categoryid=100600&dwbs=80380 to check it out.  We have products up to 50% off and a special doorbuster for today only.  Please use hostess code QT92WGZJ when checking out!
 
I am working on my Paper Pumpkin samples today and the homemade ornaments I'm teaching for a kids "class" on Wednesday.  Check back this week for some ho ho homemade goodies!
 
Have a craftastic day,
Stacy

Monday, November 2, 2015

October 2015 Paper Pumpkin - Blissful Bouquet Samples

Here I am, with your monthly dose of Paper Pumpkin inspiration.  We survived Halloween and I'm excited to get a little quality time with my Seasonal Snapshot Project Life kit to help chronicle our Autumn so far!  But, before I can scrapbook my pumpkins, I wanted to get my Paper Pumpkins created.

As a subscriber to Paper Pumpkin, you receive a kit in the mail with everything you need to create great cards or other projects.  The kit has a photopolymer stamp set, ink spot, pre-cut cardstock and embellishments, and instructions.  As a first time subscriber, you also get a clear block to use with the stamp set.  The kits are $19.95 (plus tax) and come right to your door in a great red box.

The October kit was called Blissful Bouquet.  It had supplies to make three each of these cards (3 full cards, 3 notecards, and 3 love notes) with three different sayings.

Notecard:


Full Card:


Love Note:


As a subscriber to my group of Paper Pumpkineers, I also create additional projects and give you the detailed instructions on how to replicate them.  Sometimes they use just kit contents and other times they use additional supplies, like pearls or other inks.

Card Ideas:


Gift Card Ideas:
 
Using one of the large envelopes in the kit.


Using the square pillow box thinlits.

 
Mini Book Idea:  I used the stamp set from the September 2015 Paper Pumpkin kit on this project since most of my customers had both kits!

Basic Construction with two love note envelopes.


 Insert love note and 3 x 3 yellow cardstock piece.


Decorate the cover with a 3 x 3 photo and the half banner on dimensionals.

 
Decorate the inserts.
 

If you are interested in joining my Paper Pumpkin group, please visit https://mypaperpumpkin.com/en/?demoid=80380 and start receiving your tutorial sheets with the November kit later this month!  Or, if you already got your October kit and made it, you can purchase a refill at my Online store using hostess code 9GVCUBHA and get the instruction sheets as well for free.

http://www.stampinup.com/ECWeb/ProductDetails.aspx?productID=140381


Have a craftastic day,
Stacy