A month ago, I brought a beautiful little boy into the world. Between him and my very active pre-schooler that isn't in pre-school, my crafting times have been few and far between. During this month, I have truly been able to embrace the My Paper Pumpkin product line that Stampin' Up! sells. It has allowed me to get creative juices flowing while only having to break out a box and my scissors and adhesive. It doesn't get easier than that. If I want to follow instructions, I can. If I want to get daring and do something different, I can do that too. But all of that crafting energy is funneled into 30 minutes and leaves me with something to show for it and give away to someone else that might be having a hard time or a birthday or have something great happening in their lives too!
Whew, that was a long sentence!
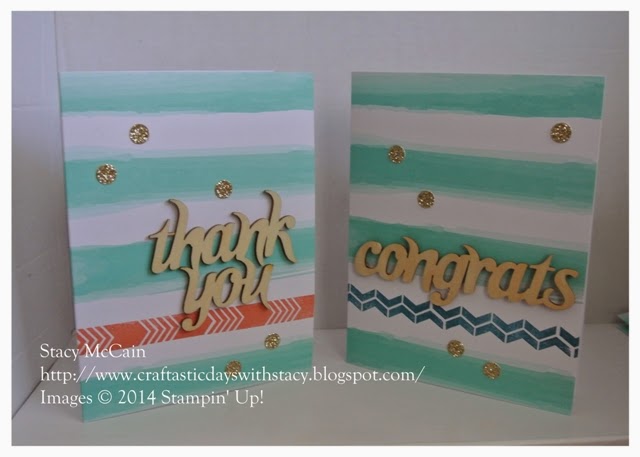
I have two nieces getting ready to graduate from college and high school. I cannot believe that as I look into the eyes of my own child born 1 month ago yesterday. I am old. But that isn't the point of the post - the point is that I will need to have some Congrats cards ready to put with their gifts since these are a few of life's milestones that cannot be ignored!
Thanks to My Paper Pumpkin, I have both of these events covered. I also have several thank you cards ready for those that are helping with the baby or bringing out items to help my family.
This month's kit had supplies for EIGHT cards, two photopolymer stamps, two Stampin' Spots in Island Indigo and Calypso Coral, 8 gold inserts and envelopes, and embellishments. That's quite the load!
The first cards I made were just like the samples in the instructions but I flipped the ink colors from what is on the instructions.
On this card I attempted to stamp the word cut element but I was crooked. Yes, even with completely clear photopolymer stamps, I can be off-center. Anyhow, I then dragged the word through the ink and attached it to the card. The words are mounted on a piece of the gold insert that was cut down to 3 x 4. I also stamped on the back of the insert and cut out an Indigo arrow to put on the bottom of the card.
The final card I finished was done with the Calypso Coral ink but is like the sample above, using the insert scraps and inking the wood element.
I hope you enjoyed these samples. If you haven't yet joined My Paper Pumpkin, you can do so by March 31st and get a free set of 2012-2014 In Color markers with your Starter kit. Check out
https://mypaperpumpkin.com/en/?demoid=80380 for more information on this awesome promotion and product line.
Have a craftastic day,
Stacy