Friday, November 15, 2013

Holiday Scrapbooking - Day 1 - The Cover & Photo Selection Tips

Last night I taught a holiday scrapbook that was one of my favorite classes I've done since becoming a demonstrator.  I loved the customers that came and they loved the project and the incredible deal they got since I can't do math.  For $35, they received the following merchandise:
Because the class was small and I think this project is a great one to do over the holidays, I thought I'd share the class content and pictures over the next week.  I really hope that you take the challenge to do one of these albums yourselves.  They take just a few hours from start to finish and set you up for a great holiday memento. Or, use the tips below to complete other great projects!

The cover of any album is something that I actually design last.  I need to get a feel for what's in the album before I work on the cover!  
 
 
Instructions:
Create the folder out of Crumb Cake DSP.  Do this by inserting the top on the punch board so that it aligns with the 3" mark.  Push the button on the board.  Turn over and align the other side to the button so that the end of the cardstock is directly in the center of the button.  Push the button to punch out.  Use the paper trimmer or scissors to cut off the unwanted Crumb Cake DSP and make the tab.   Create two banners out of the scrap of DSP and the scrap of Cherry Cobbler.  Attach using adhesive.  Layer the December Pocket card over them using dimensionals.  Punch out 2012 using the pieces of Cherry Cobbler provided and the sizzlits.  Adhere to the bottom of the folder using adhesive.  I recommend you apply adhesive using the silicon mat so that the adhesive only sticks to the letter. 
 
Tips:
  • When you cut down your DSP, cut it to 4 x 6.  This gives you two pieces of DSP to use for a short and long banner.  You will end up with a LOT of these! 
  • Use the side of the hexagon punch to make your banners - makes them all even and you can do several layers of DSP at a time!
  • When applying adhesive to small elements like the numbers, use the Silicon Sheet.  It will only allow the adhesive to stick to the back of the numbers and not to anything else!
Supplies:
1 piece of Crumb Cake from Season of Style Print Pack, Cherry Cobbler for numbers and banner, Big Shot, Sizzix Numbers, Envelope Punch Board, Season of Style Pocket Cards, Hexagon Punch, Dimensionals,  Silicon Sheet, Adhesive.
 
Wondering how to start on a project like this?  Here are a few tips for organizing photos for the holidays.
 
1 - Look through your photos to find themes for your photos.  Possible themes are:
  • Christmas Eve
  • Christmas Morning
  • Christmas Crafts
  • Christmas Parties
  • Decorating the Tree
  • Christmas Baking
  • Christmas Traditions
2 - You also need to determine if you want to scrapbook a specific year in this book or multiple years.
 
3 - Once you have your photos identified and sorted by theme, you can figure out which divided page best suits that series of pictures.
 
Tomorrow I'll offer up some creative uses of My Digital Studio for this book and more!
 
Have a craftastic day,
Stacy

Thursday, November 14, 2013

Embossed Bermuda Kindness

Taking a break from holiday cards for another day, here is another of the Tealish color scheme cards for my workshop next weekend. 

The card is done in Bermuda Bay.  I ran the Whisper White through the embossing folder to give it the same polka dot effect as the flower had once heat embossed.  I contemplated cutting out the big flower and putting it up on dimensionals but I didn't want the card to take much longer than it did since it was for a  stamp camp!  That would look really pretty though!

Once embossed, I cut out the flower using the Apothecary Accents Framelits and then sponged it to bring out a great shade.  I may not be a big fan of these colors but I think that sponging is a beautiful effect for the card.  The center of the flower is punched from the leftovers of the framelit and sponged as well.  Attendees will be able to put rhinestones in the center as well if desired.  The banner is using the Bitty Banner Framelits like on yesterday's card.


Supplies:
  • Cardstock: Whisper White (2 @ 5 1/4 x 4, scrap), Bermuda Bay (8 1/2 x 5 1/2, 5 1/2 x 4 1/4)
  • Ink: Bermuda Bay, VersaMark
  • Stamps: Gifts of Kindness
  • Accessories: 1/2 Circle Punch, Big Shot & Cutting Mats, Multi-purpose Platform, Magnetic Platform, Apothecary Accents Framelits, Bitty Banners Framelits, Perfect Polka Dots Textured Impressions Embossing Folder, Heat Gun, Embossing Buddy, White Embossing Powder, Powder Pal (retired), Daubers, Dimensionals, Adhesive
Have a craftastic day,
Stacy

Wednesday, November 13, 2013

A Coastal Sketched Birthday

It's workshop week!  I have my holiday scrapbook Thursday, my holiday stamp camp & hostess appreciation camps in Payette/Fruitland on Saturday, and then one more stamp camp for a hostess in Caldwell.  Happy we've seen crisp weather and not snowy weather yet - would be great if that held out for a little while longer to allow for all this driving!

Today's project is one for my stamp camp next weekend.  The hostess requested two holiday projects and three other cards working for other occasions all designed using the Tealish color schemes.  It was an interesting one to design too since this is a color scheme I stay away from.  It gives me creative block but in prepping this camp, I now have several cards just for my mother-in-law who LOVES this scheme too!

My camera is still somewhere in the world so my apologies for the poor quality of this photo.  I hope to hear back from Nikon in time for Thanksgiving!!!

This project utilizes Coastal Cabana.  I wanted to keep it simple but also show off some of my favorite products and some of the more versatile products that Stampin' Up! sells since I am not familiar with all the attendees of this workshop!

Supplies:
  • Cardstock: Very Vanilla (8 1/2 x 5 1/2, 3 1/4 x 4 1/2, 2 1/2 x 3 3/4, scrap), Coastal Cabana (3 1/4 x 1, scrap)
  • Ink: Coastal Cabana
  • Stamps: Sketched Birthday
  • Accessories: Big Shot & Cutting Mats, Multi-purpose Platform, Perfect Polka Dots Textured Impressions Embossing Folder, Basic Rhinestones, Magnetic Platform, Bitty Banner Framelit, Dimensionals, Dauber, Bone Folder, Scissors, Adhesive
I tried to do a banner with the strip across the card but it just didn't look the way I wanted so I cut it down to match that second Very Vanilla layer.  You could use any embossing folder to give this piece dimension and the sponging adds another layer of color.  The cake piece is cut out and sponged as well and then up on a dimensional.  The sayings are both cut using the Bitty Banner framelits and are up on dimensionals.  Then I put a few strategically placed rhinestones to complete the project!
 
What are my favorite products mentioned before in this project?
  • Dimensionals - Favorite Stampin' Up! product and they are only a few dollars per package!  I use them to give my projects dimension and they are the perfect height.  Other products that offer similar function are either too bulky or the wrong size or the wrong height.  I use these on every card, mini book, and scrapbook page I make!
  • Big Shot - I think this revolutionized my crafting and artistry.  I use it for everything!
  • Embossing Folders - I have most of them and I think they make an easy card look masterful!
  • Magnetic Platform - I love my post-its but it's nice to have them back for notes and use this great tool to keep my framelits PERFECT every time!
  • Basic Rhinestones - Sometimes a little bling is all a card needs. 
    • Tip - use the tip of your paper piercing tool to get the rhinestones off the sheet so that it will pull the adhesive off the sheet too.  If it sticks to your piercer, you'll know you got all the adhesive! 
The hostess code for online orders for next month is G3SGBMJK.  Anyone that purchases anything online by 11/24 can enter this code.  We have reached a qualifying workshop already this month so I will draw a mystery hostess from those that purchased and the lucky winner will get the free merchandise (currently at $30).
 
Have a craftastic day,
Stacy

Tuesday, November 12, 2013

New Deals from Stampin' Up!

A few updates to mention – some are time sensitive and all are super cute!!!!  SU will release all updates on Tuesday so now Tuesdays are the best day to hit this blog for updates!

Festive Flurry Ornament Kit


This cute kit gives you die cut snowflakes to make 10 homemade ornaments or gift embellishments for the holidays.  For $14.95, you get everything you need (except adhesive) to make these special projects.  I’m ordering them to make with Callie since they are kid-friendly if you are patient.    These are while supplies last and usually sell out fast!
• http://www.stampinup.com/ECWeb/ProductDetails.aspx?productID=135813

Weekly Deals


Weekly deals have posted.  These are available at discount until Monday at midnight. 


I know I’m getting the burlap ribbon, the gift boxes, and the download for holiday gifts!  Check them out via the link below!
• http://www.stampinup.com/ECWeb/ItemList.aspx?categoryid=1634 

New Digital Downloads


The newest digital downloads have posted.  There are a few “kits” that include online classes to show you projects using those downloads and include techniques. 

You can click the Facebook link below and follow the instructions to be put into a drawing for a free class!

New Digital Downloads

This sale continues until 11:50 MST on November 30th.  It includes 30% discounts on photobooks, individual pages, and cards.  You could have your tags printed or make recipe tags to include with your homemade foods and mixes (hint hint – guess who is doing that????)    It also includes various downloads at 30% off.  Check out those downloads below. 
The Best Year Photobook Template is on sale and is what I’m using for my photobooks and calendars for the holidays – highly recommended!!!


Hostess Code

The hostess code for online orders for next month is G3SGBMJK.  Anyone that purchases anything online by 11/24 can enter this code.  We have reached a qualifying workshop already this month so I will draw a mystery hostess from those that purchased and the lucky winner will get the free merchandise (currently at $30).

Holiday Sale


Our Holiday Sale (previously known as Online Extravaganza) will kick off on November 20th with a 24 hour doorbuster sale.  It will run from 11/20-12/2.

Paper Pumpkin

 
For those participating in Paper Pumpkin, your kits have shipped and should be to you by the end of the week.  If you are interested in learning more about this kit in the mail club, please check out this link: http://craftasticdayswithstacy.blogspot.com/2013/07/join-my-paper-princesses-club.html

Have a craftastic day,
Stacy

Monday, November 11, 2013

Autumn Accents ABCs

By now you know that I really like doing crafting with Callie.  If there is a way for me to use it to help her learn the fundamentals, that's even better.  If you had told me when I joined Stampin' Up! that I would be doing this with my children, I would have called you crazy.  1 - Because I never thought I'd had children and 2 - My mind doesn't work this way.  I wouldn't even look at the kid sets in the catalog because I'd never use them....

However, I think that becoming a parent was my calling.  My mom and sister are smiling right now if they are reading this.  I was one of those adamant "Kids are not for me" people. I loved my selfish lifestyle and I couldn't imagine being responsible for another person in that way.  I remember my best friend telling me she was having a baby and thinking "Oh God, here we go!"  If she hadn't gotten pregnant with Mae, I don't think I would have been brave enough to consider changing everything by bringing a child into the world.  I am grateful for their decision giving me strength to make mine with Conlyn.  I would have had a part of me that searched for my whole life for that piece of me that was missing if I hadn't had Callie.  And without Callie, I wouldn't be having Michael either.

Anyhow, personal tangent over, and back to the project. 

The inspiration for this project came from this idea I found several clicks deep in Pinterest.  I didn't have Kraft paper big enough for a tree so I decided to just use the leaves portion.

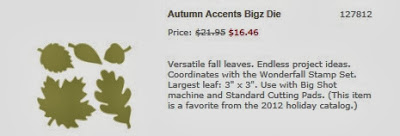
We used some scraps of retired cardstock with the Big Shot and Autumn Accents Bigz Die.  Callie loves the Big Shot.  She likes turning the handle and separating all the pieces.  Once she ran all these through, I wrote the upper case letters on one set and lower case letters on the other.  Make sure you write on both sides so that you don't spend their tiny attention spans turning over letters!   I also marked the lower case ones with rhinestones so that they would be easy to sort if they got mixed up.


We've made several games with these.
  1. Sorting by color - Sort all the leaves by color and then practice counting them.
  2. Sorting by type - Sort all the leaves by shape and then practice counting them.
  3. Alphabetizing - Put all the upper case letters in alphabetical order. 
  4. Matching - Put all the corresponding lower case letters below the upper case letters.  This was the hardest for her but the most important as we start working on sounding our letters and recognizing words in her stories.
You could also do these with numbers and practice math skills.


Supplies:
  • Cardstock: Gumball Green, More Mustard (retired), Daffodil Delight, Certainly Celery (retired), Cherry Cobbler
  • Marker: Basic Black
  • Accessories: Big Shot & Cutting Mats, Autumn Accents Die, Basic Rhinestones
Remember that the Autumn Accents Bigz Die is part of the weekly deal that expires tonight at midnight! 

http://www.stampinup.com/ECWeb/ProductDetails.aspx?productID=127812&dbwsdemoid=80380

The hostess code for online orders for next month is G3SGBMJK.  Anyone that purchases anything online by 11/24 can enter this code.  We have reached a qualifying workshop already this month so I will draw a mystery hostess from those that purchased and the lucky winner will get the free merchandise (currently at $30).

Have a craftastic day,
Stacy

Sunday, November 10, 2013

Holiday Calendar Prep Underway

Before My Digital Studio, Stampin' Up! used to sell calendars. Mom and I would spend months designing and prepping kits and it was our most popular and most difficult class of the year.  Since buying MDS and learning how to use it, I've been able to make my calendars in under an hour!  And that's without a template!

This year I am making 12 x 12, Desktop, and Easel calendars.  Below is a sample page from the October calendar page in Conlyn's calendar.  The month is on the first side and this is the back of the easel.  These photos capture our Halloween evening, our pumpkin picking, and also our pumpkin carving party this year!

 
Supplies:
 
Background
  • Color = VERY VANILLA 254,249,232
Stamps
  • Yippee Skippee\Yippee Skippee - you can never have too much happy, Color = PUMPKIN PIE 255,130,1
  • All Holidays\All Holidays - halloween, Color = PUMPKIN PIE 255,130,1
 
 
Couple design elements to mention:
  • Cropping - I used the Happy Halloween from All Holidays and used the cropping too to remove the Happy.  Then I could use the sentiment from Yippee-Skippee with this image and get it to follow my frames.
  • Photo Frames & Base Colors - I turned the base of my calendar to Very Vanilla so the white mats would show up against them like frames.  Then you use the drop shadow feature to make them look raised and it looks like a photograph with a border.
  • Bleed Area - Make sure you turn on the Desktop Calendar bleed area with these easel calendars.  If you use the Calendar bleed area, your elements will not be spaced evenly on the top and bottom.
We are off for family photos today so I hope you have a craftastic day and a great Sunday doing something you enjoy!
 
Stacy


Saturday, November 9, 2013

Hostess Appreciation Project - 2013

I am grateful for many things in my life and feel like that is something to celebrate, especially in November.  Starting last year, I began acknowledging my hostesses with a free appreciation event where they made a fun project for free.  I also include my downline in this free event since I appreciate them as well!

Last year, we made a fold out stationary box with several cards and love notes inside using the Naturals Composition paper.  This year, we are making a fun Thankful book.  We saw a demonstration at Convention about converting this kit into a book and we all had an "aha" moment.  The 12 x 6 book was designed by me and my mom, Cris McCarthy.  It takes 1/2 a Thanksgiving Tablescape kit plus a few extra items to complete.  It truly represents what I'm thankful for from my group and makes a nice decoration to have out over the holiday.

The kits for my hostesses included a cut kit from 1/2 of the Thanksgiving Tablescape kit, a chalk marker, and a role of sticky strip!  My hostesses have been asked to bring their crafting kits (scissors, dimensionals, adhesive, bone folder, paper piercing tool & mat) and a corner rounder.

The Cover:

 
The Left Page:
 
The idea is that you put into the Chalkboard Banner what you are Thankful for.  The Thankful For insert pulls out and includes the text of what makes you grateful for that.  You could also put a photo underneath it that represents what you are thankful for.


The Insert:


The Right Page:
 
 This is a photo page.  You can put a photo on the birch paper, on the front or back of the tags, and on the chalkboard element. 


The Tags:
 
The tags are the flaps from the pockets cut of and then embellished so you can put a photo or two on the patterned side and then journal if needed on the back or include more photos.  
 
 
Supplies:
Stamp Set: Thankful For, Harvest of Thanks
Ink: Crumb Cake, Chocolate Chip
Accessories:  Thanksgiving Tablescape Simply Created Kit, Corner Rounder, 1 3/4 Circle Punch, Sticky Strip, Daubers, Big Shot & Cutting Pads, Magnetic Platform, Autumn Accents Die, Chalk Marker, Candy Dot Brad Bases, Basic Pearls, Paper Piercing Tool & Mat, Apothecary Accents Framelits
Customers Bring: Adhesive, Scissors, Dimensionals, and Bone Folder

Few lessons learned & tips:
  • 6 x 12 albums are hard to ship so keep it 8 1/2 x 11 or you'll have to use a big box to ship it to out of state hostesses.
  • The curled birch paper and chocolate chevron paper is really hard to cut because of the curl. You should move your blade up and down so you cut from the top down to you don't have to lift up the cutting bar each time and can just slide it over.
  • The largest pearl in our Basic Pearls fits perfectly in the Candy Dot brad bases.
  • Birch paper is light weight but it's also curled so you need to use sticky strip to adhere it to things.  Adhesive will not hold.
  • I recommend not putting the chalkboard embellishments on this album until you have written on them - it's tough to write over dimensionals.... at least for me!
I do have word instructions for this project that can be shared for free if anyone wants them.  Email me at stacy @ acrophile.net if you'd like them.  I won't make a kit for you but you can buy the supplies from my online store!  :)  

The hostess code for online orders for next month is G3SGBMJK.  Anyone that purchases anything online by 11/24 can enter this code.  We have reached a qualifying workshop already this month so I will draw a mystery hostess from those that purchased and the lucky winner will get the free merchandise (currently at $30).

If you want to be included in next year's hostess appreciation event, contact me today to host a workshop, stamp camp, or online catalog party or join my team!

Take care,
Stacy