Friday, February 27, 2015

You Made My Day and More

Today's quick post is also from Creative Convention Online.  It features the button pack and stamp set from the Best Year Ever Sale-a-Bration product line.  You could switch these colors out or you could use the 1/2 circle punch and the epoxy scissors to make the center of the flower.

To get the two tones of purple, I inked up the stamp in Elegant Eggplant and then stamped it twice.


Supplies:
  • Cardstock: Crushed Curry, Elegant Eggplant, Whisper White
  • Ink: Elegant Eggplant
  • Stamp Set: Best Day Ever
  • Accessories: Best Year Ever buttons pack, Petite Petal Punch, 1 3/4 Circle Punch, Large Scallop Punch, Basic Rhinestones, Dimensionals, and Adhesive

Have a craftastic day,
Stacy

Thursday, February 26, 2015

Celebrating Your Big Day

Yesterday my little baby boy turned ONE!  There were so many late nights over the last year, but none longer than the night of his birthday where he was sick and couldn't breath and could only sleep sitting up.  But, while he sleeps off the trauma from his one year immunization, I will post a quick project that came out of my recent participation with Creative Convention Online.  This card is quick and gender neutral and I used it for his card!
 
The White Jute ribbon is wonderful.  If I hadn't gotten a roll of it with my make-n-take package, I wouldn't know how great it is to play with.   You can color it with Blendabilties Markers and you can cut off strips and use for tying bows, like in this card.
 
The stamp set is Big Day and the paper is Best Day Ever - both of which are Sale-a-Bration products. You can get these items for free with any $50 purchase through the end of March. 
 
 
Supplies:
  • Cardstock/DSP: Whisper White, Coastal Cabana, Best Year Ever DSP
  • Ink: Memento Tuxedo Black
  • Stamp Set: Big Day
  • Accessories: Big Shot and Cutting Mats, Magnetic Platform, Starburst Framelits, Circle Framelits, White Jute Ribbon, Dimensionals, Glue Dots, Scissors, and Adhesive


It's Sale-a-Bration time.  For every $50 you spend in merchandise, you can get a free item from the Sale-a-Bration brochure.  This promotion lasts until March 31st so work on your wishlist and check out the exclusive merchandise here.
 
Interested in hosting a workshop?  During Sale-a-Bration, when you host a $250 party, you get $25 free in merchandise.  That means you get $65 FREE in hostess benefits!
 
Ever thought that maybe becoming a demonstrator might be a good fit for you?  During Sale-a-Bration, you can sign up for $99 and get $125 in free merchandise.  You also get to either pick a kit from the Occasions catalog or any two Sale-a-Bration products for free.  If you are interested in learning more, let me know!
 
Have a craftastic day,
 Stacy

Sunday, February 22, 2015

Hooray, It's Your Day for Decorations

Today we celebrated Michael's first birthday with friends and family and the first birthday cake smash.  When Callie turned one, I had decorations and a professional cake.  For Michael, it's not that I'm lazier, it's that I've learned it doesn't matter to him.  And, I realized that if I made stamped decorations, I'd be able to easily scrapbook them with the same supplies!  Two birds, one cupcake....
 
Speaking of two cupcakes, my cake maker went out of business when she got marred - her love for her husband replacing her love for flour and sugar - so I had to improvise.  Baking is not my strong suit but I thought this was fun.  Callie was able to help me mix colors to make the bright cakes and then I decided to arrange them as a one...


As for what I made, I used the Hooray, It's Your Day stamp set for all of it. 
 
http://www.stampinup.com/ECWeb/ProductDetails.aspx?productID=137164
 
First I made cakes so I needed a topper since he's too small to blow out a candle.  I used Wild Wasabi, Tangerine Tango, and Daffodil Delight for the color scheme.  The 1 is a stamp from a retired set I can't remember the name of!  The banners are cut with scissors and wrapped around a stick using dimensionals.
 
 
I also made a party hat for him.  It looks a little like a luau hat.  I cut a piece of 3 x 11 Wild Wasabi and cut it with the fringe scissors.  Then I cut two pieces of 11 x 1.  I stamped one with stars from the stamp set using Wild Wasabi and wrapped on the bottom overlaying the fringe.  Then I stapled the second strip on the hat to size it for his noggin.  I stamped the sayings and then turned over the saying stamp and stamped an outline in Daffodil Delight.  Such a cool technique.


I also realized I needed plates.  If he was older, I'd be willing to splurge on designer plates for $4 for 8 plates.  But, again, I thought it would be fun to stamp them.  And it was much cheaper to stamp plain white plates than buy Mickey plates just to decorate the garbage can. 


At the end of the day, I could have bought gold plates and perfectly made cupcakes and helium balloons, but look how happy he is with what he had.  His first taste of sugar, his first real party, his first big mess.  And that is what is priceless.  I spend so much time trying to make things perfect for my kids but it's days like today that remind me perfection isn't important - something you just have to embrace the madness and be in the moment.


Supplies:
  • Cardstock: Whisper White, Wild Wasabi
  • Stamp Set: Hooray, It's Your Day
  • Ink: Tangerine Tango, Wild Wasabi, Daffodil Delight.
  • Accessories: Scissors, Dimensionals, Fringe Scissors, Stapler

Have a craftastic day,
Stacy

Friday, February 20, 2015

A Bash of a Card

As mentioned yesterday, I have fallen for the Balloon Bash stamp set in the Occasions catalog.  The stamp is photopolymer (137144, $25.95) so you can place it where you want it and lends itself to birthday cards for any gender and any age.


Today's card was another sample that came out of the Creative Convention Online training that I recently participated in.  It was a make-n-take designed by Ronda Wade and Maggie Patterson.  I love how quick the card is and the color combo too.  Who wouldn't love to get one of the in the mail, eh?  I really like the popped up banner on the card and also the addition of the candles at the bottom.  The designer series paper (DSP) is from our Sale-a-Bration brochure - Best Year Ever!

Supplies:
  • Cardstock: Best Year Ever DSP, Smoky Slate, Whisper White
  • Stamp Set: Balloon Bash
  • Ink: Smoky Slate, Calypso Coral
  • Accessories: Scallop Edge Border Punch, Basic Rhinestones, Dimensionals, Scissors, and Adhesive.
http://www.stampinup.com/ECWeb/default.aspx?dbws=80380

It's Sale-a-Bration time.  For every $50 you spend in merchandise, you can get a free item from the Sale-a-Bration brochure.  This promotion lasts until March 31st so work on your wishlist and check out the exclusive merchandise here.

Interested in hosting a workshop?  During Sale-a-Bration, when you host a $250 party, you get $25 free in merchandise.  That means you get $65 FREE in hostess benefits!

Ever thought that maybe becoming a demonstrator might be a good fit for you?  During Sale-a-Bration, you can sign up for $99 and get $125 in free merchandise.  You also get to either pick a kit from the Occasions catalog or any two Sale-a-Bration products for free.  If you are interested in learning more, let me know!

Have a craftastic day,
Stacy

Thursday, February 19, 2015

Celebrating in Circles


Have you ever seen a stamp set and thought "Not for me" only to see a sample that makes you buy $100 worth of product to make it?  This is one of those cards for me.  The Balloon Bash stamp set from the Occasions catalog did not speak to me when I pre-ordered.  I didn't instantly have ideas and I try to use that as my guide to keep me from going overboard.
 
Then I participated in the Creative Convention Online with Ronda Wade and Maggie Patterson.  This was a set that obviously spoke to them and they used it for one of their make-n-take packages.  Once I started playing with it, I couldn't stop.  I have taught several of their cards for my workshops and it's gaining fans like crazy.  It's even made me like the color Crushed Curry! 
 
The only change I had from their card was that I colored the brads with the Coastal Cabana Blendabilities Marker. 


Sorry for the shadow - until recently, Spring days have been at a minimum and I'm still working on my picture taking of samples outside!


Supplies:
  • Cardstock: Whisper White, Coastal Cabana, Pool Party, and Best Year Ever DSP
  • Ink: Crushed Curry
  • Stamp Set: Balloon Bash
  • Accessories: Big Shot & Cutting Mats, Magnetic Platform, Basic Rhinestones, Coastal Cabana Blendabilities Marker, Circles Framelits, Scissors, Dimensionals, and Adhesive
It makes for great gender neutral cards, which is great since we have an obscene amount of February birthdays to celebrate this month!  Come back tomorrow to see my favorite card with this set!

 
It's Sale-a-Bration time.  For every $50 you spend in merchandise, you can get a free item from the Sale-a-Bration brochure.  This promotion lasts until March 31st so work on your wishlist and check out the exclusive merchandise here.
 
Interested in hosting a workshop?  During Sale-a-Bration, when you host a $250 party, you get $25 free in merchandise.  That means you get $65 FREE in hostess benefits!
 
Ever thought that maybe becoming a demonstrator might be a good fit for you?  During Sale-a-Bration, you can sign up for $99 and get $125 in free merchandise.  You also get to either pick a kit from the Occasions catalog or any two Sale-a-Bration products for free.  If you are interested in learning more, let me know!

Have a craftastic day,
Stacy

Wednesday, February 18, 2015

Classic Gratitude

Do you know what never goes out of style?  Gratitude. 

The easier it is to communicate, the less some seem to communicate their thanks for those around them and the things they do.  I'm as guilty as anyone else.  I always have good intentions but sometimes the expression of those ideas gets lost in my daily shuffle.

Recently, a few friends helped me run a test party online to see if it was a good addition to my business.  I was hoping for a way to communicate to my friends and customers when I'm either out of town or if my kids were sick (which they seem to be all the time now!)  These friends lent me an hour of their time to help me fine tune my "script" for my live event.  Their input was priceless.

Today is Ash Wednesday, the first day of Lent.  In keeping with my balance resolution, I feel I need to give something up that really is a crutch, an indulgence, and a waste.  While I cannot give up coffee, I can give up Starbucks for six weeks to increase my health and increase my pocket book.  Since I pass one several times a week, this is a good check for me.  However, my friends aren't giving that up (hopefully) so I decided to give them gift cards for helping me out.

I really liked playing with product for these.  The heart pieces are the washi tape that comes with the So You Mini Book kit in the Occasions catalog.  The Happy Hearts embossing folder add a nice touch and I finally got to use my Perfect Blend stamp set.  You could easily substitute out a message for the coffee cup and have a great wedding or anniversary or birthday card!


The card is a 5 1/2 x 8 1/2 card that is scored 3/4" at the bottom.  The left scored area is cut off and the right is folded up and stapled.  The gift card slides in there, though it could be on the other side and leave more room for sentiment.  I included a piece of cardstock in my card with my message so they could reuse the card if they needed one!

 
Supplies:
  • Cardstock: Very Vanilla, Crumb Cake
  • Stamp Set: Perfect Blend
  • Ink: Crumb Cake
  • Accessories: Big Shot & Cutting Mats, Happy Hearts TIEF, Gold Baker's Twine, Itty Bitty Accents Punch Pack, So You Mini Book kit (washi tape), Adhesive, dimensionals, and scissors
 
Have a craftastic day,
Stacy

Tuesday, February 17, 2015

A Vintage Happy Birthday

I follow a lot of other demonstrators.  I think it's best to learn from the best and since every demonstrator has their own take on how to use our products, I find I can always see a variety of styles thanks to the beauty of internet and Pinterest.  Some of these demonstrators make me want to buy product that I've never thought was my style and others have just taught me new ways to use what I bought. 
 
One of the demonstrators that I have followed the longest and taken a lot of online classes from is Kimberly Van Diepen.  Her blog, Stampin' by the Sea, has a lot of vintage cards and projects on it.  These have never been my style but I love her color combinations and the way she distributes her embellishments.  
 
This card for my dad's birthday a few weeks ago was my first voyage into vintage.  I used Baked Brown Sugar ink, which is my go-to for distressing.  I used a doily for a stencil and then tore a part of it off to use with the woodcut piece.  The stamp set, Guy Greetings, is one I'm having a lot of fun playing with.  I then added some loose thick baker's twine and took a deep breath.  I think it's beautiful and unique, just like my dad.
 
Supplies:
  • Stamp set: Guy Greetings
  • Ink: Baked Brown Sugar
  • Cardstock: Very Vanilla, Baked Brown Sugar
  • Accessories: Baked Brown Sugar Thick Baker's Twine, Neutral Candy Dots, Sponge, Doily, Woodcut, Dimensionals, Scissors, and Adhesive
 
Check out the latest weekly deals on my Web site!


Have a craftastic day,
Stacy

Friday, February 13, 2015

Preschool Valentines

Today is Callie's first preschool Valentine's Day.  I had a million ideas but we ended up doing the cute candy bags from Paper Pumpkin since they were perfect and her little hands could do them. 


I also thought she might want to exchange Valentine's Day cards so I made up this little beauty with envelopes.  It was fun to play a little bit with a very playful image!


I colored the fish using the Coastal Cabana, Pumpkie Pie, Daffodil Delight, Old Olive, and Cherry Cobbler Blendabilites Markers.  She wrote her name on the back using a White Chalk Marker and then put the names of her classmates on the envelopes. After that, she was exhausted and said her friends need shorter names!


As for treats, before she settled on the goodie bags, I had to show her the "options". 


These were all made using the Hey, Valentine stamp set.


Treat #1 - Sour Cream Holder

This treat is hiding in a sour cream holder.  To make these, you put sticky strip or fast fuse along the two long sides and one short side of the Designer Series paper (I used the Stacked with Love). Roll it into a tube first and then press one end shut.  Add your treat and close the other end the opposite way.  I used our small handheld stapler to add staples to make sure it stayed shut!  When coloring the pirate, I used several of our Blendability markers.  I even added a few rhinestones to the treasure chest and colored them with the darkest Daffodil Delight Blendability.  Gold should be shiny right?


Treat #2 - Treat Bag
 
This little bag is also made using a single sheet of the Stacked with Love DSP.  You score the long side at 1".  Turn the paper and score at 1/2, 1 1/2, 3 1/2, & 5 1/2.  Cut the 1" score lines on the long side so that the bottom of the box will fold in.  Put adhesive on the 1/2 flap and adhere to make the box.  Then fold in the bottom pieces and seal with adhesive.  This one is closed with an In Color clothespin and colored with Tangelo Twist, Real Red, and Pink Pirouette markers.


Treat #3 - 8 x 1 Cello Bag

The third image in this stamp set works perfectly with the tall cello bags.  I stuffed this one with candy hearts (which don't taste nearly as good as they did when I was in school...)  I colored the bird with the Cherry Cobbler and Pink Pirouette Blendabilities markers and adhered with a dimensional.


I hope you had a wonderful time making goodies with your kidlets for the holiday.  Check out tomorrow to see the Valentines Day cards I did for my husband.  I love that Valentine's Day is on Saturday so I can hide them all over the house.

Have a craftastic day,
Stacy

Thursday, February 12, 2015

Blendabilities and Embossing - A Perfect Match

I recently participated in a Creative Convention Online series with Ronda Wade and Maggie Patterson.  These two amazing demonstrators, along with some great guest speakers, helped other demonstrators think outside our familiar boxes and try new things with our businesses to be successful.  This training led me to do my first Mommy & Me party, my first Online Facebook event, and to work on my first Project Life event. 
 
In addition to all the great training, there were some make-n-takes that we could do.  Since I went overboard on Sale-a-Bration and Occasions products, I actually had most of the supplies that they used on the kits and was able to use them in my workshops without the stress of designing them myself.  As a busy mom of two energetic kidlets, this was a lifesaver this year!
 
I'll be sharing my CCO samples over the next few weeks.  Some of them are straight up as they designed them.  Others have little changes either because I messed up the stamping or was inspired while I was putting them together for a  little twist!
 
This was one of my favorites because I never knew you could color on white embossing with our Blendabilities.  Did you know that?  It's like a crafting match made in heaven just in time for Valentine's Day! First you emboss using VersaMark and White Embossing Powder.  Then, after you heat set it with the heat gun, you use the fat tip of your markers and color on it.  It gives this beautiful colored embossing powder look.  Just make sure that the powder is fully melted and fully cooled or you'll ruin your marker.


This card utilizes Big Day, a set from Sale-a-Bration.  You can get this exclusive set if you purchase $50 in merchandise from your demonstrator or from my online store.  You can also get Blendability markers using your Sale-a-Bration benefits - how excellent is that idea?  Love ya, Stampin' Up!

Supplies:
  • Cardstock: Coastal Cabana, Rich Razzleberry, Basic Black
  • Ink: VersaMark
  • Stamps:
  • Accessories: Stamp-a-majig, Embossing Buddy, White Embossing Powder, Heat Gun, White Jute Ribbon, Naturals Ribbon, Best Day Ever Button, Scissors, Glue Dots, Rich Razzleberry Blendability, Coastal Cabana Blendability, Crumb Cake Blendability, Texture Boutique, Polka Dot TIEF, Dimensionals
There are some new arrivals just in time for Sale-a-Bration too!

Better Than E-Mail Photopolymer Stamp Set  - 140463 
Price: $15.95
http://www.stampinup.com/ECWeb/ProductDetails.aspx?productID=140463&dbws=80380

Lovely Amazing You Photopolymer Stamp Set  140594 
Price: $14.95 
http://www.stampinup.com/ECWeb/ProductDetails.aspx?productID=140594&dwbs=80380
 
We also have weekly specials so check out these offerings.


http://www.stampinup.com/ECWeb/ProductDetails.aspx?productID=140463&dbws=80380
 
If you order something online by Friday, please use hostess code RGAQZTBH.
 
Have a craftastic day,
Stacy

Wednesday, February 11, 2015

Mommy and Me and Valentines Make Three


Today I wanted to post the projects I did for my first ever Mommy & Me class.  I featured the stamp set from the January Paper Pumpkin kit - Filled with Love.  I wanted to target kids between 3-8 but it's a little closer to 4-7. We did three projects and I had the kids rotate tables so that they could meet new friends and so could their moms.  It was a blast.  A little hectic but 9 kids between 4-7 will do that to you. 

 
The first project was directly from the Paper Pumpkin kit.  Moms had to help with the glue dots and bows but the kids were masterful in filling the bags and stamping.  Photopolymer stamps are PERFECT for little crafters because they can see where they are stamping. 

 
The second project was the artistic one.  That means messy in kidspeak.  I took a piece of Real Red and cut a heart using our Heart Framelits out of the center.  Then I had them paint all over it using white WASHABLE paint and their fingers.  While it dried, I took their picture and had them put a piece of Stacked with Love DSP to the back of a coaster using a glue stick.  I printed the picture and cut it down to 4 x 4.  They put that on the other side of the coaster in the center.  Once their paint dried, they stamped the "You have my heart" stamp at the bottom and layered on the coaster using dimensionals in each corner.  They punched holes using the crop-a-dile and threaded through the satin ribbon.  Some moms had to help with the ribbons, some didn't.


The third project was a simple Valentine's Day card using Notecards & Envelopes.  This project had them using the Texture Boutique, which was magical for them.  They used the Happy Hearts folder on a piece of Pink Pirouette that was cut to 4 x 3 1/2.  They layered it will a glue stick so no mess at this station.  They put the heart that was left over after I cut the second project on it and then stamped the saying on the strip of white and layered with dimensionals.  "Stickers" are also a big deal at this age. 

The cost for the camp was $5.  I heard that wasn't enough but it covered my supplies and it was worth it watching all those little crafters enjoy themselves the way I do when I'm crafting.  Paper Pumpkin kits are perfect for little crafters because they can't ruin the photopolymer stamps and the ink spots are easier for their little hands to work with than big pads.  I know often we keep our supplies out of their little hands but sometimes, give them a scrap and some ink and see the artistry unfold.  Their pride in their work will be worth it.


Have a craftastic day,
Stacy

Tuesday, February 10, 2015

January Paper Pumpkin - Filled With Love

January's Paper Pumpkin kit was a great discovery!  Upon opening my pretty box, I found an 8 piece stamp set, a Real Red ink spot, and supplies to make 24 goodie bags using colors like Real Red,  Whisper White, and Gold.  The kit came with bags, gold clips, pink & gold twine, and die cuts.  IT...WAS....ADORABLE...

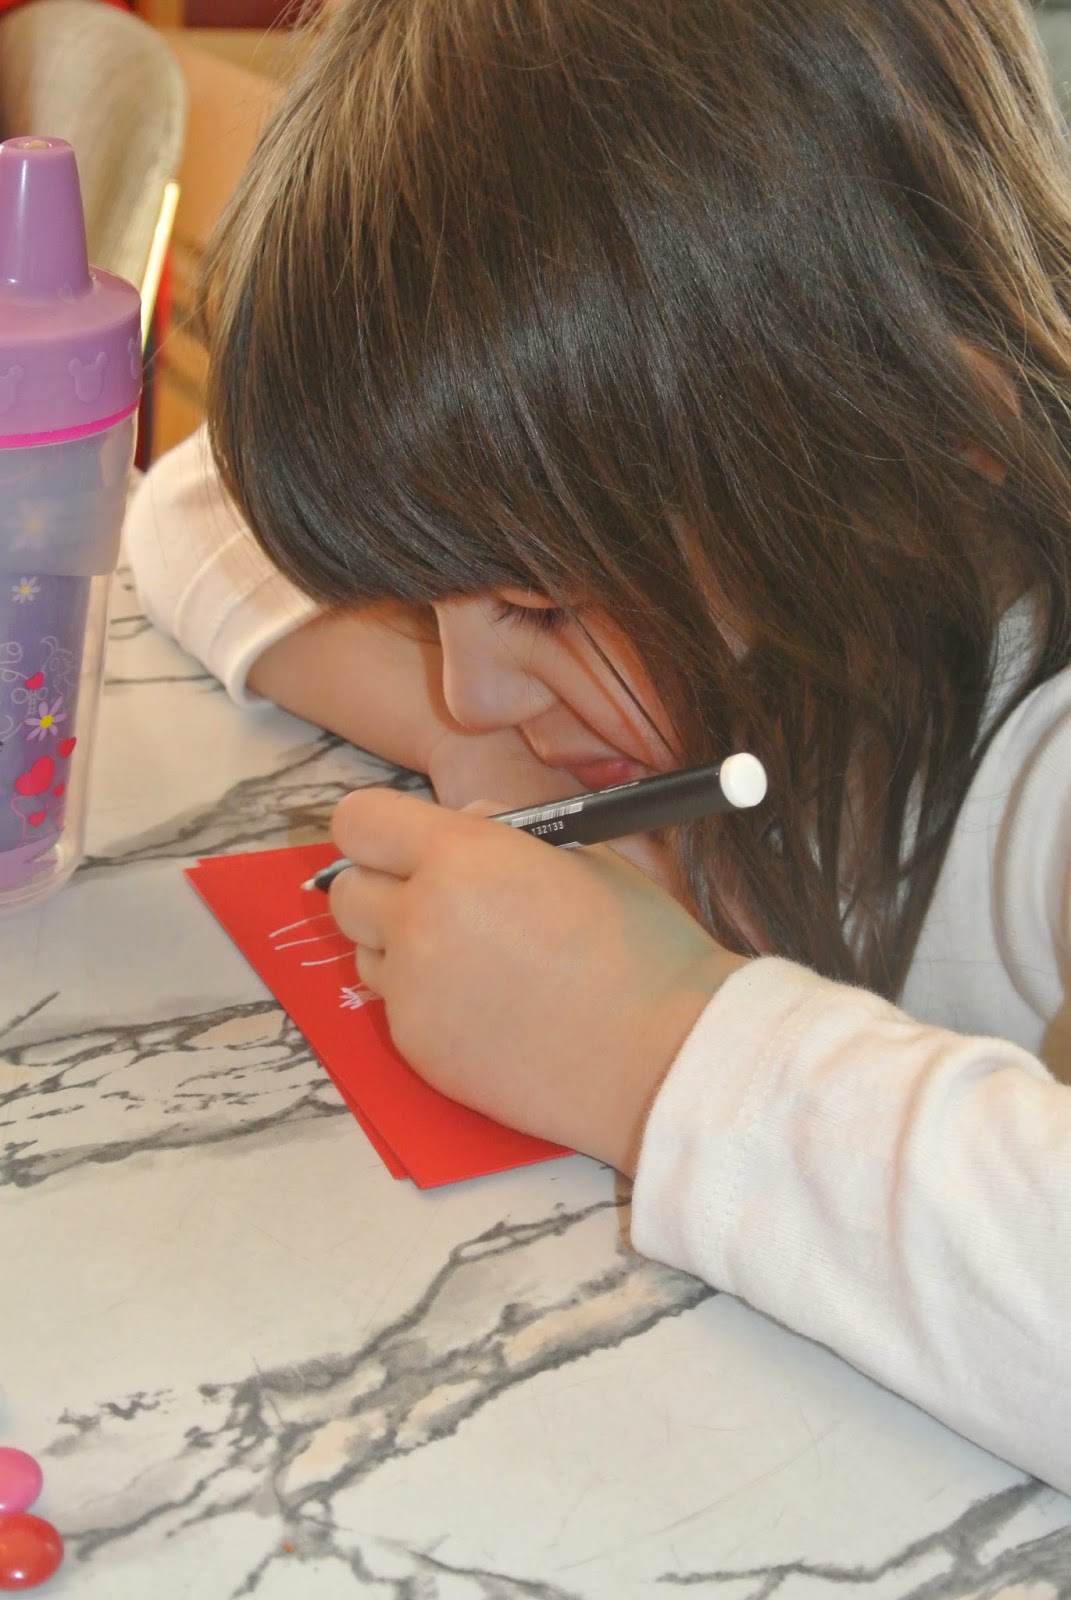
And, with Valentine's Day around the corner and a pre-schooler who needs treats, this is going to be perfect!  This is the standard project included in the kit.  You choose the heart to stamp on it.


I wanted to show a few other ideas with this stamp set too, but first, if you are interested in receiving Paper Pumpkin, you need to sign up by 11:50pm on the 10th of the month.  That's TODAY so see the links at the bottom to sign up!

Now onto the other samples....

This project features a layout from Freshly Made Sketches, a site I visit for layout ideas.  I added a little Gold Soiree paper and Real Red cardstock.

This little lovenote is just one of the banners cut in half and then cut in half again and made into a banner using the hexagon punch.  Then I colored a few rhinestones with the Pink Pirouette Blendability marker and used Pink Pirouette ink.

This Valentine features the stamp set included in the kit.  Everything else is from the Occasions catalog or the main catalog. 


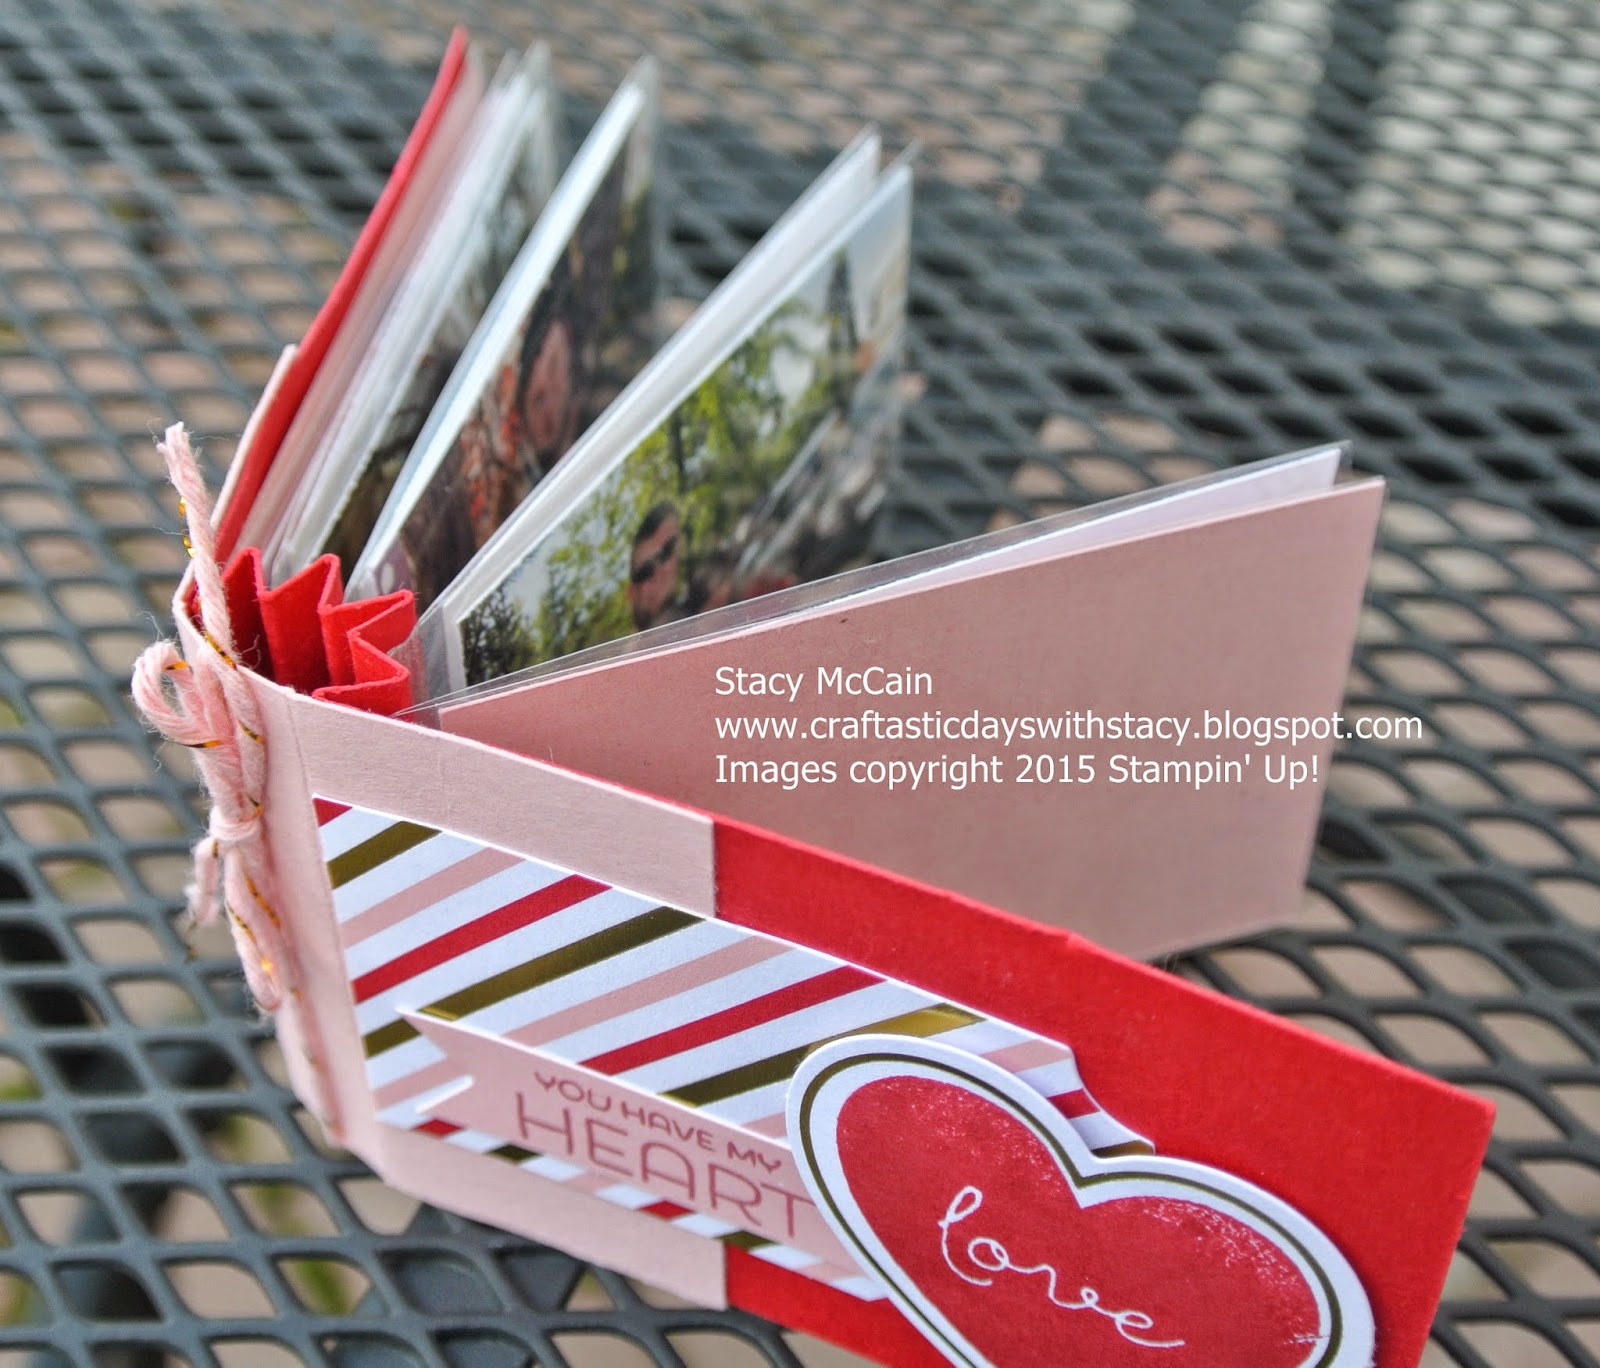
Whenever I see cello bags, I think Mini book. 


This mini book is a piece of Real Red cardstock cut to 8 1/2 x 2 1/4.  I scored it every 1/4 inches from the 3 1/4 to 5 1/4.  The piece around the ends is 3 x 2 1/4 scored at 1 1/4 and 1 3/4.  Cut the envelopes down to 3 1/4 and attach to the scored center using Fast Fuse. 


Slide either wallet sized photos or 3 x 2 pieces of cardstock for journaling.  The front is just the other half of the banner from the love note and one of the hearts and banners from the kit.


If you are interested in subscribing to Paper Pumpkin, use this link: https://mypaperpumpkin.com/en/?demoid=80380 .  Don't forget to sign up by 11:50pm tonight to qualify for the February kit!


If you are interested in purchasing a pre-paid subscription and taking advantage of the 3 month subscription for $54.95, use this link and put hostess code RGAQZTBH into the bottom of the checkout screen & pick out a Sale-a-Bration product from my online store!  http://www.stampinup.com/ECWeb/ItemList.aspx?categoryID=1444

Take care & have a craftastic day,
Stacy