Monday, September 30, 2013

Cleaning Stazon off Stencils

I am having a small group of people over next week to do a holiday banner.  We had such a good time with the spooky banner that they wanted to do another for the Christmas holidays.  Problem is, with all the chaos here, I forgot to clean the Stazon black off my letters and polka dot template after that class.  I needed those letters for my Joy banner and wasn't really excited about getting black ink in my classic pads!  When I pulled them out, they not only had Black Stazon, but they also had pieces of foam stuck to them from the daubers.


How gross is that?


So I tried to scruff off the foam and ink using an exacto knife.  As you can imagine, this wasn't effective AND it made a horrible sound.  I tried the Stazon cleaner too but after having a month making itself at home, it was stronger than the cleaner...


But, if I put the Stazon on and left a layer on there for a few minutes then I was able to use a Magic Sponge to get the ink scruffed off.


Good as new.  Much quicker on the letter stencils than this one.  I hope this tip helps you use your stencils more.  If you use classic ink, just run them under water in the sink and they will be all clean!


Thank you all for helping me hit a personal record in Sales this month.  Between your orders, your camp attendance, and your hostessing, I was able to hit a marker that gave me enough volume rebate to cover Conlyn's Christmas gifts.  Since I'm not working my corporate job anymore, both Conlyn and I appreciate your support so he's not getting just socks under the tree.

Have a craftastic day,
Stacy

Sunday, September 29, 2013

Our Canning Adventures

I am part of a crafting group that is made up of mommies (and one wonderful aunt that will be a great mommy someday.)  While we all love our families, we needed a little break from our husbands, children, and routines.  So we started getting together and doing either projects (like Joanna teaching us to sew) or to bring our own projects (everyone else is a knitter but me!)  It's been a fun way to get to know each other better and also to branch out into creative things we don't always have time for.

Last October, our Crafting Group decided that they wanted to learn to can.  Through parents and books, we figured out how to keep ourselves from poisoning our family and friends and a new passion was born.  I cannot wait for Callie to be old enough that I can pass this knowledge on to her.  I was a hard sell - I showed up with nothing thinking that I would just help with the canning they were all doing.  I ended up at Wal-Mart (my least favorite place on EARTH) and buying a canner, jars, tools, etc.  I even asked if I could just buy a person at Wal-Mart to can for me since it looked like a lot of work.  This is when I solidified my canning nickname of Silver Spoon.

Since that fateful day in October, I have made my own peaches, applesauce, and some great butters that tasted even better when I added Crown Royal to them.  Yum.... (taking a quick pause to remember how wonderful alcohol tastes since pregnant me obviously hasn't had any for a long time!)  This year I even made freezer jam and my father is going to eat me out of my supply so it's a good thing I made a lot!

My mother always made the most wonderful jams and jellies and I haven't yet branched into this territory.  I can remember the taste of her huckleberry jam growing up - full of sugar and love - but I don't remember her making it.  I'm assuming that's because I was accident prone and was never allowed to be that close to the stove.  :)  I look forward to when we get together and she shares that knowledge now that I have an interest in it. 

My grandmother was a great canner but much of that knowledge has faded as she has grown older and her memories have started to fade.  It's a very sad thing to face and that is why I plan on documenting these things for Callie now so that she doesn't have to rely on my memory to do this for her family.

I haven't made labels this year for my mason jars because I haven't decided what I'm giving away yet.  Last year I used the Friendship Preserves set but this year I'm going to use the digital kit so that I can size them depending on the size of the jar.


This digital download is only $3.95 and comes with the four images above plus a punch the shape of the stamps so you can make your own labels!  If you would rather use the stamp set, you can find the Wood Mount for $21.95 or the Clear Mount for 16.95.
 
The hostess code for October is TUBSEAHG.  If you place an order online during October under $150 in merchandise, use this code and then I will draw a mystery hostess to get the hostess benefits if the October online orders qualify.

So what brought on this post?  Ilene is on her way over so we can finish her applesauce together because canning is more fun with good friends and company. 

I have to recommend Williamson Orchards & Vineyards to get your local fruit for canning if you are in the Boise/Marsing area.  Their Web site is http://www.willorch.com/ and they are kind and wonderful people.  Their honeycrisp apples are amazing and that is what we are using today!

I love that we can support local businesses, good friends, and make memories all with the simple act of canning.

Have a craftastic day,
Stacy

Saturday, September 28, 2013

New Card Making Kit and Envelope Punch Board Update

 
Stampin' Up! has introduced a new card making kit.  The kit comes with everything you see above to complete 20 cards for $29.95 (plus shipping and tax.)  This card kit is aimed towards new crafters but I have just ordered mine so I can see if it works for experienced crafters as well.  The kit comes with everything you need except scissors and adhesive.  Good news -- I sell those too!

You can click the image above to see more details about this kit.  I will post photos of the cards once my kit gets here next week. I think this card kit might be a great thing to give as a gift over the holidays to the crafters in your life even if you aren't one (but it just might show you how easily you could be!)


Another great new product we have is the Envelope Punch board.  I've been posting some great samples on Pinterest from other demonstrators using this product.  Mine has been side-lined until I'm done with my holiday camp prep.  These boards are $19.95 and allow you to make envelopes for all sizes of cards.  They have been in high demand and SU! anticipates they will go on backorder in the next few days until mid-October.  If you think you want one of these fun tools to play with, you should order it now or be prepared to wait for it (though it is worth waiting for!)

The hostess code for October is TUBSEAHG.  If you place an order online during October under $150 in merchandise, use this code and then I will draw a mystery hostess to get the hostess benefits if the October online orders qualify.

Today is our homecoming so I had hoped to get more photos for my September scrapbook pages.  I missed out on the sorority brunch this morning since being pregnant and allergic to citrus doesn't make me excited to enjoy a mimosa brunch, even if it would have been great to see my sorority sisters from school.  We had to skip Taste of the Harvest this afternoon because Callie woke up with a case of the stuffies and a fever.  She's been in good spirits but I don't blame her for being Callie-crankypants.  Tonight she has a better demeanor but she's still all stuffy.  I'm loading her up with vitamin C (yes, more orange juice like I referenced above as being toxic) and cuddling with popcorn as we watch Disney movies until dawn. :)  Conlyn is at the BSU game with dad and I was able to get all my class prep done that I could before my order arrives on Tuesday.
 
I hope you all have a great Saturday -- that your teams win, your projects turn out right, and that you get a little time to spend on yourself.

Have a craftastic day,
Stacy

Friday, September 27, 2013

Joyful Bundle

The final "joyful" bundle for my holiday camp next weekend revolves around Spreading the Joy and Season of Joy.

The 3D item is a journal based on the tutorial provided by Cindy Schuster.  I wanted a simple notebook that could be created as a gift for friends easily using any variety of colors and supplies.


The tag is just done using a scrap of Real Red and embossed with the saying and the corner of the poinsettia.

The card is based on a card swap I received from Kim B. at Convention (because I'm her favorite).  She did a great technique involving the ink refills and blender pens.  I didn't want to have my customers use that many supplies because I thought it might overwhelm my new stamper so I used sponges after embossing the white cardstock with white embossing powder.  This card is another one I offered from my stamp-a-stack - 10 cards for $15.


I am no longer accepting RSVPs for my camp or my stamp-a-stacks but if you are interested in being a hostess for the holidays, contact me today and you can do a variety of these projects at your own house with your family and friends!

Have a craftastic day,
Stacy

Thursday, September 26, 2013

Winter Frost and Festive Flurries Bundle

The fourth bundle for my holiday camp utilizes the Festive Flurries bundle and more of the Winter Frost DSP pack. 


When I first got the pack, I was a little disappointed with the patterns in it.  They seemed so busy that I wasn't sure how to play with them.  I realized quickly that they would look good as a background on a card but also as a splash of color in a scrapbooking project. 
 
The card I made has already been on my blog but it shows how the DSP packs work as a background piece.
 
 
The tag was also easy - it was just a matter of cutting out the snowflakes to layer them in a way I liked with the scraps I had from the various projects.
 
 
But what to do for the 3D project?  Sitting on my desk was an exploding scrapbook our little crafting club did this summer for Father's Day and I realized that it could be resized to utilize the papers from the print pack.  Where most of my exploding scrapbook boxes usually measure 9 x 9 or 12 x 12, this one is 7 1/2 x 7 1/2 so each square is only 2 1/2 inches wide.  That let me use the pieces from the DSP pack to add some color and some snowflakes to this project.  The saying from Christmas Messages of Oh What Fun reminded me of watching Callie play in the snow last winter and how great those photos would be in a home décor.


These boxes are great and it shows how you can easily use your scraps in a fun way.  I've made these for baby showers, Christmas, special events, etc.  With Stampin' Up!'s Simply Scored Tool and plates, these boxes come together quickly and easily!  I think those coming to my camp will really enjoy this project.

Supplies:
  • Cardstock/Paper: Winter Frost DSP Pack, Smoky Slate, Whisper White, Pool Party
  • Ink:  Smoky Slate
  • Stamps: Festive Flurry, Remembering Christmas, Christmas Messages
  • Accessories:  Festive Flurry Framelits, Frosted Finishes Embellishment, Hexagon Punch, 2 @ 6" pieces of 1/8 Silver Taffeta Ribbon, Basic Rhinestones, Dimensionals, Scissors, and Adhesive
 
Have a craftastic day,
Stacy
 

Wednesday, September 25, 2013

Pretty Print Winter Frost Holiday Bundle

Today's bundle is another offering from my holiday camp. 

 
The card in this bundle uses the new card thinlits, Winter Frost DSP, mini silver brads, Bracket Punch, and the stamp sets Tags 4 You and Christmas Messages stamp sets. 
 
This card is one of my Stamp-a-stack options at 10 for $20.  The inside of the flip card is shown below.  This is a great product line and I'm excited to get it in front of everyone to play with!
 
The gift card holder is based on a tutorial offered by Dawn Griffith. Dawn is one of the demonstrators I've followed online for a few years, ever since I met her in person at a Stampin' Addicts event.  She's amazing and very funny!  This holder utilizes our envelopes in a fun new way.  I love the Pretty Print embossing folder because it adds an element of elegance to a project in a quick way.  You can see how I used it on the front of the holder in the bundle picture above.
 
The tag uses components from the card thinlits, embossing folder, Tags 4 You, and Bracket punch.  These are super quick and super cute so I'm excited to make a bunch of them for my Christmas gifts.

 
Last day to RSVP for my holiday camp is today, September 25th so contact me today if you are interested in a stamp-a-stack or a camp entry.  The cost is $20 for 5 cards, 5 tags, the gift card, the gift box, the journal, the exploding scrapbook box, and the washi clothespin.
Sessions are:
Session 1: Friday, October 4th, 10am-1pm (6 slots left)
Session 2: Friday, October 4th, 6pm-9pm (5 slots left)
Session 3: Saturday, October 5th, 10am-1pm (3 slots left)
Session 4: Wednesday, October 30, 10am-1pm (6 slots left)

If you cannot attend but are interested in a kit, the cost is $5 extra if you come pick it up and $10.80 extra if you'd like it shipped USPS Priority Mail.

Have a craftastic day,
Stacy

Tuesday, September 24, 2013

Season of Style Holiday Bundle

While Callie and I have been busy doing Halloween crafts, I wanted to finish getting my holiday samples out in front of you all first before my RSVP date for my great holiday class has passed!

Today's bundle is another offering from my holiday camp.  This bundle features the Gorgeous Grunge and Many Merry Messages stamp sets and the Season of Style DSP Paper Pack.


The card in this bundle is directly inspired by this great creation by Debra Currier, a fantastic designer with a blog I follow. I thought it would look great as a Christmas card and it inspired these other projects using the same stamp sets and papers.


This card is one of my Stamp-a-stack options at 10 for $15.
The gift box is very versatile and makes for a quick way to give a holiday gift. 

The tag uses the stripe from the Gorgeous Grunge set. 

Last day to RSVP for my holiday camp is September 25th so contact me today if you are interested in a stamp-a-stack or a camp entry. The camp fee is $20.

Sessions are:
Session 1: Friday, October 4th, 10am-1pm (5 slots left)
Session 2: Friday, October 4th, 6pm-9pm (5 slots left)
Session 3: Saturday, October 5th, 10am-1pm (5 slots left)
Session 4: Wednesday, October 30, 10am-1pm (6 slots left)

If you cannot attend but are interested in a kit, the cost is $5 extra if you come pick it up and $10.80 extra if you'd like it shipped USPS Priority Mail.
New Photopolymer Stamps
Stampin' Up introduced some new photopolymer sets.  You can see all their offerings here: http://www.stampinup.com/ECWeb/ItemList.aspx?categoryID=1442&dbwsdemoid-80380
Bite Met Photopolymer Set:
http://www.stampinup.com/ECWeb/ProductDetails.aspx?productID=134622


Greetings From Photopolymer Set:
http://www.stampinup.com/ECWeb/ProductDetails.aspx?productID=134621

Map It Out Photopolymer Set:
http://www.stampinup.com/ECWeb/ProductDetails.aspx?productID=134620


New Digital Downloads:

The newest digital downloads are now available. Click the image below to visit my online store and view more details about each download.


I'm placing an order on the 26th so let me know if you need anything!

Have a craftastic day!
Stacy

Thursday, September 19, 2013

Washi Holiday Camp Bundle

Welcome back!  Yesterday I shared the washi holiday card that I'm using at my Holiday workshop.  Today I'm showing you the rest of the projects at that "station" during my camp.  This year for the holiday camp, I'm putting a card, tag, and 3D together using the same box of supplies.  This lets my customers know several ways to use the products and lets me get some fun 3D projects in that I don't do the rest of the year.  After all, when it comes to gift giving at Christmas, even packaging makes people smile!


At the washi station, we will be putting together the card, the clothespin that can either have magnets on it to put on the fridge or it can be put on a package or a bag to hold on the gift tag. I was thinking of all the hostess gifts I will need this winter and this little project is quick and super cute!  Plus it's another one your kiddos could help with. 

Washi tape is paper tape.  It allows little fingers to rip it and replace it if they don't like where they put it.  Our punches are also kid friendly (as long as you watch so they don't eat their little fingers).  This means the kids can do the punch outs as well!

As for the tags, washi tape allows you to put a quick accent to a piece of scrap cardstock or paper to add to a gift.  No need to spend money on those sticky tags - just put a piece of washi tape on the end, fill out the to/from, add a dimensional on the bottom, and attach!

Supplies:
  • Cardstock/DSP: Whisper White, Crumb Cake
  • Ink: Cherry Cobbler, Old Olive
  • Stamp Set: A Round Array, Many Merry Messages
  • Accessories: Season of Style Washi Tape, Clothespin (non-SU), 1/2 Circle Punch, 7/8 Scallop Circle Punch, Old Olive 1/8 Taffeta Ribbon, Glue Dots, Dimensionals, Scissors, and Adhesive.

Have a craftastic day,
Stacy

Wednesday, September 18, 2013

Holiday Washi Card

I am a Pinterest junkie.  I get to do it in the morning when Callie watches Mickey and Doc and I get to wind down in the evening with it when the house is finally quiet and I need some "me" time before going to sleep!  It's not just about checking out what other crafters, family, and friends are pinning, but also pinning myself from my favorite blogs so that I can keep all those ideas in one place!  I have a set time on Sundays where I visit all my blogs that I follow (and it's about 40) and post projects that inspire me or I think my customers would like!  I haven't found a great organization system yet for all my stamp samples but I'm trying to make sure I put in some keywords of the stamp sets or products just to make searching my own inventory easier!

With a toddler and another baby on the way, anything I can do to help me find inspiration that I can quickly convert into my own rendition (or sometimes just directly steal) is a blessing.  Today's card that is featured in my holiday camp is no exception.  I'd come up with the idea of the washi tape on a box to be a package by myself but couldn't figure out the best way to mount it on a card.  Then I came across this wonderful card from Sandy Mathis during one of my pin-a-thons!  She has a blog full of great ideas if you haven't visited her before!

I loved that she kept the card white on white. It really makes the tape pop out on the card.  I didn't use the embossing folder on mine - I wanted to keep it really quick.  I also changed out the ribbon since I like making bows out of the 1/8 taffeta.

 
Supplies:
  • Cardstock/DSP: Whisper White
  • Ink: Old Olive
  • Stamp Set: Many Merry Messages
  • Accessories: Seasons of Style Washi Tape, Old Olive 1/8 Taffeta Ribbon, Glue Dots, Dimensionals, Scissors, and Adhesive
This card is one of my stamp-a-stacks for the holiday.  Cost is $15 for 10 cards.  You can also just make one at my holiday stamp camp.  View details for that camp here.

Have a craftastic day,
Stacy

Tuesday, September 17, 2013

Newest Digital Downloads & Holiday Camp Details

It's digital download day!  Click on the image below to visit the page with all the newest digital downloads to help with your holiday crafting. 
 
 
My next My Digital Studio class is on Monday, October 7th at either 3pm-4pm or 5:30pm-6:30pm.  Email me or leave a comment here if you are interested in signing up.  We will be covering how to use the software to build your Christmas cards and holiday newsletters and the class is free.  If you haven't already purchased My Digital Studio, you can do via the free trial.  Click here to start the 30 day trial!
 
Speaking of holiday crafting, I will start sharing my holiday projects for my October workshops starting tomorrow.  I have four sessions for this class or you can sign up to be your own hostess for you and your friends to make all or some of the projects!

The camp is $20 and you will be making 5 Christmas cards, 5 coordinating gift tags, a gift card holder, an exploding scrapbook box, a gift box, and a notebook which makes a fun gift.

Sessions are:
Session 1: Friday, October 4th, 10am-1pm (6 slots left)
Session 2: Friday, October 4th, 6pm-9pm (5 slots left)
Session 3: Saturday, October 5th, 10am-1pm (5 slots left)
Session 4: Wednesday, October 30, 10am-1pm (6 slots left)

If you cannot attend but are interested in a kit, the cost is $5 extra if you come pick it up and $10.80 extra if you'd like it shipped USPS Priority Mail.

Sign up via email or by leaving a comment here!

Have a craftastic day,
Stacy

Monday, September 16, 2013

A Busy Week

Just a quick thank you to all my customers that attending my camps last week.  I have had 4 big classes/camps in the last 10 days and it was so wonderful to spend so much time with everyone.  I've been busy making Callie feel important this weekend since she was a little neglected with all my activities but will be back tomorrow to start sharing some of my holiday projects.

I hope you have all had a good weekend and that this week good to all of you!

Have a craftastic day,
Stacy

Thursday, September 12, 2013

Make a Date with Creativity this Christmas

When I think of the holidays, I always think of crafting and creativity.  Between decorations, cards, and gifts, it’s just a glittery time of year!  I try to get my holiday class in front of you all long before Christmas to give you time to be inspired too and get anything you need to make your holiday crafting a success!

HOLIDAY STAMP CAMP:

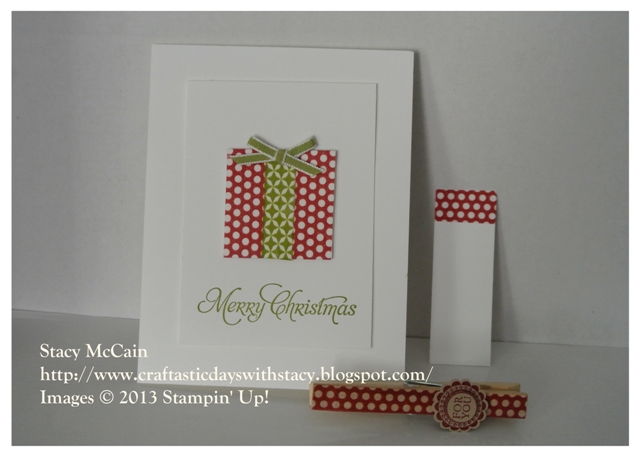
At the Holiday Stamp Camp, you will be making the following: 5 Christmas Cards (3 will be quick cards), coordinating tags to each card, a gift box perfect for gift giving, a gift card holder, an exploding winter scrapbook box, a clothespin for holiday hostess gifts, and one more I haven’t designed!  Most of the projects utilize products from the Seasonal Mini catalog so you get to work with a lot of product!

Class options are:
• Session 1: Friday, October 4th, 10am-1pm
• Session 2: Friday, October 4th, 6pm-9pm
• Session 3: Saturday, October 5th, 10am-1pm
• Session 4: Wednesday, October 30th, 10am-1pm

I’m really happy with the projects and think you will love the value you get for only $20 for my main Holiday Stamp Camp.  I showed some of the projects off this weekend at my camp and was thrilled to see the positive response from everyone on them.  I think there is something for everyone in this camp and lots of ideas you can take into other holidays or meet other crafting needs in other seasons!

RSVP by September 25th so I can get the supplies ordered and prepped in time.  Make sure you indicate which session you would like to participate in!  I have 8 slots per class session.  Cost is $20.

HOLIDAY STAMP A STACK:

For those that are only looking for cards, I am also offering a Stamp-a-Stack option this year.  I will forward a flyer with the options once I get my order in the mail with the final stamp set I’m using!  If you do the Stamp-a-Stack, you will need to arrange a time in October to come over and stamp the cards.  If you are doing the Holiday camp as well, you can stamp them after the class you attend.  For stamp-a-stacks, I cut all the pieces for your card kits, you stamp all the images, and assemble 1 card here.  Then you take the rest home and assemble them using the first card as the sample.  RSVP with the card(s) you want to create and the amount by 9/25/2012 once you see the flyer.

HOLIDAY SCRAPBOOK CAMP:

There is a great divided 8 x 8 scrapbook in the catalog that I’m putting together a really fun class!  The class kit includes the album, page protectors, insert cards, ribbons and embellishments, and digitally designed accents from My Digital Studio.  This camp is on Saturday, November 2nd, from 11am-2pm.  The cost is $35 and we will walk through the album page by page so that you leave with a complete album just needing photos!

HOLIDAY MY DIGITAL STUDIO (MDS) CLASS:

The first Monday of each month will bring an MDS class, free in most cases, to help you master the art of digital scrapbooking and card making!  This month’s class was all about calendars and I can set up 1:1 classes with anyone that is interested in learning how to make adorable calendars for your family for the holidays.  My next class will be Monday, October 7th.  One session will be from 3-4 and the other from 5:30-6:30.  We will be learning how to use MDS to make your family Christmas cards and holiday newsletters.  I have done this for the last few years and it has cut down on my holiday stress immensely.  I still make traditional homemade cards as well but this is a great way to get a professional family photo out to family and friends at a very reasonable price!  RSVP by the day of the class if you are interested in joining us.  Having the Basics 1:1 class is helpful for this class but not required!

HOLIDAY HOSTESSES:

If you have friends that would enjoy some of the projects listed for the Holiday camp but not all, consider being a hostess for a holiday event.  We can determine the price of the camp based on what you want to make or do a free workshop where we show the products and the guests make a free card to take home.  Camps can be tailored to the audience attending and their experience levels!  Hostesses are eligible to attend my free hostess appreciation event on November 9th which is going to be a great event!

HOLIDAY THIS AND THAT JOURNAL:

If you need help staying organized this holiday season, check out the Season of Joy This and That Journal.  It is AMAZING and has calendars, lists for cards sent and received, gift lists, receipt holders, and anything else you need to keep yourself on track and low stress over the holidays!  Check it out here:   http://www.stampinup.com/ECWeb/ProductDetails.aspx?productID=132277

HOLIDAY GIFT CERTIFICATES:

I offer gift cards for Stampin’ Up! merchandise for the holidays.  Any gift card comes with a homemade gift card holder.  These are only redeemable through me and are a great gift for the crafters in your life since we have a new mini catalog that comes out at the beginning of the year with great new Spring and Summer content!

Have a craftastic day,
Stacy

Tuesday, September 10, 2013

Magnetic Platforms and Downloads

Update: The magnetic platform is back!  We can place orders for them starting on September 12th so if there is anything you need, including one of these platforms, let me know by September 11th or place your order online using the hostess code of GJRX3DWP.  I will be placing this order at midnight on the 12th!

My Paper Pumpkin: If you are interested in signing up for My Paper Pumpkin, a kit that you can do from home each month, you have until midnight tonight to sign up and get the starter kit in the mail next week.  If you are an existing customer, you have until midnight to defer if you are not interested in this month's kit. Check out this page for details: http://craftasticdayswithstacy.blogspot.com/2013/07/join-my-paper-princesses-club.html

New Digital Downloads: It's also digital Tuesday and Stampin' Up! is thinking of friends, Halloween, and Thanksgiving so that you can too!  Click the link below to see more details on each download.  Downloads can be applied to a hostess code as well!  Contact me today if you'd like a 1:1 My Digital Studio class or would like to join me for my MDS Mondays which are the first Monday of the month!  My next class will be on creating Christmas cards and newsletters in My Digital Studio on October 7th.  You won't want to miss it!
 
Burlap Ribbon - Digital Download  135246 
Price: $2.95
http://www.stampinup.com/ECWeb/ProductDetails.aspx?productID=135246
 Grateful Hearts Framables - Digital Download  135238 
Price: $14.95
http://www.stampinup.com/ECWeb/ProductDetails.aspx?productID=135238
 
Halloween Banner Simply Created Kit - Digital Download  135239 
Price: $6.95 
http://www.stampinup.com/ECWeb/ProductDetails.aspx?productID=135239
 
Halloween Hello Stamp Brush Set - Digital Download  135244 
Price: $6.95 
http://www.stampinup.com/ECWeb/ProductDetails.aspx?productID=135244
 
Perfect Blend Stamp Brush Set - Digital Download  135242 
Price: $2.95
http://www.stampinup.com/ECWeb/ProductDetails.aspx?productID=135242
 
Simply Life Photo Templates - Digital Download  135245 
Price: $7.95 
http://www.stampinup.com/ECWeb/ProductDetails.aspx?productID=135245
 
Tape It Stamp Brush Set - Digital Download  135241 
Price: $4.95 
http://www.stampinup.com/ECWeb/ProductDetails.aspx?productID=135241
 

Toil & Trouble Stamp Brush Set - Digital Download  135243 
Price: $4.95 
http://www.stampinup.com/ECWeb/ProductDetails.aspx?productID=135243 
Tune in tomorrow for the great Halloween project that Callie and I created together today using mason jars!  Unless they do not turn out after they dry and then I'll share our bean bag project we did today too!

Have a craftastic day,
Stacy

Monday, September 9, 2013

My MDS Classes - Today and Beyond

Today is my second My Digital Studio (MDS) class.  I'm so excited to pilot it with some of my favorite people!

Today's class is covering the following topics:
  • Calendars
  • Converting Templates to other scrapbook page sizes
  • Free Form Tool
  • Setting Photos as Backgrounds
I am loving putting together the flyers and teaching these small classes to you all.  Today's class required you to do the Basics class first so that you were familiar with the buttons I'm talking through and to see if we could keep it at an hour, which is hard for wordy ol' me. I love how much I've been learning while I put together these classes.

Remember that I am willing to set up the Basics or Calendar classes at your availability.  One of the perks of not working for somebody else - I can set my schedule (with Callie's permission of course!)  The only thing is that  you have to come to my house so I can use my cables and show you all the wonders of the tool.

Today's sample is another page from my Mother-in-law's calendar that I'm doing month by month.  I created a calendar as a Create Your Own.  Once opened, I clicked Insert and Add Other Template Pages.  Since I was doing a 12 x 12, I started with my 12 x 12 templates.   I found The Best Year which I had purchased to do scrapbooks for friends for Christmas.  I selected the pages I wanted from it and added them to my Calendar.  I dragged and dropped them until they were in the right order and then I deleted the pages that were added by the tool when I created the calendar originally.  Then I was able to journal and highlight the fun things that happened during that month!  I moved some of the text boxes and embellishments around but am using these templates pretty close as they originally appear. 


March is always my favorite month and it's crazy for me to think that next year we'll be back to sleepless nights instead of baseball and changing diapers instead of reading by the pool!  At least I will be able to have a beer on my birthday!  :)

My next MDS class is being scheduled for Monday, October 7th at 3pm and 5:30pm.  The class will be 60 minutes and we will be walking through how to create Christmas cards and newsletters in MDS to help make your holiday check list a little shorter!  Having the Basics class will be helpful but will not be required.

I will be trying to have an MDS class on the first Monday of every month so make a note on your calendar so you don't miss out!  You can also be a hostess for an MDS class.  Then if your friends and family purchase the program at the free workshop, it goes towards your party total to help you qualify for free merchandise!

Have a craftastic day,
Stacy

Sunday, September 8, 2013

It's Candyland Time!

Saturday evening, Callie and I attended  the cutest birthday party I've ever been to.  The theme?  Candyland.  Thank goodness when I promised Callie there would be candy, there was more than just adorable candy decorations.  Course, she also went to bed at 11:45pm so it gave her a good enough sugar rush.

The Candyland Princess turned five and I didn't get a single picture of her without a lollipop stick in her mouth except this one where she blew out the candles and then immediately put it back in.  Too cute.  And look at that amazing cake that her mommy did.  I cannot even aspire to that sort of theme!  I make paper things, not sugary fun things!

 
Callie loved the blue suckers and the marshmallow fluff lollipop that was as big as her face.  Adorable, no?


And let's not skip the recognition that has to go out for the great decorations that were created.  Candyland Princess's mommy is simply the Queen of Themed Birthdays!


I thought that to go with the great theme, I would do my crafty part to at least make a themed card.  This card was super quick and was perfect for a little girl AND for the them.


Supplies:
  • Cardstock: Strawberry Slush, Crumb Cake, Whisper White
  • Ink: Strawberry Slush, Tempting Turquoise, Gumball Green, Pumpkin Pie, Daffodil Delight, Crumb Cake
  • Stamp Set: Sweets for the Sweet
  • Accessories: 1" Circle Punch, Scallop Border Edge Punch, Dimensionals, and Adhesive

Craftastic Notes:
  • Stampin' Up! sells great grid paper that keeps your workspace clean and allows you to line up cardstock and stamps.  I used the grid paper and put the base of the stick even with every 3/4 inch mark to keep them evenly spaced.
Have a craftastic day,
Stacy

Saturday, September 7, 2013

Coloring Embossing Folders

At Convention, we saw a demonstration that included brayering ink into an embossing folder.  You put your cardstock into the folder and press - it creates a "stamp" of that pattern on the cardstock.

I was playing with the Alphabet Press embossing folder because I had my baby on my brain and wanted to design a card for upcoming baby showers that I will be attending for friends.  I applied the ink to the folder and decided to put it through my Big Shot and see what the embossing did to the ink.  It was GORGEOUS!  It gave it a graffiti look that I loved.  I shared this card with my customers at my camp this morning and they really enjoyed the technique as well.

Most of them converted the card into the Star Version I've included below instead of the baby card and used Teeny Tiny Wishes to populate the saying so it was a birthday or thank you card instead of a congrats or baby card.


Supplies:
  • Cardstock:  Very Vanilla, Pear Pizzazz
  • Ink: So Saffron
  • Stamps: Zoo Babies and Seeing Stars
  • Accessories: Vintage Buttons, Big Shot & Cutting Mats & Magnetic Platform, Alphabet Press Embossing Folder, Square Collection Framelits, 7/8 Scallop Punch or Small Star Punch (retired), Scissors, Dimensionals, and Adhesive
Craftastic Notes:
  • Make sure you put the ink on the raised side of the embossing folder.  That way when you run it though the Big Shot, the ink is in in the impressions of the folder instead of on the top.
  • When doing the banner, use the hexagon punch to form an easy banner end!
  • When using buttons, put a scrap of cardstock through the holes instead of thread.  It helps draw the button into the card's color combination and it is easier to do than with twine or thread.
  • Create polaroid embellishments using the square framelits to add a trendy twist to your projects!
  • The 7/8 Scallop Punch works great to punch out the lions head in the Zoo Babies set.  Dimensionals are your friend and add a nice touch to every project!

Have a craftastic day,
Stacy

Friday, September 6, 2013

Faux Iris Technique

When prepping my camp for Saturday, I wanted to find a card that taught me a new technique and that I could pass on to my group.  I couldn't find one that had me really excited until my friend Rhonda recommended a video by Julia Davidson.  She did a tutorial for the faux iris technique and I couldn't believe how pretty and how straightforward the process was.

Check out Julia's great video here:  http://www.youtube.com/watch?v=IjmmEE5WmjU

I used a different paper selection than Julia did but kept the In Color since it's a great way to introduce those beautiful hues.  Also, I love that this technique lets us use scraps we would otherwise throw away.  Three layers of Designer Series Paper (DSP) strips cut to 3 x 1/2 are all over my stamp room - how about you?

The Venetian Romance paper is a new purchase for me.  I wasn't sold by the sample in the catalog but then saw it on a display board at Convention and realized that it was EXACTLY what my collection of DSP (and it is really a collection at this point, or a hoard situation) needed.

 
Here is a close up of this beautiful technique.  I love this paper and the pattern really pops when you are using those small pieces of it.  Don't judge that some of my words are upside-down.  I'd like to say I did that on purpose but that would be a little fib....


Supplies:
  • Cardstock: Pistachio Pudding, Calypso Coral, Crisp Cantaloupe, Very Vanilla, Venetian Romance DSP
  • Ink: Crisp Cantaloupe
  • Stamps: Six Sided Sampler
  • Accessories: 2 1/2 Circle Punch, Dimensionals, Scissors, and Adhesive
Have a craftastic day,
Stacy