Monday, December 29, 2014

Many Merry Stars Simply Created Ideas


Just a few more days to take advantage of the Year End Closeouts available through Stampin' Up!  Today's project features the Many Merry Stars Simply Created Kit that is on sale while supplies last.  This kit is so much fun to assemble and looks so much more elegant than the catalog pictures portray.  With all the pieces in the kit, you can make these boxes or you could make cards and other holiday memorabilia.  I actually put the big star on the top of my tree and hung all the smaller stars on the tree.


This kit works with the Many Merry Stars stamp set which is also on sale!

Many Merry Stars Simply Created Kit - $20.79
Many Merry Stars Photopolymer Stamp Set - $12.79

Have a craftastic day,
Stacy

Sunday, December 28, 2014

Many Merry Stars Gift Holder

 
The closeout continues on my Web site of great holiday merchandise, both retired and from the Holiday catalog.  The project below features the Many Merry Stars photopolymer stamp set which is available for $12.79 until January 5th or while supplies last.  You can order it here!


To make these adorable gift card holders, just take one of our great Tag a Bags and folder it so that the decorative edge hides the seam on the bottom of the bag.  Add a belly band of some sort.  In this case, I used the 1" Cherry Cobbler Linen Ribbon.  The stars are created using the Stars Framelits and the Typeset and Under the Tree Designer Series Papers.  Add a little dimension with a scallop scrunch flower and color some rhinestones with the Cherry Cobbler Blendabilities.  The card slips in one pocket and the gift card in the other.

Supplies:
  • Cardstock: Very Vanilla, Cherry Cobbler, Typeset DSP, Under the Tree DSP
  • Inks: Cherry Cobbler
  • Stamps: Many Merry Stars
  • Accessories: Big Shot, Magnetic Platform and Cutting Mats, Stars Framelits, 7/8 Scallop Punch, Paper Piercing Tool, Cherry Cobbler Blendabilities, 1" Cherry Cobbler Linen Ribbon, 2 1/2 Circle Punch, Polka Dot Tag a Bag, Dimensionals, Scissors, and Adhesive
On Sale now:
Have a craftastic day,
Stacy

Saturday, December 27, 2014

Watercolor Winter Simply Created Ideas

Check out the deals happening now from Stampin' Up!  Current products and holiday retired merchandise at amazing deals.  One of the products on sale is the Watercolor Winter Simply Createdaa kit.  This kit allows you to make 20 amazing handcrafted cards to use for next holiday season.  It comes with several ideas but here are a few more to make with the supplies!


Check out this kit at: http://www.stampinup.com/ECWeb/ProductDetails.aspx?productID=135869&dwbs=80380

Have a craftastic day,
Stacy

Friday, December 26, 2014

A Week in a Day - Simply Snowflake

It's been a while since I posted but not since I crafted!  Instead of taking a week to catch up on Paper Pumpkin, I am going for all my ideas in one post!  :)  Some were intentional ideas and several were results of accidental excellence - like dropping the stamp or inking it poorly!


The standard projects with this awesome kit were a fold out card and a Happy Holiday tag.  I cut my family photo slightly and attached it to the inside.  I have mine sitting up on my mantle for my own holiday keepsake.


When stamping the tag, make sure you place that To/From up far enough that it doesn't show through the window.

If you stamp too low, you can always make this card.  I speak from experience...  Just add a snowflake over the hole with some of the rhinestones and a little of the beautiful washi tape on the side.


Then use the front of the tag on a Notecard.  Just cut off the end of the tag and use on the top to make a little file folder looking element.  I added some rhinestones to the letters and the baker's twine to the top in a pretty little bow.


Now, since I was on the notecard kick, I decided to play a bit with the stencils that were left over when you punched out the snowflakes.  With a slight bit of trimming, they fit beautifully on our Notecards and Envelopes.

 
I added a little banner to the center of the card and should have put rhinestones in the center of each snowflake but I just realized that as I was typing.

 
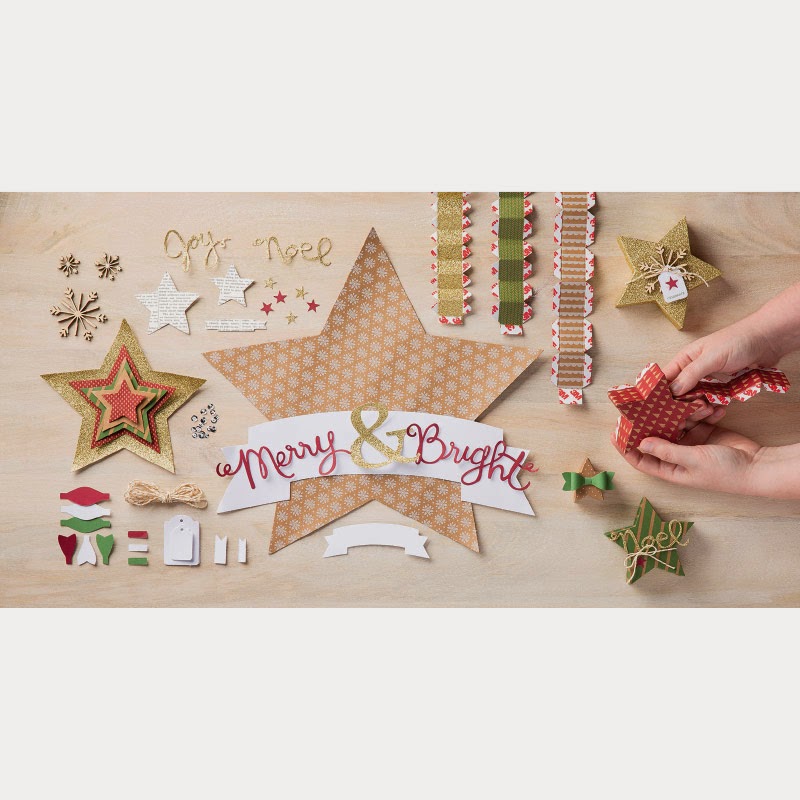
This one was a result of playing with all the embellishments in the kit.
 
I also used the stencil on a small canvas and used white paint and a sponge to go over the top.  It turned out great until I covered it with Modge Podge and it smeared.  There is potential there for those that want to try.
 
There were more happy accidents.  I dropped the Happy Holidays stamp on the front of one of my cards.  So, I tried to stamp all over it and that looked worse.  So I cut off the snowflake from the front of the card and sponged it.  I then cut it up and adhered it to the inside of the card.  On the front I just used the White Snowflake die pieces with a small snowflake to hold it shut on the front.


I loved this kit.  It came with a six piece stamp set, 8 cards, 12 tags, a Lost Lagoon Stampin' Spot, a roll of silver washi tape, rhinestones, and baker's twine.  For only $19.95 plus tax.   Remember that you can buy extras of this kit if you are a member!  http://www.stampinup.com/ECWeb/ProductDetails.aspx?productID=136919&dwbs=80380

YOU CAN DO THIS TOO!

To sign up for Paper Pumpkin, visit https://mypaperpumpkin.com/en/?demoid=80380 before midnight on January 10th!
 
Perks for signing up under me:
  1. I have committed to having additional samples created using the kit by the first week of the month.  That way those that are cardmakers have options just like those that scrapbook or like decor.
  2. I will post frequent updates to the Pinterest board I have dedicated to Paper Pumpkin projects - again providing you inspiration to use with your kit if you need something different from the instructions included!
  3. I will host a Paper Pumpkin party that is free for the recipients of Paper Pumpkin with me.  Those crafting friends can come for free and enjoy good company and a pumpkin snack while putting together your kits.  These events will usually be the first Wednesday of the month!  There will also be a door prize given each month to the attendees and if you want to make any of the samples I show using the kit (that doesn't require hardware like frames), I will provide that for attendees as well.
Take care and I hope you had a Merry Christmas and a Happy Holiday and are heading towards an awesome new year!
 
Stacy

Friday, November 7, 2014

A Week of For All Things - Curry Thanks

This week I'm featuring projects from my Hostess Appreciation event that all use the For All Things stamp set from the Holiday Mini Catalog. 

http://www.stampinup.com/ECWeb/ProductDetails.aspx?productID=135155&dbws=80380

This card was also modeled off of an Online Creative Convention sample.  I just wnated to use another piece of the Color Me Autumn Designer Series Paper and the Cajun Craze and Crushed Curry scream FALL to me.
 
 
Supplies:
  • Cardstock: Mossy Meadow (2 1/2 x 2 3/4), Color Me Autumn DSP (4 x 1 1/2), Very Vanilla (2 3/4 x 2 1/2, scrap)
  • Stamp Set: For All Things
  • Ink: Crumb Cake
  • Accessories: Mossy Meadow Markers, Crumb Cake Blendability Markers, Linen Thread, Basic Rhinestones, Dimensionals, Adhesive
The hostess appreciation project is FREE to my hostesses so if you want to make next year's fun project, contact me today to book your workshop!

Have a craftastic day,
Stacy

Thursday, November 6, 2014

A Week of For All Things - Embossed Gratitude

This week I'm featuring projects from my Hostess Appreciation event that all use the For All Things stamp set from the Holiday Mini Catalog. 

http://www.stampinup.com/ECWeb/ProductDetails.aspx?productID=135155&dbws=80380


This card is pretty straightforward.  Stamp the background and then stamp the saying and emboss.  The leaf is stamped and cut.

Supplies:
  • Cardstock: Very Vanilla (scrap), Crumb Cake Notecard
  • Stamp: For All Things
  • Ink: VersaMark, Soft Suede, Mossy Meadow
  • Accessories: White Embossing Powder, Heat Gun, Linen Thread, Gold Button, Glue Dot, Dimensional
The hostess appreciation project is FREE to my hostesses so if you want to make next year's fun project, contact me today to book your workshop!

Have a craftastic day,
Stacy

Wednesday, November 5, 2014

A Week of For All Things - Mossy For You

This week I'm featuring projects from my Hostess Appreciation event that all use the For All Things stamp set from the Holiday Mini Catalog. 

http://www.stampinup.com/ECWeb/ProductDetails.aspx?productID=135155&dbws=80380


This design is designed off a sample from our Online Creative Convention earlier this year.  I changed out the inks, stamp, and papers but stole the layout.  I also inked up the For You from the stamp to show again the versatility of the sayings in this set!

Did you know you can use the hexagon punch to create even banner ends on your DSP?  There are a lot of different ways to do them but I've found this to be the easiest!


Supplies:
  • Cardstock: Very Vanilla (scrap), Color Me Autumn DSP (5 x 1, 4 x 1), Mossy Meadow (2 3/4 x 2 3/4)
  • Stamp: For All Things
  • Ink: None
  • Accessories: Mossy Meadow Marker, 1 3/4 Circle Punch, Linen Thread, Deco Label Framelit, Big Shot, Hexagon Punch, Dimensionals, Glue Dot
The hostess appreciation project is FREE to my hostesses so if you want to make next year's fun project, contact me today to book your workshop!

Have a craftastic day,
Stacy

Tuesday, November 4, 2014

A Week of For All Things - Hello Card

This week I'm featuring projects from my Hostess Appreciation event that all use the For All Things stamp set from the Holiday Mini Catalog. 

http://www.stampinup.com/ECWeb/ProductDetails.aspx?productID=135155&dbws=80380

This card uses another technique I saw on Lyssa Zwolanek's blog about inking up the clear block with the fat tip of the marker to create a frame. 

I also just inked up the Hello from the saying and stamped on the bottom to get even more versatility from this set.  The rhinestones on this card are also colored with the Crumb Cake Blendabilities markers, which is a great way to get embellishments to match the color scheme of your projects!


Supplies:
  • Cardstock: Mossy Meadow (2 1/2 x 2 3/4), Color Me Autumn DSP (4 x 1 1/2), Whisper White (2 3/4 x 2 1/2, scrap)
  • Stamp Set: For All Things
  • Ink: Crumb Cake
  • Accessories: Mossy Meadow Markers, Crumb Cake Blendability Markers, Linen Thread, Basic Rhinestones, Dimensionals, Adhesive
The hostess appreciation project is FREE to my hostesses so if you want to make next year's fun project, contact me today to book your workshop!

Have a craftastic day,
Stacy

Monday, November 3, 2014

A Week of For All Things - Embossed Thank You

This week I'm featuring projects from my Hostess Appreciation event that all use the For All Things stamp set from the Holiday Mini Catalog. 

http://www.stampinup.com/ECWeb/ProductDetails.aspx?productID=135155&dbws=80380

This first card uses a technique I saw on Lyssa Zwolanek's blog about inking up the clear block and using it for background blocks.  Once stamped and dry, you can stamp the second image in VersaMark and emboss.

I also just inked up the Thanks from the saying and stamped on the bottom to get even more versatility from this set.


Supplies:
  • Cardstock: Whisper White (4 3/4 x 3 1/4), Crumb Cake Notecard with Envelope
  • Stamp Set: For All Things
  • Ink: Crumb Cake
  • Accessories: White embossing powder, heat gun, linen thread, Crumb Cake marker, glue dot
The hostess appreciation project is FREE to my hostesses so if you want to make next year's fun project, contact me today to book your workshop!
 
Have a craftastic day,
Stacy

Sunday, November 2, 2014

Hostess Appreciation Project

In the last decade, I've experimented a lot with different ways of thanking my hostesses for their support of my business.  From free projects to free product, free shipping to free camp fees, it seemed like each hostess appreciated something different.  When I became a mother and started giving 80% of my brainpower to my daughter, I couldn't keep track of who I had thanked and how.  Thus, my hostess appreciation event was born. 

The first year we did a stationary set and the second year we did a mini book.  The theme is always centered around gratitude since I'm so thankful for these dear customers and friends.  And, since it's a thank you for them, it's also FREE!  They just bring their own adhesive and crafting tools.

This year I decided to do a top note holder and notecards with envelopes. 

 
I wanted to do something easier to prep than in the past since two children makes prep much more difficult than one.  I was given this great pattern for the box during one of the Online Creative Conventions that I attended earlier in the year.  I just needed to "Fall it up" instead of the springtime version we did.


Supplies:
  • Cardstock:  Crumb Cake (8 1/2 x 7 3/4, 2 @ 5 1/2 x 4 1/4), Mossy Meadow (3 1/2 x 3 1/2), Very Vanilla (strip 2 3/4  tall)
  • Stamp Set: Merry Everything
  • Ink: Crumb Cake
  • Accessories: Tag Punch, Gold Button, Linen Thread, Dimensionals, Sticky Strip, Autumn Accents, Big Shot & Mats.
I really like this project - I think it makes a good gift or a good stationary holder to keep on your desk for when you need to drop someone a line.  Plus, it was nice to get to use all the great autumn products in the Holiday mini! 

The rest of the week I will be posting the projects in the holder that all use the For All Things set.  I used a couple new techniques that I saw from fellow demonstrator, Lyssa Zwolanek. If you want to do next year's project for FREE, contact me to book your 2015 workshop today!

Have a craftastic day,
Stacy

Friday, October 31, 2014

A Little Halloween Treat

Today is Callie's first school Halloween party.  She is excited to be a fast fairy and I get to spend the morning with her at her preschool party.  The parents were asked to bring treats and I love an excuse to use some of my supplies to make cute kidlet things!

These little boxes are from the Holiday catalog.  I just put two squares of DSP at 1 3/4 x 1 3/4 and two pieces of Basic Black as well.  I made a banner using another scrap of Motlley Monsters DSP and the Bitty Banners Framelits. The Freaky Friends set works well with the Basic Rhinestone embellishment!

 
Supplies:
  • Cardstock/DSP: Basic Black, Motlley Monsters DSP, Whisper White
  • Ink: Memento Black Ink
  • Stamp Set: Freaky Friends
  • Accessories: 1 3/8 Circle Punch, Tiny Boxes, Big Shot, Magnetic Platform, Bitty Banners Framelits, Basic Rhinestones, Dimensionals, and Adhesive
Hope you enjoy your Halloween.  This weekend kicks off my fall scrapbooking and I can't wait to share the great photos from this party!

Have a craftastic day,
Stacy

Thursday, October 30, 2014

A Week of Sweet as Pie - Thankful Banner

Welcome to my week of Paper Pumpkin projects using the October Paper Pumpkin kit - Sweet as Pie.  This kit came with a five piece stamp set which included the following images:
  • Saying: Happy Thanksgiving
  • Saying: Holiday calories don't count
  • Saying: There's no such thing as too much pie
  • Saying: Thankful for you
  • Image: small heart
The Stampin ' Spot is Old Olive.  The kit contained supplies to make 8 treat boxes with four sheets of stampable flaps and four sheets of feathers in five colors and bright yellow yarn for pom poms. 

Today's project is another décor item.  I love my kids - moms do that - but I am also super thankful for them.  Becoming a mom was not something I ever planned to do.  I was career driven, selfish, and enjoyed my wine and my spirits.  But when my husband and I started talking about making a family, I figured that it was a good challenge and I was ready to make some life changes.  My children saved me from becoming something other than my best because I think that being a mother was my calling.  I was not prepared for the level of change becoming a parent brings into your life but it's the best roller coaster and adventure I could be on.  Now with two, I never know what each day will bring but as long as there are smiles like these, I'm game for whatever happens.


For this project, I cut up a box.  The pieces I didn't use are what you've seen on the other projects from the week.  I scored the triangles at 1/2 from the top and folded down over a piece of yarn that is knotted into a loop at each end.  The center piece is the box top that is also scored at 1/2 and folded over the yarn.  The "Thankful for You" saying is cut from another of the sides and layered using dimensionals.   The pom pom is about 1/4 of  a yarn ball.  The yellow heart is punched from the yellow feather using the Itty Bitty Accents Punch Pack and up on dimensionals.

Supplies outside of the Paper Pumpkin kit:
  • Itty Bitty Accents Punch Pack, Scissors, Dimensionals, Bone Folder
As a reminder, Paper Pumpkin kits are mailed to your door and provide all the supplies you need to complete adorable projects (excluding scissors and adhesive).  You get a photopolymer stamp set, a Stampin' Spot of ink, instructions, and all the supplies needed to make either cards or 3D objects depending on the month.  The cost is $19.95 per month and you need to sign up by the 10th of the month to receive that month's kit around the 18th.  Kits are designed to take 30 minutes if you follow the instructions in the kit which is great for busy moms and new crafters.  Those with more experience can combine kits with other craft supplies and take a little more time to literally think "outside the box."  Have more questions - contact me today!

YOU CAN DO THIS TOO!

To sign up for Paper Pumpkin, visit https://mypaperpumpkin.com/en/?demoid=80380.

Perks for signing up under me:
  1. I have committed to having additional samples created using the kit by the first week of the month.  That way those that are cardmakers have options just like those that scrapbook or like decor.
  2. I will post frequent updates to the Pinterest board I have dedicated to Paper Pumpkin projects - again providing you inspiration to use with your kit if you need something different from the instructions included!
  3. I will host a Paper Pumpkin party that is free for the recipients of Paper Pumpkin with me.  Those crafting friends can come for free and enjoy good company and a pumpkin snack while putting together your kits.  These events will usually be the first Wednesday of the month!  There will also be a door prize given each month to the attendees and if you want to make any of the samples I show using the kit (that doesn't require hardware like frames), I will provide that for attendees as well.
Tomorrow I will be posting the treat holder that Callie and I made for her Halloween party at school.  They are so cute, it's scary...
 
Have a craftastic day,
Stacy

Wednesday, October 29, 2014

A Week of Sweet as Pie - Modified Saying Cards

Welcome to my week of Paper Pumpkin projects using the October Paper Pumpkin kit - Sweet as Pie.  This kit came with a five piece stamp set which included the following images:
  • Saying: Happy Thanksgiving
  • Saying: Holiday calories don't count
  • Saying: There's no such thing as too much pie
  • Saying: Thankful for you
  • Image: small heart
The Stampin ' Spot is Old Olive.  The kit contained supplies to make 8 treat boxes with four sheets of stampable flaps and four sheets of feathers in five colors and bright yellow yarn for pom poms. 

The first card I made here uses the Gorgeous Grunge splatter again.  I inked up just the For You from the Thankful for You stamp and stamped on a strip of Very Vanilla.  I distressed the edges of the feather using my fingernail and attached to the card using the glue dots included with the kit.  I then raised the saying up on dimensionals and stamped a small heart above the For.  I love the speed of this card.


For the second card, I modified the "There's no such thing as too much pie" by removing the ink from Pie.  I then stamped just the Happy from "Happy Thanksgiving" and raised it up on a dimensional so that it had some dimension. The saying is stamped on a piece of the die cut label.  I cut off the two striped pieces and layered them on the card.  The kraft piece is the top of the box that I cut up for the hanging pouch project I posted Sunday.


Supplies outside of the Paper Pumpkin kit:
Gorgeous Grunge stamp set, Crumb Cake cardstock, Very Vanilla cardstock, Dimensionals

As a reminder, Paper Pumpkin kits are mailed to your door and provide all the supplies you need to complete adorable projects (excluding scissors and adhesive).  You get a photopolymer stamp set, a Stampin' Spot of ink, instructions, and all the supplies needed to make either cards or 3D objects depending on the month.  The cost is $19.95 per month and you need to sign up by the 10th of the month to receive that month's kit around the 18th.  Kits are designed to take 30 minutes if you follow the instructions in the kit which is great for busy moms and new crafters.  Those with more experience can combine kits with other craft supplies and take a little more time to literally think "outside the box."  Have more questions - contact me today!

YOU CAN DO THIS TOO!

To sign up for Paper Pumpkin, visit https://mypaperpumpkin.com/en/?demoid=80380.

Perks for signing up under me:
  1. I have committed to having additional samples created using the kit by the first week of the month.  That way those that are cardmakers have options just like those that scrapbook or like decor.
  2. I will post frequent updates to the Pinterest board I have dedicated to Paper Pumpkin projects - again providing you inspiration to use with your kit if you need something different from the instructions included!
  3. I will host a Paper Pumpkin party that is free for the recipients of Paper Pumpkin with me.  Those crafting friends can come for free and enjoy good company and a pumpkin snack while putting together your kits.  These events will usually be the first Wednesday of the month!  There will also be a door prize given each month to the attendees and if you want to make any of the samples I show using the kit (that doesn't require hardware like frames), I will provide that for attendees as well.
Tomorrow I'm posting my final and favorite project using this kit.  Remember that all the samples this week were made in under 90 minutes and any of them can be recreated by any of you by substituting in whatever cardstock and background stamp you have handy!
 
Have a craftastic day,
Stacy

Tuesday, October 28, 2014

A Week of Sweet as Pie - Feather Outline Cards

Welcome to my week of Paper Pumpkin projects using the October Paper Pumpkin kit - Sweet as Pie.  This kit came with a five piece stamp set which included the following images:
  • Saying: Happy Thanksgiving
  • Saying: Holiday calories don't count
  • Saying: There's no such thing as too much pie
  • Saying: Thankful for you
  • Image: small heart
The Stampin ' Spot is Old Olive.  The kit contained supplies to make 8 treat boxes with four sheets of stampable flaps and four sheets of feathers in five colors and bright yellow yarn for pom poms. 

This first card is one that I'll be making a lot of using the scraps from the kit.  The splatter is from Gorgeous Grunge.  The outline of the feather is done by punching out the feather from the die cut sheet and then cutting around the edges left behind.  I love the look of it!  The little heart was stamped on Very Vanilla and then attached using adhesive.  The Thankful for you banner is up on dimensionals.


This second card also uses the outline left from punching out a feather.  The strip of striped paper is one of the sides of a cut up box.  The strip behind the Happy Thanksgiving is the scrap left after punching the scalloped edge.


Supplies outside of the Paper Pumpkin kit:
  • Gorgeous Grunge Stamp Set, Very Vanilla cardstock, Night of Navy cardstock, Old Olive cardstock, Scallop Edge Border Punch, Scissors, Dimensionals, and SNAIL adhesive
As a reminder, Paper Pumpkin kits are mailed to your door and provide all the supplies you need to complete adorable projects (excluding scissors and adhesive).  You get a photopolymer stamp set, a Stampin' Spot of ink, instructions, and all the supplies needed to make either cards or 3D objects depending on the month.  The cost is $19.95 per month and you need to sign up by the 10th of the month to receive that month's kit around the 18th.  Kits are designed to take 30 minutes if you follow the instructions in the kit which is great for busy moms and new crafters.  Those with more experience can combine kits with other craft supplies and take a little more time to literally think "outside the box."  Have more questions - contact me today!

YOU CAN DO THIS TOO!

To sign up for Paper Pumpkin, visit https://mypaperpumpkin.com/en/?demoid=80380.

Perks for signing up under me:
  1. I have committed to having additional samples created using the kit by the first week of the month.  That way those that are cardmakers have options just like those that scrapbook or like decor.
  2. I will post frequent updates to the Pinterest board I have dedicated to Paper Pumpkin projects - again providing you inspiration to use with your kit if you need something different from the instructions included!
  3. I will host a Paper Pumpkin party that is free for the recipients of Paper Pumpkin with me.  Those crafting friends can come for free and enjoy good company and a pumpkin snack while putting together your kits.  These events will usually be the first Wednesday of the month!  There will also be a door prize given each month to the attendees and if you want to make any of the samples I show using the kit (that doesn't require hardware like frames), I will provide that for attendees as well.
Check back tomorrow for two more card ideas!


Check out this week's specials - click the image below for more details.
 

http://www.stampinup.com/ECWeb/ItemList.aspx?categoryid=1634&dwbs=80380
 
 
Have a craftastic day,
Stacy

Monday, October 27, 2014

A Week of Sweet as Pie - FMS159 For You Card

Welcome to my week of Paper Pumpkin projects using the October Paper Pumpkin kit - Sweet as Pie.  This kit came with a five piece stamp set which included the following images:
  • Saying: Happy Thanksgiving
  • Saying: Holiday calories don't count
  • Saying: There's no such thing as too much pie
  • Saying: Thankful for you
  • Image: small heart
The Stampin ' Spot is Old Olive.  The kit contained supplies to make 8 treat boxes with four sheets of stampable flaps and four sheets of feathers in five colors and bright yellow yarn for pom poms. 

This first card for the week was inspired by the Freshly Made Sketches for the week. 
 
Couple of things about this card.
  • The FOR YOU is from the THANKFUL FOR YOU stamp included in the kit.  Because the stamps are photopolymer (long speak for completely clear) you can tell when they are inked or clean and it makes inking portions of the stamp really easy.
  • The strip of yellow stripes is from cutting one of the triangle die cut stickers under the score line.
  • The kraft background is one of the box sides that I cut in half. 
  • The strips on the top of the heart are from putting the bigger yellow stripe piece on a scrap of the die cut sheet and then punching out with the Itty Bitty Accents Punch Pack.


Supplies outside of the Paper Pumpkin kit:
  • Strawberry Slush cardstock, Very Vanilla cardstock, 1 3/4 Circle Punch, Itty Bitty Accents Punch Pack, Dimensionals, and SNAIL adhesive
As a reminder, Paper Pumpkin kits are mailed to your door and provide all the supplies you need to complete adorable projects (excluding scissors and adhesive).  You get a photopolymer stamp set, a Stampin' Spot of ink, instructions, and all the supplies needed to make either cards or 3D objects depending on the month.  The cost is $19.95 per month and you need to sign up by the 10th of the month to receive that month's kit around the 18th.  Kits are designed to take 30 minutes if you follow the instructions in the kit which is great for busy moms and new crafters.  Those with more experience can combine kits with other craft supplies and take a little more time to literally think "outside the box."  Have more questions - contact me today!

YOU CAN DO THIS TOO!

To sign up for Paper Pumpkin, visit https://mypaperpumpkin.com/en/?demoid=80380.

Perks for signing up under me:
  1. I have committed to having additional samples created using the kit by the first week of the month.  That way those that are cardmakers have options just like those that scrapbook or like decor.
  2. I will post frequent updates to the Pinterest board I have dedicated to Paper Pumpkin projects - again providing you inspiration to use with your kit if you need something different from the instructions included!
  3. I will host a Paper Pumpkin party that is free for the recipients of Paper Pumpkin with me.  Those crafting friends can come for free and enjoy good company and a pumpkin snack while putting together your kits.  These events will usually be the first Wednesday of the month!  There will also be a door prize given each month to the attendees and if you want to make any of the samples I show using the kit (that doesn't require hardware like frames), I will provide that for attendees as well.
Check back tomorrow for two great card ideas!
 
Have a craftastic day,
Stacy

Sunday, October 26, 2014

A Week of Sweet as Pie - Box Projects

Welcome to my week of Paper Pumpkin projects using the October Paper Pumpkin kit - Sweet as Pie.  This kit came with a five piece stamp set which included the following images:
  • Saying: Happy Thanksgiving
  • Saying: Holiday calories don't count
  • Saying: There's no such thing as too much pie
  • Saying: Thankful for you
  • Image: small heart
The Stampin ' Spot is Old Olive.  The kit contained supplies to make 8 treat boxes with four sheets of stampable flaps and four sheets of feathers in five colors and bright yellow yarn for pom poms. 

When I first saw this kit, I wasn't sure what I thought of the yellow pom poms or the pie image on the front.  It wasn't a "decor" item like I was used to but then I realized that it was just posed for a picture.  The standard project looks like this and is Sweet as Pie all on it's own!


Once I started playing, I couldn't believe how versatile the kit was and all these projects were created in just over 1 hour with minimal additional supplies.  Those pie piece boxes made great treat holders and who doesn't love something stamped with "Holiday Calories Don't Count"... because they don't until the holidays are over, right?

The first modified project I made with this kit is this hanging treat holder.  It reminds me so much of Fraggle Rock that I smile each time I look at it and hum the theme song in my head.  I cut off the box flap so I could have it be open and then I punched a hole and ran a piece of the yarn through it.  I put a pom on each end and stamped the saying.  I think these would be GREAT hanging on a Christmas tree with some Real Red or Cherry Cobbler ribbon....  I'll post that project later!


Callie can't wait for this one to go into use on her door - I may have created a monster when I told her what it's for but maybe I'll put carrots in a baggie in it and see what she does.... :)  These boxes are food safe after all!

As a reminder, Paper Pumpkin kits are mailed to your door and provide all the supplies you need to complete adorable projects (excluding scissors).  You get a photopolymer stamp set, a Stampin' Spot of ink, instructions, and all the supplies needed to make either cards or 3D objects depending on the month.  The cost is $19.95 per month and you need to sign up by the 10th of the month to receive that month's kit around the 18th.  Kits are designed to take 30 minutes if you follow the instructions in the kit which is great for busy moms and new crafters.  Those with more experience can combine kits with other craft supplies and take a little more time to literally think "outside the box."  Have more questions - contact me today!

YOU CAN DO THIS TOO!

To sign up for Paper Pumpkin, visit https://mypaperpumpkin.com/en/?demoid=80380.
Perks for signing up under me:
  1. I have committed to having additional samples created using the kit by the first week of the month.  That way those that are cardmakers have options just like those that scrapbook or like decor.
  2. I will post frequent updates to the Pinterest board I have dedicated to Paper Pumpkin projects - again providing you inspiration to use with your kit if you need something different from the instructions included!
  3. I will host a Paper Pumpkin party that is free for the recipients of Paper Pumpkin with me.  Those crafting friends can come for free and enjoy good company and a pumpkin snack while putting together your kits.  These events will usually be the first Wednesday of the month!  There will also be a door prize given each month to the attendees and if you want to make any of the samples I show using the kit (that doesn't require hardware like frames), I will provide that for attendees as well.
Have a craftastic day and come back tomorrow for details on another project!
Stacy

Monday, October 20, 2014

Announcing the 2014 Holiday Supplement

While the holiday catalog was full of great holiday ideas, Stampin' Up! had a few more projects in mind.  Today is the day - you can now order as customers from the Holiday Supplement.  The brochure is a bit difficult to navigate online but I will have paper copies at my holiday and hostess classes.  You can also view the products easily on my online store here.

http://su-media.s3.amazonaws.com/media/catalogs/holiday_supplement_2014/NA/20141020_HolidaySupplement_en-US.pdf


I purchased more than I intended from this supplement because Michael has started crawling so I needed paper décor and ornaments that wouldn't break or hurt him.  I purchased the Many Merry Stars kit and will turn the small ones into a tree, the medium ones into ornaments and the largest into wall art for the holidays.  They were very easy and fun to put together. 

I also bought the Project life 6 x 8 scrapbook with the new envelope page protectors and the Hello December cards and accessories so that I can have a scrapbook ready for all our fun holiday traditional photos. 

The Watercolor Wonder Card Kit is in the holiday catalog as well but now I'm getting this kit so I can work on it for our family Christmas card day.  20 cards and envelopes for only $25 plus shipping with NO kit prep - that is a deal!

6 x 8 Project Life Envelopes

http://www.stampinup.com/ECWeb/ProductDetails.aspx?productID=135874


Cherry 6 x 8 Project Life Album

http://www.stampinup.com/ECWeb/ProductDetails.aspx?productID=135834


Hello December Project Life Accessory Pack

http://www.stampinup.com/ECWeb/ProductDetails.aspx?productID=135833


Hello December Project Life Card Collection

http://www.stampinup.com/ECWeb/ProductDetails.aspx?productID=135831

Many Merry Stars Simply Created Kit

http://www.stampinup.com/ECWeb/ProductDetails.aspx?productID=138104
Watercolor Winter Simply Created Kit

http://www.stampinup.com/ECWeb/ProductDetails.aspx?productID=135869


If you are interested in purchasing any of these products, contact me today.  They are available while supplies last.  If you order online before 11/15, please use hostess code: HP93EFV9.

You can check out some great ideas using these products on Pinterest - http://www.pinterest.com/stampinup/merry-bright-2014-holiday-supplement/

Have a craftastic day,
Stacy