Thursday, October 31, 2013

It's Trick or Treating Day

Today's final Thursday special is on Chevron ribbon.  I love the black one since you can color it with marker and have a chevron accent in any color!

Ribbons on sale for $6.71 instead of $8.95 are:
  • Basic Black 3/4" Chevron Ribbon - #130010
  • Calypso Coral 3/4" Chevron Ribbon - #130018
  • Crushed Curry 3/4" Chevron Ribbon - # 130019
  • Island Indigo 3/4" Chevron Ribbon - # 131151
  • Smoky Slate 3/4" Chevron Ribbon - # 131152
You can order them here

The hostess code for online orders for next month is G3SGBMJK.  Anyone that purchases anything online by 11/24 can enter this code.  If we reach a qualifying party total ($150), I will draw a mystery hostess from those that purchased and the lucky winner will get the free merchandise.

Today will be the first time Callie goes trick or treating.  She's been practicing all week to scam candy out of her gullible mommy who think it's very cute how she pretends to knock on the door and shyly asks for candy and then shouts thank you once the prize is delivered.

She will be going as her favorite princess, Cinderella.  Daddy and Mommy are being her mouse friends Jaq and Mary.  I was very disappointed last night to realize that being a Project Runway fan doesn't automatically qualify you to make jackets in an hour.  Seriously?  It's so easy on TV....  But we have made hats, noses, and other accessories using my Stampin' Up! supplies and my patience.  Pictures tomorrow.

For today, I thought I'd post a final Halloween project.  This card was designed by Cris McCarthy again and I love the simplicity and the layout on this one.  Remember that these products are available in the holiday mini until the end of December so remember to order if you want to use them for next year's crafting!


Supplies:
Cardstock/DSP: Very Vanilla
Marker: Basic Black
Stamp Set: Tags 4 You
Accessories: Bracket Punch, 1/8 Pumpkin Pie Taffeta Ribbon, Witches' Brew Washi Tape, Dimensionals

Craftastic Notes:
  • To get the big border around the Trick or Treat Image, you ink up the stamp with the marker and then punch it out with the bracket punch.  This usually leaves about 1/8 inch of cardstock outside the border.  Just use your marker and color that ink.  Cute idea, eh?  Glad mom thought of it and shared so we could pass that little tidbit on!
  • When using washi tape, don't try to put it right to the edge of the cardstock when you tear it.  Extend it past the end of your project and then either cut the excess off or wrap it to the back of the cardstock.  Washi tape is not about exact placement.  :)  I'm still learning this!

Have a craftastic Halloween,
Stacy

Tuesday, October 29, 2013

November Stampin' Up! Specials


Today's weekly deals have been posted!  If you are looking to make a craft kit for my stamp camps, you can get your Paper Snips (scissors) at 25% off this week.

Click here for the full list.


  • Secret Garden Framelit Dies - #129372 - Reg Price - $24.95, This Week Only - $18.71
  • Stampin' Pierce Mat - #126199 - Reg Price - $4.95, This Week Only - $3.71
  • 7/8 Scallop Circle Punch - #129404 - Reg Price - $12.95, This Week Only - $9.71
  • Ovals Collection Framelits Dies - #129381 - Reg Price - $26.95, This Week Only - $20.21
  • Paper Snips - #103579- Reg Price - $9.95, This Week Only - $7.46
  • Baker's Twine Island Indigo - #125575 - Reg Price - $2.95, This Week Only - $2.21
  • Blossom Petals XL Punch - #121808 - Reg Price - $6.79, This Week Only - $5.09
  • Keep This Memory Photobook Template - #129879- Reg Price - $19.95, This Week Only - $9.98
 
 
From today until November 19th, you can take advantage of these great tag bundles to help with your holiday packaging needs!  Click here for the flyer or here to order.
 
Bundle 1: Holiday Tag It Decorative Box Bundle - #135811 - $19.95Includes: Stamp a Tag Kit, Cherry Cobbler 1" Stitched Edge Grosgrain Ribbon (10 yards), & Decorative Window Gift Boxes (6 boxes)
Bundle 2: Tag It Extra Large Box Bundle - #135812 - $18.95
Includes: Stamp a Tag Kit, Cherry Cobbler 1" Stitched Edge Grosgrain Ribbon (10 yards), and Extra Large Gift Boxes (3 boxes)


It's the most wonderful time of the year-30% off select holiday downloads and print products!   From now until November 29th, you can take advantage of these specials and enjoy getting a head start on your digital holiday gifts.  You can also get 30% off photobooks, swatchbooks, cards, tags, and individual pages.
Link to the Pricing Sheet (Looks like the discount is not reflected until you place the order) - http://su-media.s3.amazonaws.com/media/MDSnet/MDS_pricingList_US.pdf


Today's new digital downloads are available!
 
 
The hostess code for online orders for next month is G3SGBMJK.  Anyone that purchases anything online by 11/24 can enter this code.  If we reach a qualifying party total ($150), I will draw a mystery hostess from those that purchased and the lucky winner will get the free merchandise.

Even with all these specials, I thought I'd still show another great project from Cris McCarthy.  This card uses another of the Single Holiday stamps.  The background is embossed using the Square Lattice Textured Impressions Embossing Folders and the stamp is punched out using the Circles Collection Framelits.  Top it off with a special bow using the gorgeous 1/8 Silver Taffeta Ribbon and you have a beautiful and quick holiday card that celebrates the reason for the season.


Supplies:
Cardstock/DSP: Whisper White, Night of Navy
Ink: Night of Navy
Stamp Set: Wonderful Blessing
Accessories: Basic Rhinestones, Big Shot & Cutting Mats, Square Lattice Embossing Folder, Circles Collection Framelits, 1/8 Silver Taffeta Ribbon, Glue Dots, Dimensionals, and Adhesive

Have a craftastic day,
Stacy

Monday, October 28, 2013

Tag a Joyful Star Bag

 
Today is the last day to get the 25 stamp sets for 25% off!  Click here to see the sets and order online!

The hostess code for online orders for next month is G3SGBMJK.  Anyone that purchases anything online by 11/24 can enter this code.  If we reach a qualifying party total ($150), I will draw a mystery hostess from those that purchased and the lucky winner will get the free merchandise.
Today's project is another wonderful card from Mom from her last workshop.  The Christmas Star stamp is one that is part of the 25% off special.  These single stamps come in clear mount only.  Click here for details.


You'll notice that you don't see that design on this project.  In this case, we stamped the star on the back of the foil paper.  Then you cut it out with your scissors and score along the lines from the stamp.  This helps you fold out the foil side and then we sanded it with our sanding system.  The center is popped up on several dimensionals. 

To keep the bag closed, score it at the top for a crisp fold and then tuck that under the point of the star.  Adhere the bow with a glue dot in the center and add the

 
Supplies:
Cardstock: Whisper White, Silver Foil Paper
Ink: Smoky Slate
Stamps: Christmas Star, Joy & Love
Accessories: Tag a Bag, 1/8 Silver Taffeta Ribbon, Sanding System, Dimensionals, Glue Dots, Paper Snips, Bone Folder or Simply Scored Tool
 
These bags are perfect for gift cards, treats, or small gifts for under the tree.  They come in packs of 10 for only $3.95.  Check them out here!
 
 
Have a craftastic day,
Stacy

Sunday, October 27, 2013

Simply Elegant Embossed Gift Box

Today's post is a quick one.  It's love and leisure day at McCasa.  Conlyn is out on the golf course enjoying the last good weather day for a while. I'm trying to get caught back up on my Pinterest pinning of my favorite blogs and get a little crafting in with Callie between Disney movies.  We may even make some pumpkin cookies, just so the house smells good of course..... :)

This beautiful box was designed by Cris McCarthy (who I affectionately call Mom).  We completed it at her holiday workshop a few weeks back.  The box holds a lot of cards which I will showcase throughout the next two weeks because Christmas is under TWO MONTHS AWAY!  This is the project that inspired the poinsettias on my last post for Ella's auction.


Supplies:
Cardstock: Cherry Cobbler
Stamp Set: Joyful Christmas
Ink: VersaMark
Accessories: Big Shot & Cutting Mats, Apothecary Accents, Basic Pearls, Gold Embossing Powder, Heat Gun, Powder Pal (retired), Embossing Buddy, Dimensionals, Extra Large Gift Box, Cherry Cobbler 1" Grosgrain Stitched Ribbon, Adhesive, and Scissors


Ideas to fill the box with:
  • A set of homemade cards and envelopes for all occasions
  • A set of notecards and envelopes with a personalized address stamp
  • A yummy combination of home preserves or cookies
  • Anything that will fit in a 4 3/8 x 6 x 6 box
Have a craftastic day,
Stacy

Saturday, October 26, 2013

Joyful Season for Giving

Tonight is the Hillside Academy carnival from 5pm - 8pm in Boise off Hill Road.  While we do our kiddo playdates each Wednesday, Ella is busy making her mark in the kindergarten class there.  If you are looking for something to do and want to support a great school, you should swing by.

If you are looking for a way to give without attending, Miss Ella is also selling scented lotions to raise money for her school's new air conditioner.  They are $20 each and come in Pumpkin Latte and Lemon Yuzu.  Since I'm allergic to citrus, I didn't try that one but I did try the Pumpkin Latte and bought one on the spot.  My hands feel lovely!  If you are interested in either product, please leave me a comment and I'll route you to this great little girl for payment.

I won't be making it but I was able to make something to raffle off to help raise money for the school.

The card was a version of what I taught at my Holiday stamp camps in October.  This time I did two layers of embossing and sponging to create a more dimensional flower. 


To create the card, you follow these simple steps:
  • Rub the bottom of the Real Red cardstock with the embossing buddy, stamp and emboss the saying.
  • Stamp the poinsettia in VersaMark on Whisper White cardstock.
  • Emboss with White embossing powder.
  • Sponge with a sponge and Real Red ink to your desired saturation.
  • Sponge the center and ends of the poinsettia with Raspberry Ripple ink to your desired saturation.
  • Rub with a tissue or Swiffer sheet to remove the excess ink from the white embossing powder.
  • Cut out and use a bone folder to fold the bottom leaves down and the top leaves up.
  • Layer on the card front using dimensionals. 
 
To create the bag box, you follow these simple steps:
  • Cut two pieces of cardstock at 8 x 9. 
  • Score both pieces at 1 3/4 and 6 1/4 on the 8" side and at 1 3/4 and 8 on the 9" side. 
  • Fold along the score lines. 
  • Cut up the 1 3/4 score lines and fold in to create the bottom of the bag and adhere them with sticky strip.
  • Fold over the 1" score line and secure with sticky strip. 
  • See which bag piece fits best into the other leaving a straight edge.
  • Put sticky strip on the two sides of one of the box pieces and the bottom and slide the two pieces together.

The flower on the bag is done the same as with the cards but has several pearls arranged in a circle to form the center of the flower.  I didn't put them on the card to make it easy for them to mail without extra postage!  The ribbon on the bag box is the Mistletoe Original Ribbon and is held in place by a strip of sticky strip behind the knot.


Supplies:
Cardstock: Real Red, Whisper White
Stamp Set: Joyful Christmas
Ink: VersaMark, Pear Pizzazz, Real Red, Raspberry Ripple
Accessories: Mistletoe Original Ribbon (retired), Embossing Gun, White Embossing Powder, Embossing Buddy, Powder Pal, Sponge, Tissue/Swiffer Sheet, Basic Pearls, Dimensionals, Scissors, Bone Folder, and Sticky Strip.

The hostess code for online orders for next month is G3SGBMJK.  Anyone that purchases anything online by 11/24 can enter this code.  If we reach a qualifying party total ($150), I will draw a mystery hostess from those that purchased and the lucky winner will get the free merchandise.

Have a craftastic day,
Stacy

Thursday, October 24, 2013

Thursday Only Specials & Mystery Hostess Winner

October Mystery Hostess Winner


This month’s mystery hostess winner is…. ARDYCE B!  Congrats!!!

 November Online Hostess Code


The hostess code for online orders for next month is G3SGBMJK.  Anyone that purchases anything online can enter this code and if we reach a qualifying party total ($150), I will draw a mystery hostess from those that purchased and they will get the free merchandise.

Thursday Only Specials


A great way to get into the November mystery hostess drawing is through these great Thursday only specials.  Especially if you have a Big Shot!!!
Check out the images by clicking here!   
  • Hearts a Flutter Framelits - #130159 – Regularly $24.95, Today Only $18.71
  • Honeycomb Textured Embossing Folder - #129378 – Regularly $7.95, Today Only $5.96
  • Envelope Liners Framelit Dies - #132172 – Regularly $26.95, Today Only $20.21
  • Alphabet Press Textured Embossing Folder - #130916 – Regularly $7.95, Today Only $5.96
  • Window Frames Framelits - #129021 – Regularyly $26.95, Today Only $20.21
  • Chalk Talk Framelits - #129983 – Regularly $24.95, Today Only $18.71 

Cut and Ready Card Bases


Through December 31, we're offering a new trial product-our Cut & Ready Card Bases. These pre-scored, pre-cut card bases will make it easy for you  to create a stack of cards in no time-or even just a card or two. Think of it . . . holiday cards, thank you cards, party invitations, and more in a snap! (We can hear you breathe a sigh of relief.)
 
Our Card Bases are available in a variety of colors for any occasion or creative whim. We've chosen these colors to coordinate with the holiday catalog Designer Series Papers-to make it even easier to get those holiday cards done.
 
Each Card Base package contains:
  • 20 pre-scored, pre-cut cards in one color 
  • Each card measures 5-1/2" x 8-1/2"-scored at 4-1/4". Finished card size is 4-1/4" x 5-1/2". (Card Bases are packaged flat.)
  • All are $4.95
Options are:
  1. Whisper White Cut & Ready Card Bases - 135804
  2. Very Vanilla Cut & Ready Card Bases - 135805
  3. Crumb Cake Cut & Ready Card Bases - 135806
  4. Smoky Slate Cut & Ready Card Bases - 135807
  5. Cherry Cobbler Cut & Ready Card Bases - 135808
  6. Old Olive Cut & Ready Card Bases - 135809
  7. Pool Party Cut & Ready Card Bases - 135810
You will definitely want to add a package of envelopes to your Card Bases order. Try any of these:
 
  1. Clear Medium Envelopes -102619
  2. Crumb Cake Medium Envelopes - 107297
  3. Very Vanilla Medium Envelopes - 107300
  4. Whisper White Medium Envelopes - 107301
  5. Upcoming Holiday Sale

Upcoming Specials


  • From October 29th - November 30th, we will have two new holiday packaging bundles that will be announced. They will be perfect for creating cute packaging and tags.
  • Also, there will be a variety of hoilday and year-end downloads and 30% off photobooks, swatchbooks, cards, tags, and individual pages!

Have a craftastic day,
Stacy

Tuesday, October 22, 2013

25% off 25 Stamp Sets & Weekly Specials


From today until October 28th, you can order these great stamp sets for 25% off as part of Stampin' Up!'s 25th Anniversary celebration!

Review the stamp sets here!

 
It's Tuesday which means more weekly specials from Stampin' Up!  Click the image below for more details on these products.  They will be discounted for 1 week and are available while supplies last. 
 
 
Since the Dress Up Framelits are on sale for 25% off, I will finally get them to make dress up magnets for Callie!


It's also Digital Tuesday so there are some great new downloads.  I'm excited to see the Holly Jolly Overlays - I think that's exactly what I need for my Christmas cards this year!  Now if I could only settle on a picture for that card!

Click the image below to be taken to the page with more information on each download! Contact me today if you would like to get in an MDS basics class for free before the holiday season hits full swing!


Since there is something for everyone in today's specials, remember that there is one more perk to ordering online today!

When you order online, make sure you use hostess code TUBSEAHG and be entered for a drawing as the mystery hostess at the end of the month.  I have enough orders to qualify for a $250 workshop so someone will be a lucky winner of at least $65 in free merchandise!!!!  I will draw a name on 10/24!

If you have an order of $150 or more, do not add a hostess code as you are your own hostess!

Have a craftastic day,
Stacy

Monday, October 21, 2013

MDS Mixed Media Halloween Canvas

When I started to work on this project, I didn't have a game plan in mind.  I just knew after three years of visiting Cheryl's house on Halloween, I really needed to do something to say thank you for the hospitality.  You see, Cheryl, our family friend, is a Halloween fanatic.  She goes all out for the holiday and has amazing Halloween props that she has bought and made throughout the years.  While some of it is quite creepy, it's always amazing to see how she lays everything out year after year.

I had a goal this year to spend more time tapping into the artsy side of myself and not just the stamp and inks side of things.  I feel like Mixed Media canvases are a great way to combine different medias for a unique result.  I'm not sure that Modge Podge is the best product for a pregnant woman but thankfully the weather was nice when I finished this project up so I could open the window.

For the background of this project, I used My Digital Studio.  I took three photos from Cheryl's house that I got during Callie's first and second Halloweens.   Isn't she adorable!!!


I created a custom project in MDS that was 8 x 8, which was the size of my canvas.  I put a photo box on the project that was 8 x 8.  I added the first of the photos and zoomed in until only the gravestone appeared.  I got the pixilation warning but it was okay because with this type of project, it's okay if it's a little blurry. 

I changed the opacity to 30% and used the photo effects to make it black and white.  I repeated this process with the other two photos to get the curio cabinet and spider web.  The opacity setting is completely up to you - do what allows you to see all three images to the right degree.  Also, use the page layers icon to help put them in the right order so that you have the correct image on the top of your project.  Then use the Print option under Share from the Design Center to print the project on White cardstock.

Once printed, I cut it out with my trimmer and attached to my canvas using Modge Podge.  For the zombie girl, I was inspired by this picture I found on Pinterest.  A few highlights:
  • I cut her head freehand using Very Vanilla cardstock. 
  • I used the Boho Blossoms punch to punch out a daisy for one eye. 
  • I did not use our Basic Black marker as it will smear with the Modge Podge so I used a Sharpie for this project. 
  • The skull is stamped in White craft ink and cut out.  Instead of using dimensionals, I used a glue gun to give it depth so that it wouldn't fall off when hung. 
  • The shoes are done using the Scallop Edge Border punch and cut down individual scallops.


Supplies:
  • Cardstock/DSP: Witches' Brew DSP, Very Vanilla, Basic Black
  • Stamp Set: Halloween Hello
  • Ink: White Craft
  • Accessories:  Black Wire (retired), Neutrals Candy Dots, Summer Starfruit Stitched Ribbon, Boho Blossoms Punch, Itty Bitty Punch Pack, Black Permanent Marker, Glue Gun, Scallop Edge Border Punch.
When you order online, make sure you use hostess code TUBSEAHG and be entered for a drawing as the mystery hostess at the end of the month.  I have enough orders to qualify for a $250 workshop so someone will be a lucky winner of $65 in free merchandise!!!!  I will draw a name on 10/24!

I just finished my Creative Convention Online where I got a lot of great ideas from Ronda Wade and Maggie Patterson.  I'm pretty excited about all the things I learned from them and the other demonstrators through the live chats.  You will see a different business model from me in 2014 but I think you will all really enjoy the changes.


Remember that today is the last day to join my Stampin' Up! family for only $25.  Contact me today for more details!

Friday, October 18, 2013

Halloween Crafts - Day 10 - Another Cheesecloth Ghost

Have you seen those great posts in Pinterest to build the life size dress forms for Halloween that stand by themselves in the yard (assuming a big wind doesn't blow?)  This week's kiddo craft for Halloween was the starchy cheesecloth ghosts.  It was a messy project with the kids but they had fun and practiced good hand/eye coordination.  It's a little hard to aim a squirt bottle at cheesecloth and not shoot right through it but thankfully Nana Sandy didn't mind the mess.


When you make these, you have to start with a form for them.  Most blog posts I saw used soda bottles and dowels but you can use what you have around.  In this case, I asked Meghan if we were making Molotov cocktails but neither of us drink soda much so there weren't those bottles to use.  You use tape or washi tape to attach the arms and the Styrofoam ball at the top.


Then you cut your cheesecloth to cover your form.  You want it to pool at the bottom since that is what provides the support for it to stand.  We ended up with about 2 yards on this little guy. 


The kiddos spray the liquid starch on the cheesecloth until it's really wet.  Don't forget to really spray around the head or else when you pull it off the form, it won't really hold a shape for a head.

 
Once thoroughly doused, we recommend letting them dry for about an hour.  We took the kiddos to the park and let them play so they wouldn't touch them!  When we got back, we had to use a hair dryer on the bottom as where the starch dripped down, it was pretty thick and wet.

Callie named her ghosts Scary though it's not scary at all.  She likes to keep her eye on it.

 
I have one more Halloween project that I will be posting on Sunday.  I am super proud of this project as it's a gift for a very Halloween spirited friend.

As for kiddo crafts, we are done with the Halloween crafts for now for our playdates/  Moving forward, I will post our kiddo craft every Thursday, whether is uses Stampin' Up! materials or not. I think it's important to explore creativity with your children and I hope some of these ideas help make that easier for you and your family!

 
You can join SU for only $25 from October 7-21, 2013.  This offer is only good for two weeks, so take advantage of it right away! During this offer, only the special $25 starter kit will be available; the regular $99  starter kit will not be available. The $25 Starter Kit includes:
  • $26.95 worth of Stampin' Up! product (it must be more than $25, but not more than $26.95 before tax)
  • Business pack which includes: Customer postcards, Customer Order Forms, Getting Started DVD, A package of the current seasonal catalog, A box of annual catalogs

When you hold your first Workshop or place an order yourself within 45 days of signing up, you will receive 30% instant income and any eligible hostess benefits if you host your own event. You also get two months FREE of the Demonstrator Business Web Services (DBWS)!
 
Perks to joining my team:
  • Free admission to my hostess appreciation event on November 9th
  • 50% camp fees for my buffets and camps
  • Instant Income - you receive 20% back on all orders placed with you.  If you are a hobby demonstrator, you would basically have no shipping/tax plus 4% back.
  • If your sales each month reach$ 400, you will receive 5% volume rebate back.  Higher sales, higher volume rebates.
  • Eligibility to attend Regionals and Convention
  • Eligibility for incentive trips
  • Pre-order and sneak peek opportunities
  • Demonstrator only specials
  • Demonstrator only Webinars and training on new products and promotions
  • Stampin' Success - a bi-monthly magazine delivered to your door around the 15th of the month filled with ideas and business tips
  • Inclusion in the Creatively Inspired meetings for free -- includes business discussions, training, make-n-takes, card swaps, and product challenges
  • Free attendance for my hostess appreciation event in November
  • Access to all my instruction sheets for buffet and exclusive club projects
Have a craftastic day,
Stacy

Thursday, October 17, 2013

October Stampin' Up Promotions & Products

There have been a lot of specials tied to the 25th Anniversary and a lot of new products offered online so I wanted to capture those all in one post.  Please remember that some of these specials are time sensitive so if you are interested, jump to my online store and order today!

Thursday Only Special - One Day Only


Today is Thursday so Stampin' Up! has released their one day only specials!  I love punches and am so excited to see this product offering at 25% so they are only $11.56 instead of $15.95.   Click the links below to see more details on these punches.  I LOVE the hexagon punch - it lets me do banner ends with no effort which saves me a lot of crafting stress!

Bitty Butterfly Punch -
http://www.stampinup.com/ECWeb/ProductDetails.aspx?productID=129406
Hexagon Punch - http://www.stampinup.com/ECWeb/ProductDetails.aspx?productID=130919
 
Pansy Punch - http://www.stampinup.com/ECWeb/ProductDetails.aspx?productID=130698

Artisan Label Punch - http://www.stampinup.com/ECWeb/ProductDetails.aspx?productID=130920

Mosaic Punch - http://www.stampinup.com/ECWeb/ProductDetails.aspx?productID=131267
 

 Photopolymer Stamp Sets

Stampin' Up! has a limited amount of Photopolymer sets that they have produced.  These stamps are completely clear and super sticky so that they will stay on your blocks and also clean easily.  They stamp a very clear image and allow for perfect placement. 

To see the full set of photopolymer stamps, click HERE!

The newest set in this collection is Endless Wishes Photopolymer Stamp Set - 133455 - $13.95


There are 19 stamps in this set and when you click the image, you'll be taken to a page that shows several holiday projects using the stamp set, a nice new development on the SU! Web sites!

The other newer stamp set is the Christmas Tagables set - 134623 - $13.95.  For more information on bundle opportunities with this set, check out this post: http://www.craftasticdayswithstacy.blogspot.com/2013/10/new-pop-place-product-offering.html


My Digital Studio Downloads


I missed including these in my Tuesday post, so check out these new downloads.  Click on the image for more details.


Mystery Hostess Drawing on 10/24 

When you order online, make sure you use hostess code TUBSEAHG and be entered for a drawing as the mystery hostess at the end of the month.  I have enough orders to qualify for a $250 workshop so someone will be a lucky winner of $65 in free merchandise!!!! 

Wednesday, October 16, 2013

Halloween Crafts - Day 9 - QTip Skeleton

So we are having a BOY!  Yesterday was our big appointment and there it was, easy to see, that the McCain name will live on.  Conlyn is over the moon and Callie is excited to play tractors with her new baby brother.  I didn't put much effort into this page but will fix it later since it will be the first page of his baby book. 


Today's post is actually the first Halloween craft the kiddos did on their playdates.  I loved this project because it allowed Callie to practice matching.  I made the pattern using Elmer's Glue and she layered the QTips on it to match.  This is when we realized our kids are perfectionists and if copying from an image, it has to match exactly.  If making this with your kids, I recommend cutting the rib pieces in half and not having them layer one QTip on another - they teeter and take a while to dry.  This was originally inspired by a pin Meghan found on Pinterest.

 
Supplies:
Black Marker, Scissors, Elmer's Glue, QTips, Black Construction Paper

Weekly Specials

Stampin' Up! has released their weekly specials for this week.  Click on the image below to bring you to my online store to review the products in more detail.


When you order online, make sure you use hostess code TUBSEAHG and be entered for a drawing as the mystery hostess at the end of the month.  I have enough orders to qualify for a workshop so someone will be a lucky winner!!! 


You can join SU for only $25 from October 7-21, 2013.  This offer is only good for two weeks, so take advantage of it right away! During this offer, only the special $25 starter kit will be available; the regular $99  starter kit will not be available. The $25 Starter Kit includes:
  • $26.95 worth of Stampin' Up! product (it must be more than $25, but not more than $26.95 before tax)
  • Business pack which includes: Customer postcards, Customer Order Forms, Getting Started DVD, A package of the current seasonal catalog, A box of annual catalogs

When you hold your first Workshop or place an order yourself within 45 days of signing up, you will receive 30% instant income and any eligible hostess benefits if you host your own event. You also get two months FREE of the Demonstrator Business Web Services (DBWS)!
 
Perks to joining my team:
  • Free admission to my hostess appreciation event on November 9th
  • 50% camp fees for my buffets and camps
  • Instant Income - you receive 20% back on all orders placed with you.  If you are a hobby demonstrator, you would basically have no shipping/tax plus 4% back.
  • If your sales each month reach$ 400, you will receive 5% volume rebate back.  Higher sales, higher volume rebates.
  • Eligibility to attend Regionals and Convention
  • Eligibility for incentive trips
  • Pre-order and sneak peek opportunities
  • Demonstrator only specials
  • Demonstrator only Webinars and training on new products and promotions
  • Stampin' Success - a bi-monthly magazine delivered to your door around the 15th of the month filled with ideas and business tips
  • Inclusion in the Creatively Inspired meetings for free -- includes business discussions, training, make-n-takes, card swaps, and product challenges
  • Free attendance for my hostess appreciation event in November
  • Access to all my instruction sheets for buffet and exclusive club projects
Have a craftastic day,
 Stacy
 

Monday, October 14, 2013

Halloween Crafts - Day 8 - Batty For You Can

Tomorrow we find out if we are having a boy or girl so I will take a break in the Halloween posts to post the gender! 

I spent a lot of time this weekend finishing out several Halloween books that I've created over the last few years.  I ended up with an album for each of Callie's Halloween experiences and an album of party pictures with the college gang which is much less cute but made me smile just as big to reflect upon.  Today I'm looking forward to finishing my apple pie filling and canning just because it means I won't be cutting out photos!!!

Today's post is a project I just kept tinkering with.  I wanted to do the can luminaries but then I heard that you had to freeze the cans first and that sounded like more work than I wanted.  Plus that meant I had to wait to do them until they were frozen.  So I decided to make a tin can holder instead.

The can is a normal 14oz can.  It's wrapped in Witches' Brew DSP that is held on using Sticky Strip.  I used a Crop-a-dile (retired) to create the holes through the side of the can.  I used some retired black wire from the old days of Stampin' Up and created the handle.  Then I stamped and cut out several bats that are hanging from the handle from the Halloween Hello stamp set.  I had a few scraps of taffeta ribbon so I tied those on the handle as well. 

 
Supplies:
Cardstock/DSP: Witches Brew, Very Vanilla
Ink: Basic Black
Stamp Set: Halloween Hello
Accessories: Black Wire (retired), Crop-a-dile (retired), Scissors, Dimensionals, Adhesive, Sticky Strip, Basic Black 1/8 Taffeta Ribbon, Pumpkin Pie 1/8 Taffeta Ribbon

When you order online, make sure you use hostess code TUBSEAHG and be entered for a drawing as the mystery hostess at the end of the month.  I have enough orders to qualify for a workshop so someone will be a lucky winner!!! 

 
You can join SU for only $25 from October 7-21, 2013.  This offer is only good for two weeks, so take advantage of it right away! During this offer, only the special $25 starter kit will be available; the regular $99  starter kit will not be available. The $25 Starter Kit includes:
  • $26.95 worth of Stampin' Up! product (it must be more than $25, but not more than $26.95 before tax)
  • Business pack which includes: Customer postcards, Customer Order Forms, Getting Started DVD, A package of the current seasonal catalog, A box of annual catalogs

When you hold your first Workshop or place an order yourself within 45 days of signing up, you will receive 30% instant income and any eligible hostess benefits if you host your own event. You also get two months FREE of the Demonstrator Business Web Services (DBWS)!
 
Perks to joining my team:
  • Free admission to my hostess appreciation event on November 9th
  • 50% camp fees for my buffets and camps
  • Instant Income - you receive 20% back on all orders placed with you.  If you are a hobby demonstrator, you would basically have no shipping/tax plus 4% back.
  • If your sales each month reach$ 400, you will receive 5% volume rebate back.  Higher sales, higher volume rebates.
  • Eligibility to attend Regionals and Convention
  • Eligibility for incentive trips
  • Pre-order and sneak peek opportunities
  • Demonstrator only specials
  • Demonstrator only Webinars and training on new products and promotions
  • Stampin' Success - a bi-monthly magazine delivered to your door around the 15th of the month filled with ideas and business tips
  • Inclusion in the Creatively Inspired meetings for free -- includes business discussions, training, make-n-takes, card swaps, and product challenges
  • Free attendance for my hostess appreciation event in November
  • Access to all my instruction sheets for buffet and exclusive club projects
Have a craftastic day,
 Stacy
 

Sunday, October 13, 2013

Halloween Crafts - Day 7 - Toilet Roll Pumpkins

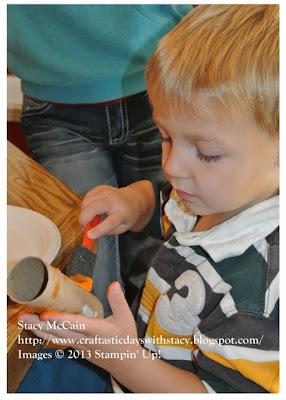
This Wednesday's Play Date craft was toilet roll pumpkins.  It's been really fun having the kids look forward to their crafts together and actually choose to do them before they play with cars and princesses!  This idea came from this pin on Pinterest.  They had more fun than it looks like in this photo - I made them take a photo instead of eat cheese sticks.  Bad mommy.

 
For this type of craft, I highly recommend using the black foam brushes.  There is a lot of surface to cover with a little paint brush and they will lose interest.  Also, the foam brushes prevent the "glob effect" which looks cool but takes a long time to dry when doing a two-stage craft like this one.

 
First you paint the toilet paper roll with orange paint.  The mommies found that it worked best if we put our fingers into the rolls and held them while the kiddos did their painting.  Then we set them on a paper plate to dry.  The top of the pumpkin is an aluminum foil roll cut to about 1" with scissors.  It's painted with small paint brushes in green paint.

 
Then the kids washed their hands and went to play while the paint dried.

The strips of Pumpkin Pie cardstock are cut at 1" x 11.  Use a bone folder to curl the paper to avoid hard folds when you assemble.  We ended up needing 10 to get a full pumpkin look.  Once your pumpkin is dry, use glue dots on each end of the strip and attach to the inside top and bottom of the roll.  This held the kids attention for about 6 strips - then it became a race to which mommy could finish first.  Congrats Meghan for winning (reference OCD crafting mom again for me....)

Once you have all the strips attached, you can use Elmer's glue to layer a 2 1/2 Circle of Pumpkin Pie on the top and bottom of the pumpkin.  Then put glue on the bottom of the green roll to attach to the top of your pumpkin. 

Supplies:
Orange/Green Paint (non-SU), Toilet Paper Roll, 2 1/2 Circle Punch, Pumpkin Pie cardstock, Glue Dots, Elmer's Glue (non-SU), Bone Folder 

Non-Kiddo Version

If you didn't have a kiddo at home and wanted to make these for a fun centerpiece, you can do it without the paint and toilet paper roll.  Cut a rectangle of Pumpkin Pie and form into a cyclinder.  Seal with sticky strip to make the roll stay.  Curl the strips of Pumpkin Pie cardstock with the bone folder and attach to the cardstock tube with glue dots.  Use glue dots to put the 2 1/2 Circle on the top and bottom.  Make a small cylinder with the Gumball Green cardstock and attach to the top using more glue dots.  You could also use DSP to make a décor covered pumpkin.

When you order online, make sure you use hostess code TUBSEAHG and be entered for a drawing as the mystery hostess at the end of the month.  I have enough orders to qualify for a workshop so someone will be a lucky winner!!! 

Envelope Punch Board Update

SU has noticed that one of the envelope measurements on the Envelope Punch Board is incorrect. The dimensions for the 5-1/2" x 8" card size envelope are 1/4" too small. The correct envelope measurement for this card size is: 10-5/8" x 10-5/8" (paper size); 4-3/8" (score line). The Envelope Punch Board still functions perfectly and they have corrected the measurement chart on the punch board. New labels are available through Demonstrator Support, if you would like one. Contact me today if you need one.

Special reminder for Stampin' Up! cards: These envelope measurements are meant for simple cards, without a lot of dimension. At Stampin' Up! we love adding dimension to our cards, but that can make the envelope a bit snug. So, if you need an envelope to fit your cards with lots of flair, go up an envelope size (or two) for the perfect fit.


You can join SU for only $25 from October 7-21, 2013.  This offer is only good for two weeks, so take advantage of it right away! During this offer, only the special $25 starter kit will be available; the regular $99  starter kit will not be available. The $25 Starter Kit includes:
  • $26.95 worth of Stampin' Up! product (it must be more than $25, but not more than $26.95 before tax)
  • Business pack which includes: Customer postcards, Customer Order Forms, Getting Started DVD, A package of the current seasonal catalog, A box of annual catalogs

When you hold your first Workshop or place an order yourself within 45 days of signing up, you will receive 30% instant income and any eligible hostess benefits if you host your own event. You also get two months FREE of the Demonstrator Business Web Services (DBWS)!
 
Perks to joining my team:
  • Free admission to my hostess appreciation event on November 9th
  • 50% camp fees for my buffets and camps
  • Instant Income - you receive 20% back on all orders placed with you.  If you are a hobby demonstrator, you would basically have no shipping/tax plus 4% back.
  • If your sales each month reach$ 400, you will receive 5% volume rebate back.  Higher sales, higher volume rebates.
  • Eligibility to attend Regionals and Convention
  • Eligibility for incentive trips
  • Pre-order and sneak peek opportunities
  • Demonstrator only specials
  • Demonstrator only Webinars and training on new products and promotions
  • Stampin' Success - a bi-monthly magazine delivered to your door around the 15th of the month filled with ideas and business tips
  • Inclusion in the Creatively Inspired meetings for free -- includes business discussions, training, make-n-takes, card swaps, and product challenges
  • Free attendance for my hostess appreciation event in November
  • Access to all my instruction sheets for buffet and exclusive club projects
Have a craftastic day,
 Stacy