Saturday, August 31, 2013

Best of September Set and Butterfly Promotion

Sorry I've been MIA on the project front.  This week has been spent doing canning and trying to keep up with Callie.  I don't remember being this tired when I was pregnant with Callie but I am reminded by those around me that it's tough work building a little person.
 
I plan on working on my samples for the Special Occasions camp next weekend this weekend and will post one project each day next week.  They are pretty cute - I think those that RSVP'd will really enjoy making them and learning the techniques involved.
 
A couple of new promotions to pass along today from Stampin' Up!


From now until September 30th, you can get the Papillion Potpourri stamp set and Bitty Butterfly punch at a 15% savings.  Click the image above or here to view the flyer and image of the stamp set.
 
 
Best of Autumn - 134390 - $14.95

 
Click here to view all the exclusive stamp sets that are part of the 25 Year Anniversary collection! 
 
These sets are available until the beginning of 2014.  If you purchase 6 of them in 2013, you receive a voucher for a free set of your choice valued at $14.95.  Each stamp set contains images from sets over the last 25 years plus one brand new image!
 
Have a craftastic day,
Stacy
 

Friday, August 30, 2013

Last Day for My Paper Pumpkin Special - August 31st

 
If you sign up to receive Paper Pumpkin by August 31st (TOMORROW!), you can get it for $10 per month (plus tax) for the next two months.  Click Add Promo Code and then enter PUMPKINDEAL as the promo code field to participate.  Then you can either continue or skip a month or cancel after that.  This promotion is only for new paper pumpkin customers and is a great deal for those looking for a creative escape once a month!

https://mypaperpumpkin.com?demoid=80380

So what is Paper Pumpkin?  It is a kit of crafting supplies that will help you enjoy a creative escape once a month.  The cost of the kit is normally $19.95 which includes the shipping.  It typically breaks out to 4 cards or a 3D projects, 2-3 stamps, and 1-2 ink spots.  Your product comes in a cute little box and lands on your doorstep around the 18th of the month.  They contain everything you need (including instructions but excluding adhesive) to make the projects. 

To see samples using Paper Pumpkin products, click here:  http://craftasticdayswithstacy.blogspot.com/search?q=Paper+Pumpkin

These kits will be on trend and will be exclusive to members.  Once a month happens, the kits will not be available again.  So you have a chance to be a part of something exclusive and it gives you a surprise each month! 

And, if you decide that you need to skip a month once you sign up, you just log into your account and click Manage my Pumpkin and either skip the month or cancel.  If not, it will auto bill you on the 10th.   It’s that easy!

You can check out this page to see how to sign up!  http://craftasticdayswithstacy.blogspot.com/2013/07/join-my-paper-princesses-club.html 

The first kit you get is shown on the Web site.  It includes the clear block you will need for future projects (all the stamp sets in the kits will be clear mount as I understand it).  Then the next month, you will start getting the surprise kits on your doorstep and we can all ooh and ahh together.

The first group that joined me on this journey received adhesive pouches to help them complete the projects.  I won’t be doing this moving forward but I will be keeping up my quarterly princess events.  Any crafting princess that joins Paper Pumpkin will also get to participate in a fun free Princess stamping event.  To qualify for the free event, you need to have 3 kits under your belt since we will use those same supplies to make some cute projects and I will spoil you like every princess deserves. 

Feel free to forward this email to anyone that may be interested in this kind of monthly kit.
Remember to follow Craftastic Days with Stacy on Facebook to receive immediate updates: https://www.facebook.com/#!/CraftasticDaysWithStacy or just follow my blog!

Have a craftastic day and let me know if you have any questions,
Stacy

Tuesday, August 27, 2013

It's Digital Tuesday - August 27th

It's digital Tuesday - that means new digital downloads from Stampin' Up!  Check out the images below and click the links for more images and information.

Chevron Border Punch - Digital Download  135226 
Price: $1.95
Chillin Out Pocket Cards - Digital Download  134980 
Price: $5.95 
Crazy, Mixed-Up Love Stamp Brush Set - Digital Download  135229 
Price: $5.95 
Old School September Kit - Digital Download  134978 
Price: $9.95 
Old School September Wallpaper - Digital Download  134979 
Price: $0.00 
Rev Up The Fun! Stamp Brush Set - Digital Download  135228 
Price: $3.95
The Traveling Tag - Digital Download  134986 
Price: $2.95
Timeless Talk Stamp Brush Set - Digital Download  135227 
Price: $3.95 
 
If you decide to order any of these downloads or anything else outside of a party, please use the hostess code of J3R4BYRD.  I will put your name into a drawing for a mystery hostess if the monthly online workshop qualifies for free merchandise.

Have a craftastic day,
Stacy


Monday, August 26, 2013

A Princess Affair to Remember

Today was Callie's final 3rd birthday celebration.  We wanted to do a princess party so we could get the cute kids to be even cuter.  It was successful.  Look at these cuties!  Our friends make adorable children!


The crowns that some are wearing was the party favor.  The crown template came from this great site I found, First Palette, that has all sorts of printables for kids for all occasions - check it out!

I cut the crowns out while doing my family Fantasy Football draft yesterday afternoon.  Then I set the kids loose with my retired punches and papers and had them make their own crowns.  Instead of using glitter, I punched out circles of glitter paper and had the kids color on them with color crayons.  No muss, no fuss!


Another added touch - I took photos of them while they were making their crowns.  Then I created a custom project in MDS that was 4 x 6.  I added circle punches that were 1 3/8 to the project and then filled them with photos.  Then I was able to size them correctly for the punch and could export them as a single JPG that I could print on my Epson Zoom.  So each of their crowns had their photos on them like the Disney crown AND no one had to worry about who's crown was whose! I'm such a genius sometimes.  :)


Supplies:
Cardstock/Paper: Barely Banana (retired), Bashful Blue (retired), Glitter Paper
Accessories:  1 3/8 Circle Punch, 1" Circle Punch, 1 1/4 Circle Punch, Scallop Circle Punch, Dimensionals, Stapler, Paper Snips, and Crayons
MDS: 1 1/4 Circle Punch resized to 1.375

Have a craftastic day,
Stacy

Saturday, August 24, 2013

The Most Romantic Label

Emily Montoya's stamp set that was submitted for the In With You challenge is my current favorite stamp set.  Called Spread the Joy, it has such a fresh look to it and the sayings all make me smile.   I love the stamp "You are my Bucket List" and it makes me want to kiss my husband.  If only it included one that said "I love you despite that mustache that you really should stop growing so I can kiss you without being scratched."  But that might be too specific, you think?  I guess since I'm the DD for Beer Fest today for my father and my husband, I should have looked for a stamp that says "Thank you in advance since I might not be able to speak later..."


I wanted to showcase products to my customers because they are not listed in catalogs anywhere but didn't want to take a long time to do it. So I combined this great stamp set with the Label Card Thinlit Die and showed it at my last workshop.  I think it's very pretty.
 

Supplies:
  • Cardstock/Paper: Cherry Cobbler, Modern Medley DSP, Very Vanilla
  • Stamp Set: Spread the Joy
  • Ink: Cherry Cobbler
  • Accessories: Big Shot, Cutting Mats, Magnetic Platform, Label Card Thinlit Die, Season of Style Washi Tape, Dimensionals, Paper Snips, and Adhesive
 
Just a few closeups:

 
Craftastic Notes:
  • You can put washi tape on scraps and then run them through the Big Shot with the additional thinlits that come with the card thinlits.  It's a fun way to utilize scraps and it will give them a fun smooth texture.
  • When cutting the DSP to match these thinlits, insert it into the card thinlit and make sure you leave a border around it.  Then when you cut it out, it will fit on the card but hug the area of the card that swivels.  If this isn't clearer than mud, you should schedule a free workshop and I'll just show you!
  • I love the look of cutting out a stamped image and raising it on dimensionals. 
  • The Modern Medley paper is designed to be inked and sponged to change the color to match other colors on the card.  I left mine cream but could have easily used my dauber to change it to Cherry Cobbler or another color.
Have a craftastic day,
Stacy

Friday, August 23, 2013

August My Paper Pumpkin Samples

Have you heard about the great My Paper Pumpkin deal going on until August 31st?  If you haven't already signed up, you can sign up for My Paper Pumpkin by August 31st and get the first two kits (delivered in mid-September & mid-October) for only $10 per month plus tax.  The first kit has two great stamps, a Gray Stampin' Spot, the D clear block and supplies for 4 cute cards.  For TEN DOLLARS?  Why haven't you signed up yet???  After your two month special is up, you can either continue on at $19.95 a month or you can defer or cancel. 
 
For those that have, this was the kit we received as existing members for August.  I love the bike and banner stamps - both very trendy - and love that the Stampin' Spots included Baked Brown Sugar since it's a great color to distress with.
 
The kits are designed to be put together in 30 minutes or less.  If you deviate from the instructions, it can take as long as your creative mind would like to take.  I always try to come up with some non-standard projects you can make with minimal outside supplies.


I tried to do a technique on my first card and it destroyed it.  So I decided to use that messed up card as a scrap paper where I could stamp and punch out wheels and circles.
 
This first card has the two wheels punched out with a 3/4 circle punch.  The banner was curled with a bone folder and adhesive was put on the pointed end.  Dimensionals were put on the middle and right side and slid under the bike tire.  I also put mini silver brads into the wheels for extra depth and shine.


The next card was the technique I messed up on the first card.  I stamped the bike first on the far right and then stamped it three more times moving it to the left each time. However, I was crooked on the tires so that is why the banner is strategically placed so that it's not so obvious!  :)  The tires and banners are on dimensionals again on this card.


This was fun.  I punched out a 1 3/4 circle from the messed up card.  Then I punched out a 3/4 circle where the yellow washi tape in the kit was on 3/4 of the circle.  I distressed the edges and attached it to the big circle using adhesive.  The banner is distressed too and elevated with dimensionals.  Two mini brads are under the banner.  Then I took the circle and put adhesive on the back of the circle.  I worked the Baked Brown Sugar Ruffled Ribbon around the circle for extra dimension.  Then I put the whole cluster on the card using dimensionals.


Finally, I was a card short since I used one for my scraps.  So I cut a Whisper White card and layered a piece of Whisper White on a piece of Bermuda Bay cardstock.  Those two layers are on the Cherry Cobbler piece that had the banner pieces in it.  I also created a cluster of triangles on the card to do a fun pattern.  The saying is on the bottom is up on dimensionals.


I hope you enjoyed these samples.  If you want more information about the perks of joining My Paper Pumpkin under me, you can check out the Join My Paper Pumpkin page for those benefits and instructions on how to sign up.  I hope you join our Paper Princesses group today!
 
Have a craftastic day,
Stacy

Thursday, August 22, 2013

Wishing for Winter

After a super hot summer, I'm looking forward to Fall and Winter weather where you can go outside without the soles of your shoes melding with the pavement!

When my most recent hostess asked me to show items from the holiday mini, I smiled but swore under my breath and looked at the box of goodies that I hadn't even opened yet.  I usually don't get my Christmas on until I prep for my Holiday Stamp Camp (on October 5th if you want to register).  So, pulling out a holiday sample when the weather says anything other than snow is a challenge in itself!

In the end, I love that she wanted the seasonal catalog since I was able to pull out this beautiful card that I will use for my holiday stamp camp and my holiday swap groups too!  This card uses the items I got from my Prize Patrol at Convention (Remembering Christmas stamp set, 1/8 Silver Ribbon, and the Winter Frost DSP) so I felt good about it from the beginning.  It also solidified that Smoky Slate is one of my FAVORITE all time SU! colors.  It dries so pretty and works with so many color combinations.  The Framelits go perfectly with the stamp set and make it really easy to layer the snowflakes and create a great texture on a card.  The 1st and 3rd sizes of snowflakes layer so perfectly that you can hardly tell in the photo that they are there!  And that Frosted Finishes embellishment just makes the card go BING!

 
Supplies:
  • Cardstock/Paper: Whisper White (8 1/2 x 5 1/2, 3 x 3 3/4, 2 1/4 x 2, 2 1/2 x 2 1/2), Smoky Slate (3 1/4 x 4), Winter Frost DSP Stack (5 1/4 x 4)
  • Stamps: Festive Flurry, Remembering Christmas
  • Ink: Smoky Slate
  • Accessories: Big Shot, Cutting Mats, Magnetic Platform, Festive Flurry Framelits Dies, Frosted Finishes Embellishments, Silver 1/8 Ribbon, Hexagon Punch, Dimensionals, Paper Snips, Glue Dots, Bone Folder, and Adhesive
Directions:
  • Distress the pieces of cardstock and DSP if desired with either a bone folder or your finger nail.
  • Attach the silver ribbon to the bottom of the DSP piece.  Attach the DSP to the front of the folded Whisper White card. 
  • Tie the 2nd piece of Silver ribbon into a bow.  Trim the ends and attach to the card as shown using a glue dot.
  • Attach the piece of Smoky Slate to the upper portion of the card so the border is even on top, left and right.  Stamp the 3rd biggest snowflake in Smoky Slate on the larger rectangle of Whisper White.   Attach to the card using adhesive.
  • Stamp the smallest snowflake on the smallest square of Whisper White.  Run through the Big Shot and punch out using the Framelit.  Layer on the bigger snowflake using dimensionals.
  • Stamp Warm Wishes on the small strip of Whisper White.  Using the hexagon punch, make a banner out of this saying.  Attach one end to the center of the snowflake using a glue dot.  Put a dimensional on the pointed end.
  • Attach the Frosted Finishes embellishment using a glue dot as shown.
  • Stamp the saying on the inside using Smoky Slate.
Craftastic Notes:
  • Tie your bows and attach to the card using glue dots instead of trying to tie around the ribbon on the card.  This lets you get the perfect size without the tweaking that comes from literally tying it on the card.
  • Use the hexagon punch to make the banners.
  • Have a DSP that you don't really like the pattern on?  Layer cardstock on top of it and use the colors in the slight amount that shows to determine the inks and cardstock you use on the card.  Then the pattern isn't the focal point but it ties the card together.
 
 
Don't forget that you have until August 31st to sign up for My Paper Pumpkin for only $10 (plus tax) per month for the first two months.  The first kit is displayed on the Web site and the 2nd is a surprise.  Click the image for details.  Tomorrow I'll post my samples using the August kit.  It almost makes me want to take up bike riding.  Almost....
 
Have a craftastic day,
Stacy  

Wednesday, August 21, 2013

Fall Card Thinlits

Have you used our new card thinlits yet?  They make a horrible noise when they go through my Big Shot but a great sound escapes me when I'm done with a card using them.  I love the instant WOW they bring to a card. 

I am also a big fan of our Designer Papers.  I love that you can simply turn them over and have a whole new theme.  Such is the case with these cards that were the make-n-take at my workshop last night.  One side of the Sweater Weather Designer Paper lends itself to Halloween and the other lends itself to Thanksgiving.  I also LOVE our candy dots.  After the card was all put together, I realized that it needed something extra.  I was able to add a "brad" without the legs showing in the back. Whoo hoo!


Supplies:
  • Cardstock/Paper: Sweater Weather Designer Series Paper (1 7/8 x 5 1/4, 2 3/4 x 5 1/4), Sahara Sand (2 3/4 x 2 3/4), Whisper White (8 1/2 x 5 1/2)
  • Stamps: Tags 4 You
  • Ink: Tangerine Tango or Chocolate Chip
  • Accessories:  Big Shot, Cutting Mats, Magnetic Platform, Circles Card Thinlit, Label Bracket Punch, Bold Brights or Neutrals Candy Dots, Bone Folder, Dimensionals, Scissors, and Adhesive
Directions:
  • Do NOT fold your Whisper White cardstock in half.  Run it through the Big Shot using the Card Thinlit.  Press it flush against the left side.  My Big Shot makes a VERY loud noise when you run this through - it's okay.  Set the 2 1/2 x 5 1/2 scrap to the side.   Use the bone folder to make sure the scores are sharp so the card closes.
  • Place the Card Thinlit back on the cutting mat.  Center the pieces of DSP in the framelit with about 1/8 inch space on all sides.  MAKE SURE YOU HAVE THE SIDES UP THAT YOU WANT TO USE ON THE CARD. Run through the Big Shot.   Set the circle scraps to the side.  If you don't like my embellishment cluster, you can use other framelits in the set on the DSP.  If you do this, do it before you attach it to the card.  The DSP is attached using adhesive.
  • Run the Sahara Sand piece through the Big Shot using the Scallop Circle Framelit.  Attach to the center using adhesive.
  • With the 2 1/2 x 5 1/2 strip that is left over from the thinlit, stamp the seasonal image of your choice.  Use Chocolate Chip for Thanksgiving and Tangerine Tango for Halloween.  Punch out using the Label Bracket punch and attach to the Sahara Sand Scallop as shown.
  • Layer the half circles on the lower right side as shown using adhesive. 
  • Take the scrap that you used for the Tags 4 You image and punch out a bracket.  Trim the ends using your Paper Snips.  Attach to the card using adhesive.
  • Attach a candy dot in the correct color to the cluster.

To view the Card Thinlits that are available, click the image below!


If you decide to order any of these downloads or anything else outside of a party, please use the hostess code of J3R4BYRD.  I will put your name into a drawing for a mystery hostess if the monthly online workshop qualifies for free merchandise.

Have a craftastic day,
Stacy

Tuesday, August 20, 2013

Digital Tuesday and Resizing Templates in MDS

It's Digital Tuesday and I have our newest downloads and also a little project I created on the fly this weekend.

Starting with the project.  I like MDS because it allows me to capture scrapbookable moments real time.  For example, last night Callie and Conlyn were sitting on the couch and Callie was playing with her new elastic headbands.  Conlyn said to her "Are those headbands?" and Callie shook her head and called her dad silly.  "They are necklaces for your hair," she said as serious as can be.
So I was busy prepping for my class and didn't have a lot of time to come up with a layout.  So I stole a template from the Delight in the Day download that I bought.  I was working on a 12 x 12 page and that template was 8 1/2 x 11. 

To adjust the template to the right size, I clicked Insert/Add Other Template Pages to add it to my existing 12 x 12 album.  Then I clicked Ctrl-A to highlight everything on the page.  I right-clicked and selected Group/Group. Once everything was grouped as a single image, I resized it by dragging on the corners to fill the 12 x 12 page.  Then I right-clicked and selected Ungroup so that I could work on the individual elements.  I added a title at the bottom using the Things I Said Font that I downloaded from dafont.com.


Supplies:
 
Embellishments
  •     Staple & Stitching\Staple
  •     Staple & Stitching\Staple
  •     2011-2013 In Color Ruffled Ribbon\Ruffled Ribbon - pool party
Stamps
  •     _Designer Kits\Delight in the Day\Delight in the Day - create the moment, Color = POOL PARTY 169,221,199
  •     _Designer Kits\Delight in the Day\Delight in the Day - all the little things, Color = CALYPSO CORAL 245,116,97
  •     _Designer Kits\Delight in the Day\Delight in the Day - times spent with you, Color = PEACH PARFAIT 243,146,75
  •     _Designer Kits\Delight in the Day\Delight in the Day - today , Color = CALYPSO CORAL 245,116,97
  •     _Designer Kits\Delight in the Day\Delight in the Day - ampersand, Color = POOL PARTY 169,221,199
  •     _Designer Kits\Delight in the Day\Delight in the Day - enjoy the moment, Color = BASIC GRAY 118,122,121
Punches
  •     1.25 Square Punch, Fill Color = PEACH PARFAIT 243,146,75
  •     1.25 Square Punch
  •     Small Arrow Punch, Fill Color = BASIC GRAY 118,122,121
  •     Small Heart Punch, Fill Color = POOL PARTY 169,221,199
  •     Small Heart Punch, Fill Color = BASIC GRAY 118,122,121
  •     Small Heart Punch, Fill Color = PEACH PARFAIT 243,146,75
  •     Small Heart Punch, Fill Color = CALYPSO CORAL 245,116,97
Now on to the digital downloads - looks like Fall is here!

Harvest Of Thanks Stamp Brush Set - Digital Download  134930 
Price: $3.95 
http://www.stampinup.com/ECWeb/ProductDetails.aspx?productID=134930
 
 
Magnificent Maple Stamp Brush - Digital Download  134929 
Price: $2.95 
http://www.stampinup.com/ECWeb/ProductDetails.aspx?productID=134929
 
Outdoor Exploration Kit - Digital Download  134982 
Price: $9.95
http://www.stampinup.com/ECWeb/ProductDetails.aspx?productID=134982
 
 
Perfectly You Stamp Brush Set - Digital Download  134931 
Price: $3.95 
http://www.stampinup.com/ECWeb/ProductDetails.aspx?productID=134931
 
Truly Grateful Stamp Brush Set - Digital Download  134928 
Price: $3.95 
http://www.stampinup.com/ECWeb/ProductDetails.aspx?productID=134928
 
Wanderlust Stamp Brush Set - Digital Download  134939 
Price: $5.95
http://www.stampinup.com/ECWeb/ProductDetails.aspx?productID=134939
 
 
If you decide to order any of these downloads or anything else, please use the hostess code of J3R4BYRD.  I will put your name into a drawing for a mystery hostess if the monthly online workshop qualifies for free merchandise.
 
Have a craftastic day,
Stacy


Monday, August 19, 2013

Project Life Calendars & Converting Templates in MDS

Being on vacation, I was finally able to go through some of the MDS (My Digital Studio) videos I've been pinning for months.  I was really interested in a video posted by Erica Shaw about converting the "The Good Year" template into Project Life-like page layouts and saving them in MDS.

Watch the video here: http://www.youtube.com/watch?v=8nac02Q2igc

This template is amazing.  I bought it to do summary scrapbooking for 2013 and never thought of using it for layouts for other books.  As I started completing the steps in Erica's video, it hit me that this would be a great template to use for my Christmas calendars this year.  But was  I smart enough to figure out how?  Thankfully, yes!  :)

First, the content in this download is amazing.  It's $19.95 which is on the high end for our downloads but you get an amazing amount of images and embellishments.  To view the contents of this kit, click on the itty bitty image below.  Once you land in the online store, click More Images to see the close ups of each page.  You will want to do this!

The Best Year Photobook Template - Digital Download  132566 
Price: $19.95
 
Download includes:
* 28-page photobook designer template (12" x 12")
* 49-piece SVG stamp brush set*
* 12 Designer Series Papers
* 90 embellishments
* 4 punches
 
So how did I make this into a calendar?  Here were the simplified steps:
  • I started out by creating a 12 x 12 calendar in MDS. 
  • I added a calendar month to each of the odd numbered pages using the Calendar option on the Design Center.
  • I removed the blank pages from the entire calendar so I was only left with the 12 calendar months.
  • I went to the upper tool bar and selected Insert/Add Other Template Pages.
  • I clicked on the 12 x 12 and scrolled to The Best Year.  Click Next.
  • Click on the pages that you don't want to import into your calendar.  I removed all but the cover and the first pages for each month that had the JAN, FEB, etc. on them.  Click Next.
  • Click Next to manually populate photos.
  • Click Finish.
  • Then I dragged and dropped the pages into the right order.
Eventually, I did go back and add in the other page for each month at the end.  This let me steal embellishments that I needed if I didn't have enough photos or if I needed to change out a tile based on the photo I wanted to add.
 
Here is what my first page came out like for my mother-in-law's calendar.  Cute, eh?  I love all the text prompts so that you can truly put a variety of pictures on each page and get through it quickly!
 
 
Remember that if you create one of these, it's best to create the template out as much as you can and then save it before adding text and photos.  That lets you use it for other calendars without having to redo any of the text boxes or things you already changed.
 
We will talk about this at my MDS class on September 9th.  To attend that class, you need to have gone through the Basics class.  Contact me today if you are interested in that 1:1 class before September 9th!
 
Have a craftastic day,
Stacy 

Sunday, August 18, 2013

New Photopolymer Stamp Set

Have you used any of the photopolymer stamp sets yet that SU! offers.  These completely clear stamp sets adhere securely to our clear blocks and stamp crisp! 

The newest set is the Another Thank You (#133454) set of 10 stamps for $13.95.


To view all the photopolymer sets, click the link below to visit my Online store and get more details!

http://www.stampinup.com/ECWeb/ItemList.aspx?categoryID=1442


Have a craftastic day,
Stacy

Saturday, August 17, 2013

Yippee for Creatively Inspired In Colors

Being a member of our team of Stampin' Up! demonstrators brings with it many perks.  One of them is involvement in monthly meetings of our Creatively Inspired team.  During our last meeting, we paid $2 and made these five excellent cards to show off the In Colors to our customers.  They are full cards so we can also use them!!!

These meetings are coordinated by Lori Bowerman and these samples were designed by her as well.   I like that all of these cards are made using the same core supplies so they could be easily demonstrated or done at home! The don't require a lot of supplies and could all be done in a single color with the same stamps!

2013-2015 In Colors are: Pistachio Pudding, Crisp Cantaloupe, Coastal Cabana, Baked Brown Sugar, and Strawberry Slush


Supplies:
  • Paper: Whisper White, In Color 2013-2015 cardstock, In Color 2013-2015 Designer Paper Stack
  • Ink: In Color 2013-2015
  • Stamp Sets: Yippee Skipee, Flower Shop Clear Bundle (stamp set and punch)
  • Accessories: 7/8 Scallop Circle, In Color 2013-2015 Ruffled Ribbon, In Color Boutique Details, Dimensionals, Glue Dots, Scissors, and Adhesive


Have a craftastic day,
Stacy

Friday, August 16, 2013

New Holiday Single Stamps

Happy Friday to you all!  Today I have a new special from Stampin' Up! to share.


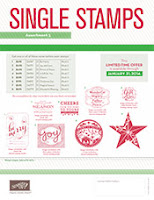
A new, holiday-themed collection of single stamps is now available! The holidays will be here before you know it, and these holiday-themed single stamps may be just what the budget-conscious stamper needs. There are eight different stamps to choose from, six of which coordinate with Framelits dies or punches.

These stamps are only available until January 31, 2014. 
http://www.stampinup.com/us/documents/Flyer_SingleStamps5_Aug1213_NA.pdf
 
Have a craftastic day,
Stacy

Thursday, August 15, 2013

Celebrating Callie

Three years ago on August 13th, I was not having the birthing experience that I dreamt about.  It was long and scary and traumatic.  But, at the end, I understood why people always tell you that it's worth it.  There was my beautiful husband holding my beautiful girl and I thought "Thank God she's okay.  Thank God I'm OK.  Oh God, now what do we do!?!"  We didn't know how to put in the car seat or how to dress her.  However, we knew instantly how to love her.

Three years.  It's been full of moments I never thought would be funny (like being pooped on) and moments that were hilarious "It's me, it's Callie!" or "Snow White kisses Dopey on his one-head (instead of forehead), and moments that were sad with fevers and scrapes.  But they have all been wonderful and her personality is wonderful!!!

Callie thoroughly loved her birthday.  She woke up to her presents from Nana and Papa, which included an iTunes gift card so she could finally "buy some apps".  She's a sponge to any marketing on Disney Junior.   While everyone else went for a round of golf, I took her to Toddler Time at the Sun River Library and listen to books being read and learn some new songs.  We also crafted.  She whispered that we had to be quiet so we didn't wake the library.  I don't think she translated my instructions about a library being a quiet place exactly like I intended.  :) 
 
Then she went to the park and played on the slides and swings and picked rocks out of her shoes.  We came home, napped, and opened more presents.  We got her some princess outfits so that she could play dress up with her friends back in Boise.  There is a lot of glitter on them so we are all still finding glitter on our faces and on our clothes.


We then baked her cake and sang and enjoyed the evening as a family.  It was "a perfect day" according to her!


Since I haven't posted any samples this week, I thought I'd post Callie's birthday card and a tip.  Tag It is the stamp set for Ronald McDonald where $3 goes to the charity each time we sell one.  I think this set is super cute and love that we got it for Convention!


Supplies
  • Paper: Whisper White, Epic This and That Journal paper, Strawberry Slush
  • Markers: Wild Wasabi, Strawberry Slush
  • Stamp Set: Tag It
  • Accessories: 3/4 Circle Punch, 1/2 Circle Punch, Strawberry Slush Ruffled Ribbon, Dimensionals, Bone Folder, Scissors, and Adhesive

Craftastic Notes:
  • When making tags, I used the corner of the hexagon punch to make the sides.
  • Use the paper from the Epic This and That journal on your cards.
Have a craftastic day,
Stacy