Wednesday, July 31, 2013

Digital Updates and New Downloads


I am doing a girl retreat this weekend and am taking my laptop and Paper Pumpkin kits so I will have a lot of fun My Digital Studio and Paper Pumpkin hybrid projects to share next week!
It was digital Tuesday yesterday!  Check out the latest digital downloads for sale from Stampin' Up!   Click on the images below to pull up the content and pricing! 
About To Blossom August Kit - 134860 - $9.95
 About To Blossom August Wallpaper - 134861 - $0.00
 Birthday Candles Stamp Brush - 134921 - $2.95
 Gingham Garden Designer Series Paper - 134853 - $4.95
 Kind & Cozy Stamp Brush Set - 134854  - $3.95
 Really Good Greetings Stamp Brush Set - 134805 - $3.95
 
Have a craftastic day,
Stacy

Tuesday, July 30, 2013

Spooky Sneak Peek

One of the new product lines that Stampin' Up! is showcasing in the Seasonal Catalog are the great Build a Banner Kits.  The  Simply Created kit includes image and alphabet stencils, 18 5x7 banner pieces in 3 designs, and Jute twine.  It also includes a Stampin' Spritzer to help apply the color using rubbing alcohol and ink refills.  Once you have the stencils, you can purchase the Banner Simply Created Kit to refill on the canvas banners and make even more. 

I bought the kit because I wanted to use the stencils on some Mixed Media projects.  However, at Convention, Sara Douglass showed some great projects with the banners and I realized that was totally within my abilities and all of yours!

In addition, Stampin' Up! has added two seasonal accessories kits that can be used with the banners to create Winter or Halloween banners.  While the Halloween sample in the catalog shows how you can use the accessory kit along with other supplies, I wanted to stay as true to the kit as I could. I couldn't stop thinking of One-Eyed Willie from Goonies and so I did add a few large rhinestones.


How about some close-ups?


Supplies:
  • Ink: Black Stazon, Summer Starfruit (pad & refill), Pumpkin Pie
  • Accessories: Build a Banner Simply Created Kit, Dauber, Sponge, Glue Dots, Scissors, Low Temp Glue Gun (non-SU), Silicon Mat, Large Rhinestones, 1" Circle Punch, Summer Starfruit Satin Ribbon, Basic Black Marker.
Craftastic Notes:
  • There are several ways to color the banners.  You can use daubers, sponges, markers, or the Spritzers with ink refills and rubbing alcohol.  If you use markers, please be forewarned it will run the fat tips.
  • I used Stazon for my letters since it would not run when I used the alcohol spritz.  Thanks for that tip Missi (through Paula).
  • I chose to thread my banner with the Summer Starfruit Satin Ribbon because it was easier to thread and I have a LOT of it.  The jute that comes with the kit is good for the banners but will fray if you do not wet the ends to thread it!
  • I bent the bat to create a crease in the middle that I could put the glue on to hold it to the banner. You can't see it but it gives the bat dimension like the other pieces!

I cannot wait for August 1st when I can start using the Interactive prompts in the mini catalog. For those that have received their catalogs, you can download the free Layar app from the App Store and then take a picture of the product in the catalog and it will pull up a video on how to use it!  Don't worry, you'll still need me but it means the internet is there to help you with the products you buy as well!

I will be having a class on this banner on September 12th at 6:30pm.  The cost for the class at my home in Boise is $20.  If you are out of town and would like to have this class for your friends and family, the cost is $25 to cover the transportation costs.  In this case, I will set up a hostess code for you and will purchase the necessary kits and supplies on your party to help you towards getting free merchandise!!!

Have a craftastic day,
Stacy


Monday, July 29, 2013

Join My Paper Pumpkin

Have you heard of My Paper Pumpkin?  It's a kit that comes right to your door!

Kits are designed to be completed in 30 minutes or so.  They come with instructions, project/card supplies, ink, and photopolymer stamps.  They do not always include adhesive.  These products will be on trend and the kits will be either cards or 3D.  Part of your pumpkin adventure is that you don't know what you will get until it shows up at your door!  And, if you get a kit that isn't up your alley, put it together and give it as a gift to someone for the holidays or birthdays or just because!  Or contact me right away so I can help make it right!  The kits cost is $19.95 per month plus tax and is charged around the 11th of the month.

The first month you join you also get a clear block to use with the exclusive photopolymer Paper Pumpkin stamp sets. 

Perks for signing up under me:
  1. I have committed to having additional samples created using the kit by the first week of the month and posted on my blog.  That way those that are cardmakers have options just like those that scrapbook or like décor when possible.
  2. I will post frequent updates to the Pinterest board I have dedicated to Paper Pumpkin projects - again providing you inspiration to use with your kit if you need something different from the instructions included!  That board is http://www.pinterest.com/prpl1dr/crafts-su-paper-pumpkin/
  3. I will host Paper Pumpkin parties that are free for the recipients of Paper Pumpkin with me.  Those crafting friends can come for free and enjoy good company and a pumpkin snack while putting together your kits. 
Pre-paid Subscriptions
You can also order pre-paid subscriptions from yourself or others.  They are commissionable and count towards your workshop orders.  You can also use your hostess benefits to buy subscriptions or you can use your 50% off item (if your workshop qualifies) to get the pre-paid subscription at half price! 
  • 1-Month Prepaid Paper Pumpkin Subscription - 137858 - Price: $19.95
  • 3-Month Prepaid Paper Pumpkin Subscription - 137859 - Price: $59.85 
  • 6-Month Prepaid Paper Pumpkin Subscription - 137860 - Price: $113.70 (save $1 per month!)
  • 12-Month Prepaid Paper Pumpkin Subscription - 137861 - Price: $215.40 (save $2 per month!)
Past Kits

Once a member, you can purchase refills for the kits as well.  You can check out the current offerings on my Web site.

Resources

A few resources exist to give you ideas for these kits.

Joining Paper Pumpkin
Joining up is easy - just follow the steps below!


  • Enter a quantity of 1

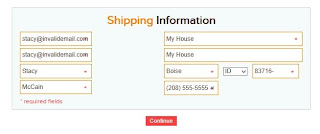
  • Click Continue.  You will see this message on the top of your screen.

 
  • Fill out your contact information


  • Click Continue.  Fill out your credit card information - this is a secure site.  Click Continue and you will get a confirmation screen.


  • Leave me a comment or email me if you have any questions!

Deferring for the Month

If you want to defer or cancel your subscription, you need to do so by the 10th of the month to avoid the automatic charges.  Here's how.

  • Click My Account
  • Click Manage my Pumpkin


Click Skip or Cancel.  Then select Update.


Have a craftastic day,
Stacy

Sunday, July 28, 2013

Hello Lovely Grunge Card

Very rarely do I complete all the make-n-take projects at Convention and usually they are riddled with errors.  That's why I never post them or show them off.  :)  But this year's projects were amazing and the structure of Convention allowed us to take time to stamp them instead of rushing.

My favorite project is this Hello Lovely Grunge card.  These two stamp sets are going to be favorites of mine, even if they aren't usually my type of set.  I figure that if Stampin' Up! can sell me on them, I can sell you, right?  :) 

 
Supplies:
  • Paper: Whisper White, Crisp Cantaloupe, Coastal Cabana, Glitter Paper
  • Ink: Old Olive, Crushed Curry, Calpyso Coral, Coastal Cabana, Crisp Cantaloupe
  • Stamp Set: Hello, Lovely and Gorgeous Grunge
  • Accessories: Epic Day Washi Tape, Vintage Button, White Baker's Twine, Sponge, 1 3/4 Circle Punch, Dimensionals, Scissors, and Adhesive
 
Craftastic Notes:
  • Drag your White Baker's Twine through an ink pad with a sponge to change the color.
  • Stamp off your background stamps to make them a shade lighter than your focal image.
  • Don't forget to stamp your envelope!

Have a craftastic day,
Stacy

Saturday, July 27, 2013

Blushing Bridal Decorations

I have never given a bridal shower before and was very happy to be able to throw one for my dear friend Jessica who is marrying one of the best men I have in my life.  I adore his whole family and was happy to meet Jessica's family and friends, which only confirmed how fun and loving she is and how wonderful they are as well!

I could gush on them all for hours but I want to gush on myself for a minute!  :)  For the past week I've been working on getting the decorations completed.  Between My Digital Studio, my current and retired supplies, and swaps and knowledge gained at Convention 2013, I was able to put together a pretty fun spread of party materials!

Let me know which one is your favorite!

LOVE BANNER


Supplies:
  • Paper: Blushing Bride, Basic Gray, Whisper White
  • Ink: Basic Gray (pad & refill), Blushing Bride (pad & refill)
  • Stamp Set: Love & Laughter
  • Accessories: Big Shot and cutting mats, Magnetic Platform, Heart Framelits, Simply Scored, Perfect Print Embossing folder, Adorning Accents Embossing Folders, Silicon Mat, Glue Gun (non-SU), Blushing Bride Ribbon Stitched Poly (retired), Dimensionals, Sponge, Scissors, Glue Dots, and Adhesive

Craftastic Notes:
  • When doing the banners, remember that the alcohol will bleed a little - my "L" is purposely covered a little bit.  Spray from about 6 inches and wear gloves if you are using a permanent ink.
  • If you make rosettes using cardstock, they have a tendency to tear.  You can fix this by cutting up 1/2 inch on each seam - then it doesn't look like it's ripping and adds an interesting dimension to it.
  • Use white Baker's Twine, a sponge, and an ink pad to transform the twine to any color needed for your project. 
  • Thank you to Sara for showing us how easy these were at Convention 2013. 
ADVICE CARDS

Supplies:
  •     _Designer Kits\2012 Fresh Flowers - embellishments\Calendar - f6
  •     _Designer Kits\Storytime\Storytime - lines 2, Color = 0,0,0
Craftastic Notes:
  • I created an 8 1/2 x 11 scrapbook page and then inserted a 3.5 x 5 photo box on the page.  I filled it with the Blushing Bride color and then layered the journaling lines on it.  Then when I put the flower on the corner, it was the same color so it just covered up the lines in the corner.
 BRIDAL NAPKINS


Supplies:
  • Paper: Shimmer White, Basic Gray, and Blushing Bride
  • Accessories: Big Shot and Mats, Oval Framelits (3rd smallest), Large Oval Punch, 1 1/4 Circle Punch, Boho Blossoms Punch, Blushing Bride Pleated Satin Ribbon (retired), Paper Piercing Tool & Mat, Mini Silver Brads, Dimensionals, Glue Dots, and Scissors
 
Craftastic Notes:
  • Thank you to the mystery swapper at Convention that gave me a sample in black of this project.  Your name wasn't on it but I'd love to give you credit.  We'll just have to settle for the lovely demonstrator that made my day on that Friday!
  • When doing the napkins, fold the napkins to a point and then insert in the back of the dress form and fold over the "belt" and hold with a glue dot.
  • These would look great with our clay flowers on them - I just wasn't patient enough to wait for enough of them to dry!
 
DOOR SIGN
 
Supplies:
  • Designer Series Paper\_Designer Kits\2010 In Color Patterns - designer series paper\Blushing Bride Polka Dots
  • _Designer Kits\2012 Fresh Flowers - embellishments\Calendar - f6
  • Alphabet & Numbers\Simple Letters\Simple Letters - j, e, s, s, i, c, a, Fill Color = BLUSHING BRIDE 243,182,177
 
Craftastic Notes:
  • I put this on the door with dimensionals so it would peel off without harming the paint on my door.
  • The background is a designer paper that I changed the opacity to 20% - this gave me a slight design without me having to compete with the Blushing Bride elements.
 
NAME TAGS and PLACECARDS


Supplies:
  • Placecards: _Designer Kits\2012 Fresh Flowers - embellishments\Calendar - f6 & photo box filled with Blushing Bride cardstock.
  • Nametags: Whisper White & Blushing Bride cardstock, Oval Punch, Decorative Label Punch, Dimentionals, and Adhesive.
Craftastic Notes:
  • Once I created one of these in the right size using a cardstock layer on an 8 1/2 x 11 page, I was able to copy and paste them to put 8 on a page and have the same text.  They measured 2 x 3 which was perfect to go on the food and by the beverages. 
  • The Name tags were just the Large Oval and the Decorative Label punches.  Then I put a dimensional on the back of them so they could put them on their cups and also on their shirts so everyone could know everyone!
THE OVERALL LOOK! 

 
I've had a craftastic day, I hope you have one too!
Stacy

Friday, July 26, 2013

Bridal Decorations Tomorrow

I have been busy crafting this week but haven't been able to post what I've worked on. Please check back in tomorrow for the decorations I've made for a Bridal Shower I'm hosting.  I've been too busy finishing them to take pictures and too busy trying to finish my last full week of work and Callie's swimming lessons to write about them!

I have to say that I've typically just used my Stampin' Up! supplies for card making and My Digital Studio for scrapbooking.  I don't really do 3D or home décor very often.  Maybe that is tied to having a toddler and not having the time to finish a project when a card is so quick!  When Jessica came into the craft cave, she identified her wedding colors as Blushing Bride, Night of Navy, and Basic Grey.  It's been a fun color palette to work with.  From invitations to thank you notes, I've been able to use current and retired supplies to make some cute projects (IMO).  I made bridal napkins, a Love Banner, name tags, advice cards in MDS, and a welcome sign in MDS as well. 

At least now I can focus on baking two more kinds of breakfast breads and making fruit kabobs, once I finishing cleaning the house that is!  Anyone seen Conlyn?  Oh yeah, he's at the Boise Open..... ;)  That's why I haven't felt bad spending his hard earned money on this shower.  :)

I hope when you see them all, you think they are cute as well!

Have a craftastic day,
Stacy

Tuesday, July 23, 2013

It's Digital Tuesday - July 23rd, 2013

It's digital Tuesday and that means Stampin' Up! has released the next round of downloads.  I realize that with my Convention prep, I missed the downloads from last week so I'm including those too!

Before I get into the downloads, I wanted to thank those that were able to attend my first ever MDS Basics class yesterday.  I'm glad you could hear me over Callie's participation.  :) My Digital Studio is an amazing product and does not require you to be technically minded to use it.  Those taking my classes receive access into a Facebook forum to share questions and ideas and offer encouragement about the software (and share photos of your cute families and projects!)  The basics classes are always free and can be scheduled according to your availability.  Please contact me today if you would like to walk through it using the FREE TRIAL. 

I will be having an advanced class on September 9th at 3-5pm that covers converting templates, calendars, and free form tools.  To do the advanced class, you must have the basics class so you know the basics!

Many ask me why I prefer MDS for scrapbooking.  The answer is simple: it's quick!  When we went to Arizona this past March, I was able to scrapbook my vacation while on my vacation and didn't have to worry about the TSA confiscating my supplies since all I needed was a laptop. Stampin' Up! has amazing print services that are now cost competitive and the books and cards I've printed through them have be professional and timely!

As a mom to a busy toddler, it also allows me to open up a page, throw a Callie quote on it and plug in the photo I know I just took before the memory and moment are gone.  Through templates and the content in the original download, you can quickly complete entire scrapbooks in record time and use the software to do your photo editing like cropping, removing red eye, or changing the tone on your pictures to black/white or sepia.  And you can either do it free for 30 days OR you can just buy the software for only $19.95.

Have I sold you on it yet?  I'll let the beautiful artwork from the design team close the deal.
 
July 23, 2013
 
Hello, Lovely Stamp Brush Set - 134852 - $5.95
Party Premiere Ensemble - 134762 - $19.95
 
 Post Card Stamp Brush - 134803 - $2.95
 Rise & Shine Pocket Cards - 134841 - $5.95
 Soho Subway Designer Series Paper - 134845 - $4.95

World Map Stamp Brush - 134802 - $2.95
7/16/2013
 

Birthday Basics Designer Series Paper - 134847 - $4.95

Birthday Cake Stamp Brush - 134851 - $2.95
 

Cycle Celebration Stamp Brush Set - 134850 - $3.95
 
 
Eastern Elegance Designer Series Paper - 134846 - $4.95
 
 
 Lots Of Thanks Stamp Brush Set - 134804 - $5.95

Yippee Skippee Stamp Brush Set - 134856  - $3.95


I hope you see something you like.  I am grabbing Yippee Skippee so I can have that happy sentiments for my Walla Walla pictures and the pocket cards for my new divided paper protectors from the Seasonal mini so I can scrapbook this weekend's outdoor movie with the family!
 
My Digital Studio makes it easy to get inspired and to enjoy the art of scrapbooking!
 
Have a craftastic day,
Stacy


Monday, July 22, 2013

Convention 2013 Wrap Up

We are back from Convention and once I convince Callie I'm not leaving her again, I might actually separate her from my hip and get my goodies put away in my craft room.


We got amazing gifts this year.  Our bags were the best I can remember in 9 years being a demo.  Mine is already filthy, the downside of a white bag, but we'll see if Mr. Clean's special sponge will help that!  I love the my sister and my mom are both demonstrators and that I get to share this experience each year with them as our annual girl trip!


We also got more giveaways than any year before.  I ended coming home with 7 stamp sets, a stamp to design myself, a goodie bag kit, a pack of Winter Designer Paper, silver taffeta ribbon, both sets of washi tape from the Seasonal Catalog, and the May Paper Pumpkin kit that was the mini book that I fell in love with and was so sad to have missed out on!!!


While I loved the free stuff and all the surprises, I have to say that the on stage demonstrations were fantastic this year and the samples were much more my style than years prior.  I felt truly inspired as these amazing women demonstrated for us!  As for classes, I also left all three of my classes feeling like I learned something I can immediately put into play for my business.  The classes were "Turning Contacts into Customers", "Teaching MDS", and "Living the Creative Life."  Emily, Kimberly, and Carrie did such a good job with these topics!!!

There appeared to be two themes at Convention.  One was Be the Difference and there was a real focus on how Stampin' Up! is able to reach out in the community and make a difference.  The other theme seemed to be Innovation and what the company will be doing to try new items and reach new customers.  This is what brings us product lines to try out, great promotions, and changes like the Color Refresh.  Some are afraid of change but I think it helps us make sure that we have products for you to fall in love with like we do.

There are several new products coming out of Convention.

 
Starting August 1st, you can order the Thinlits Card Dies.  These framelits work with the big shot and create both the pull out from the image above but also the words and embellishments unlike any of our current framelits. 
 
 
For the artist in all of us, Stampin' Up! has introduced a new line called Undefined.  These stamps need to come to life by your hand.  You get tools, rubber, and wood blocks to sketch and carve the stamps that you have been missing from your collection.  I cannot wait for this product to get into my hands and am stalking my email for the UPS notification saying they are on their way.  This product may not be for everyone but for those that know they are artistic or just need to realize they are artistic, this product line could be the best thing for you since dimensionals!!!


Through August 31st, you can sign up for Paper Pumpkin and receive the first two months for only $10 each!  Usually the kits run $19.95 per month.  You will receive a kit that is designed to give you a 30 minute escape from the world and a way to create cards or 3D items that are on trend.  Kits usually include 4 cards or a 3D item, 2-4 stamps, and 1-2 ink spots.  You just have to provide the adhesive.  If you would like to try out this product offering, click the header above.  When you sign up, click Add Promo Code and enter PUMPKINDEAL.

Another perk of Paper Pumpkin is joining my Pumpkin Princesses.  Once you have 3 kits under your belt, you qualify for this free event as a thank you!  The next time you hit 3 kits, you win it again for that quarter.  The Princess Party is free and will involve projects using the supplies from the kits you received during that 3 month period.

Click here to sign up or email me with any questions you have! 

Tomorrow I will be posting the newest digital downloads and some information on my digital classes.  I hope you are all well and had as good of a time over the last four days as I did!

Have a craftastic day,
Stacy


Tuesday, July 16, 2013

Chalk Talk Convention Swap

Taking a moment out of my last minute swap prep for Convention to post another of the general swaps that is complete for this week.

This card allows me to teach my customers how to do the chalkboard techique while using a few of my favorite products in the catalog like the magnetic platform and the Chalk Talk Bundle.  The bundle includes the stamp set and the framelits for 15% off! 

This card showcases how you can use the Big Shot in your paper crafting.  Embossing Folders & Framelits bring dimension and texture to cards with very little effort.  While not a glitter gal, I have to say that this card is made by having a small glitter brad right on the top!


Supplies:
  • Cardstock: Real Red, Old Olive, Basic Black, Whisper White
  • Ink: VersaMark, White Craft Ink
  • Stamps: Chalk Talk
  • Accessories: Big Shot, Magnetic Platform and Mats, Chalk Talk Framelits, Beautifully Baroque Embossing Folder, Hearts Framelits, Chalk Marker, Sponge, White Embossing Powder, Heat Gun, Powder Pal, Embossing Buddy, Glimmer Brads, Paper Piercing Tool & Mat, Dimensionals, and Adhesive
Craftastic Notes:
  • If using framelits and embossing folders, make sure you do the framelit first.  Otherwise, the pressure of putting the cardstock through the Big Shot to cut it will flatten out your embossing.
  • This card has a sneak peek of our Chalk Talk Marker available on August 1st!
  • When doing the chalkboard technique, you use VersaMark and white embossing powder to do the saying but a sponge and White Craft ink around the Basic Black cardstock to make it look chalked.
Have a craftastic day,
Stacy

Monday, July 15, 2013

Convention Swaps - Pretty Pansies

It's Convention week!  I'm so excited because this is more than just a great Stampin' Up! event for me.  It's an annual trip I get to take with my mom and sister, who are both demonstrators, where we get to tap into every part of our creativity and we come back so energized though exhausted!

This year is the 25th Anniversary for Stampin' Up!  While the beauty of convention is that it's usually like clockwork for us (we know when to get up, where we sit, where we go on which days, etc.), this year they have changed the format up and so it's all going to be an adventure.  I have my water, apples, and energy bars - so I'm up for the challenge.

The challenge I haven't been so prepared for was getting my convention swaps done.  I thought I had great ideas and that I was done early and then I realized I only made like 50 general swap cards.  I mean, with SIX THOUSAND stampers in one space, I really only want to meet a fraction of them and get their great ideas????  So I'm back at the drawing board making more cute swaps while my husband plays single dad for the night.

I will be posting my projects this week that I'm swapping at convention.  These cards are ones that I did at my camp this weekend and will be doing again on August 3rd if anyone is interested in attending or getting a kit.

This card is for a swap group I'm in.   I love the new 2013-2015 In Colors.  All you have to do is look through a Pottery Barn catalog for color ideas for them which is how I landed on this combo.

 
Supplies:
  • Cardstock: Crumb Cake, Pistachio Pudding Core'dinations, Very Vanilla
  • Ink: Early Espresso
  • Stamps: Dictionary, Really Good Greetings, Mosaic Madness
  • Accessories: 3/4 Circle Punch, Pansy Punch, Hexagon Punch, Sponge, Basic Pearls, Dimensionals, Sanding Block, Adhesive
Craftastic Notes:
  • The Pistachio Pudding flower is out of our Core'dinations paper.  You can crinkle it, sand it, and more to show the core on the inside.
  • The stems are one of the strips from the Mosaic Madness stamp set.  I thought it added a little funky look to it.
  • The Dictionary background stamp is a lot of fun to use. I have mine in clear mount but didn't mount it on a block.  Just cover it with ink and then lay your cardstock on it.  Tap with your fingers to get that sporatic wording all over the card.
  • Use the hexagon punch to punch out the ends of the banner.  Mine was done with scissors since I hadn't heard that great tip yet.  If you use the hexagon, it works best on paper that is 1 1/4" wide or less.
Have a craftastic day,
Stacy

Sunday, July 14, 2013

Free Project Kits when you join Stampin' Up!


From July 15 - August 31, 2013, any new recruits get to pick one of four project kits for free in addition to their starter kit when they join Stampin' Up!  Click here to view the flyer!  

Just a few notes about joining my Stampin' Up! team...

Obligations for an Independent Demonstrator:
  • Pay the initial kit fee of $99 for $125 worth of merchandise - you choose what that $125 is so the kit is COMPLETELY CUSTOMIZABLE!
  • Achieve $300 in sales each quarter (Jan-March, April-June, July-September, October-December).  There are big promotions each quarter like: Sale-a-Bration & new mini catalog in January/February, Retired List in May, New Catalog in June, and Seasonal Mini in August/September.
  • When you sign up, you have until the end of the next quarter to meet your first minimum.
  • If sign up between July 15th and August 31st, you receive a free creative kit from the Seasonal Catalog for free! 
Financial Perks:
  • Instant Income - you receive 20% back on all orders placed with you.  If you are a hobby demonstrator in Idaho, you would basically have no shipping/tax plus 4% back.
  • Your first order you receive 30% back.
  • If your sales each month reach$ 400, you will receive 5% volume rebate back on that total.  Higher sales, higher volume rebates.
  • Once your total sales reach $1000, you will promote to Sr. Associate.
  • If you have $1500 in a quarter, you are eligible for Great Rewards.  Each dollar counts as a point and you can use them to redeem catalog and demonstrator merchandise.
  • If you recruit others under you, you receive a percentage of their sales each month as well with your own qualifying sales.
  • Stampin' Start - if you have $300 in sales for each of your first 3 months as a demonstrator, you receive 2 free stamp sets.  If you do that for 6 months, you get 4 free stamp sets.  For each recruit you have during the first 6 months, you also get a free stamp set.  Plus more!

Other perks include:
  • Edibility to attend Regionals and Convention - this year is the 25th anniversary for SU! and it's going to be epic!
  • Eligibility for incentive trips
  • Pre-order and sneak peek opportunities
  • Demonstrator only specials
  • Demonstrator only Webinars and training on new products and promotions
  • Stampin' Success - a bi-monthly magazine delivered to your door around the 15th of the month filled with ideas and business tips
  • Inclusion in the Creatively Inspired meetings for free -- includes business discussions, training, make-n-takes, card swaps, and product challenges
  • 50% camp fees for my buffets and camps
  • Free attendance for my hostess appreciation event in November
  • Access to all my instruction sheets for buffet and exclusive club projects

Some questions I have been asked:

Do I have to have classes?  No - you can use your demonstratorship to purchase your own materials at a discount.  If you purchase $300 a quarter by yourself, you wouldn't need another workshop.
Do I have to come up with all those ideas on my own?  No - you can leverage resources like Splitcoast Stampers, Stampin' Addicts, or the exclusive Stampin' Connection - an internet site just for demonstrators where ideas are shared across the world.  There is also an online site for My Digital Studio.  Plus you have access to all the Creatively Inspired demonstrators and their blogs. You can also use any of my instructions for projects you like.

What if I don't make my minimum by the end of the quarter? You will be notified by Stampin' Up! that you are in pending and you will have 1 more month to hit your minimum.  If you are unable to, you will go into inactive status and then you will keep everything from your kit but will not have access to demonstrator resources any more or financial benefits.
What if my customers are your customers?  I will continue to have my stamp classes and buffets.  If any customers are in clubs with me, they have to finish out the terms of their contracts.  Otherwise, you can have all orders from those individuals that they choose to place with you.

Am I responsible for providing catalogs to those customers?  You will receive catalogs with your kit but if you remain a demonstrator through the end of the year, you will need to send catalogs out to customers who you are taking orders from.  I will only send to those that are buying merchandise from me.
Contact me today if you have any questions - I would love to have you on my team!  If you are ready to sign up, click here and click the Join Now button.

Stay tuned for tomorrow when I start posting my week of Convention swaps!

Have a craftastic day,
Stacy

Saturday, July 13, 2013

CAS(E)d this Sketch - #36

One thing I have wanted to do for some time on the creative front was participate in some of these great online sketch challenges that I've seen posted on other blogs I follow.  Now that I'm approaching the end of my corporate career, I have had time to scope them out and actually complete a few.  I can safely say that my brain is looking forward to this type of challenge over the system ones I've been faced with at work!  Though I may need to spend more time finding the right lighting for these types of photos....

This card is from the Case this Sketch blog.  See the sketch below.  Hopefully I didn't take too many liberties with the sketch since it's my first time! 


The beauty of these types of sketch challenges is that they can inspire you for the need you have at the moment.  I needed a baby card and have been dying to use Zoo Babies so this challenge was great timing for me. Plus I got to play with my magnetic platform again which is one of my favorite Stampin' Up! products ever.

Supplies:
  • Paper: Whisper White, Early Espresso, Polka Dot Parade DSP
  • Ink: Early Espresso, Marina Mist
  • Stamps: Zoo Babies
  • Accessories: Big Shot, Magnetic Platform & Cutting Mats, Square Framelits, 1 1/4 Circle Punch, Dauber, Neutrals Designer Button (retired), Dimensionals, Scissors, and Adhesive

Notes:
  • The new magnetic platform and the square framelits make it easy to make these polaroid mats.
  • The button has a small strip of DSP threaded through it to make it easier to combine the other colors in the cards with the buttons!
  • I punched out a 1 1/4 circle from a post it note and covered the monkey.  Then I used the dauber to sponge around it.  It highlighted the monkey without me having to take time to cut it out which quickly seemed to be a bad idea.

Thank you so much for looking.  Have a craftastic day!
Stacy