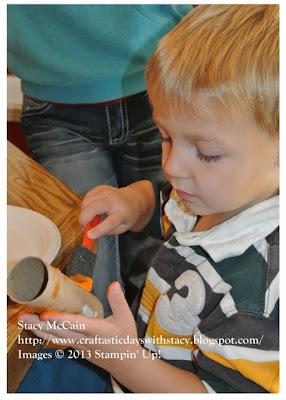
The strips of Pumpkin Pie cardstock are cut at 1" x 11. Use a bone folder to curl the paper to avoid hard folds when you assemble. We ended up needing 10 to get a full pumpkin look. Once your pumpkin is dry, use glue dots on each end of the strip and attach to the inside top and bottom of the roll. This held the kids attention for about 6 strips - then it became a race to which mommy could finish first. Congrats Meghan for winning (reference OCD crafting mom again for me....)
Once you have all the strips attached, you can use Elmer's glue to layer a 2 1/2 Circle of Pumpkin Pie on the top and bottom of the pumpkin. Then put glue on the bottom of the green roll to attach to the top of your pumpkin.
Supplies:
Orange/Green Paint (non-SU), Toilet Paper Roll, 2 1/2 Circle Punch, Pumpkin Pie cardstock, Glue Dots, Elmer's Glue (non-SU), Bone Folder
Non-Kiddo Version
If you didn't have a kiddo at home and wanted to make these for a fun centerpiece, you can do it without the paint and toilet paper roll. Cut a rectangle of Pumpkin Pie and form into a cyclinder. Seal with sticky strip to make the roll stay. Curl the strips of Pumpkin Pie cardstock with the bone folder and attach to the cardstock tube with glue dots. Use glue dots to put the 2 1/2 Circle on the top and bottom. Make a small cylinder with the Gumball Green cardstock and attach to the top using more glue dots. You could also use DSP to make a décor covered pumpkin.When you order online, make sure you use hostess code TUBSEAHG and be entered for a drawing as the mystery hostess at the end of the month. I have enough orders to qualify for a workshop so someone will be a lucky winner!!!
Envelope Punch Board Update
SU has noticed that one of the envelope measurements on the Envelope Punch Board is incorrect. The dimensions for the 5-1/2" x 8" card size envelope are 1/4" too small. The correct envelope measurement for this card size is: 10-5/8" x 10-5/8" (paper size); 4-3/8" (score line). The Envelope Punch Board still functions perfectly and they have corrected the measurement chart on the punch board. New labels are available through Demonstrator Support, if you would like one. Contact me today if you need one.Special reminder for Stampin' Up! cards: These envelope measurements are meant for simple cards, without a lot of dimension. At Stampin' Up! we love adding dimension to our cards, but that can make the envelope a bit snug. So, if you need an envelope to fit your cards with lots of flair, go up an envelope size (or two) for the perfect fit.
You can join SU for only $25 from October 7-21, 2013. This offer is only good for two weeks, so take advantage of it right away! During this offer, only the special $25 starter kit will be available; the regular $99 starter kit will not be available. The $25 Starter Kit includes:
- $26.95 worth of Stampin' Up! product (it must be more than $25, but not more than $26.95 before tax)
- Business pack which includes: Customer postcards, Customer Order Forms, Getting Started DVD, A package of the current seasonal catalog, A box of annual catalogs
When you hold your first Workshop or place an order yourself within 45 days of signing up, you will receive 30% instant income and any eligible hostess benefits if you host your own event. You also get two months FREE of the Demonstrator Business Web Services (DBWS)!
Perks to joining my team:
- Free admission to my hostess appreciation event on November 9th
- 50% camp fees for my buffets and camps
- Instant Income - you receive 20% back on all orders placed with you. If you are a hobby demonstrator, you would basically have no shipping/tax plus 4% back.
- If your sales each month reach$ 400, you will receive 5% volume rebate back. Higher sales, higher volume rebates.
- Eligibility to attend Regionals and Convention
- Eligibility for incentive trips
- Pre-order and sneak peek opportunities
- Demonstrator only specials
- Demonstrator only Webinars and training on new products and promotions
- Stampin' Success - a bi-monthly magazine delivered to your door around the 15th of the month filled with ideas and business tips
- Inclusion in the Creatively Inspired meetings for free -- includes business discussions, training, make-n-takes, card swaps, and product challenges
- Free attendance for my hostess appreciation event in November
- Access to all my instruction sheets for buffet and exclusive club projects
Have a craftastic day,
Stacy


No comments:
Post a Comment
Note: Only a member of this blog may post a comment.